Installation‐UnpackingfromtheCrate
16
6.3 UnpackingfromtheCrate
Thechillerissecuredtotheskidatthebottomofthecratewithmetalshippi ngbrackets.Thecrateisheld
togetherwithwoodscrews.Toremovethechillerfromitscrate:
1. Movethecratedchillerascloseaspracticaltoitsinstallationlocation.
2. Startdisassemblyofthecratebyremo
vingtheT25Torx®headwoodscrewssecuringthetoppanelof
thecrate.
3. ContinuedisassemblybyremovingtheT25Torx®headwoodscrewsholdingthetwoshortpanelsofthe
crate.Thiswillallowaccesstotheinternalbracing.
4. RemovetheT25Torx®headwoodscrewssecuringthein
ternalbracingtothetwolongsides.
5. Removethe3/8‐16boltssecuringtheshippingbracketstothebaseofthechillerusinga9/16”wrench.
6. Cuttheshippingbagthatthechillerwasplacedin.
7. Cutorunwraptheplasticshrink‐wrapfromtheunit.
8. Removethedesiccan
tbaglocatedintheebox,alongwiththedesiccantbaglocatedinsidethechiller,
referencingsection6.4onhowtogaininternalaccesstothechiller.
9. Removethelagboltssecuringtheshippingbracketstotheskidusinga1/2”wrench.
10. Removetheshippingbrackets.
11. Useaforklif
ttoliftthechilleruntilitscastersclearthetopboards oftheskid.
12. Pulltheskidfromunderthechiller.
13. Lowerthechillerontothefloor.
14. Movethechillerintoitsfinalinstallationposition.
15. Lockthecasters.
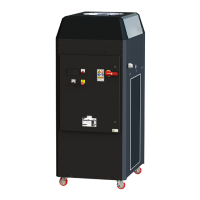
Figure5:CratedChiller
Hypertherm, Inc. Part Number: 810540
 Loading...