40
5. Installation
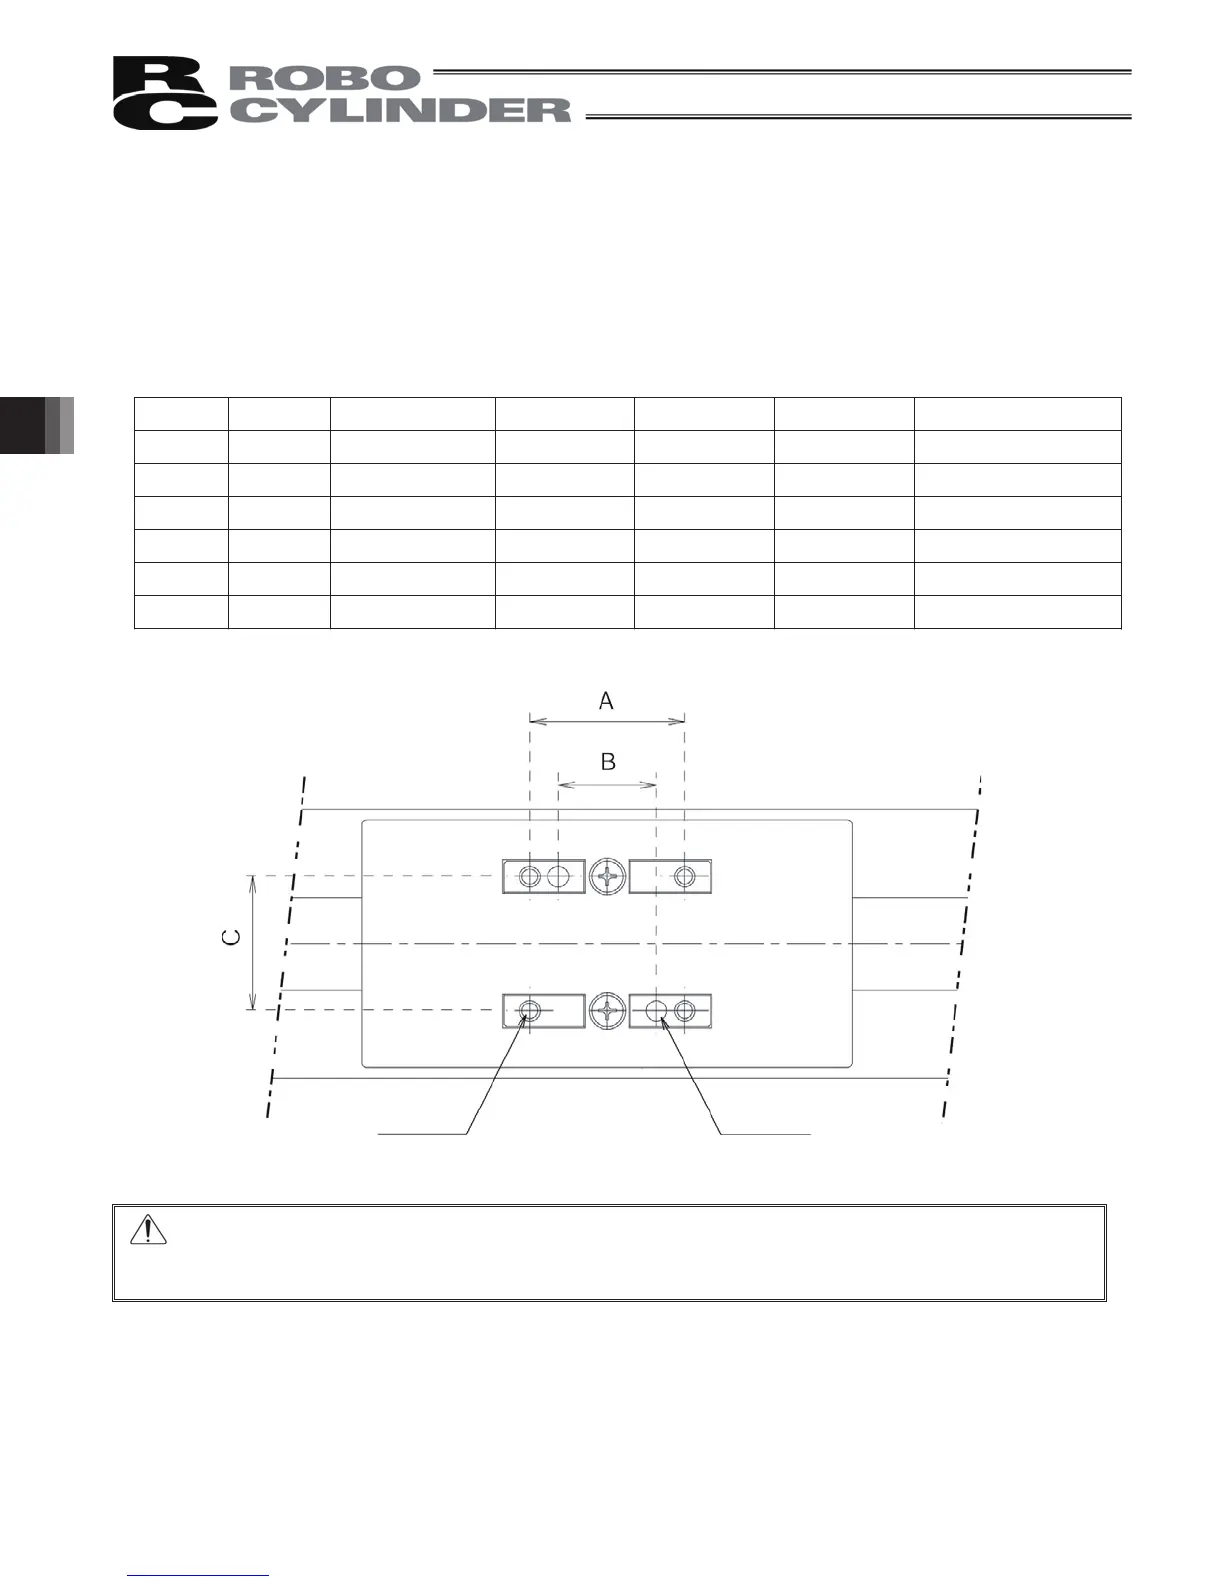
Tapped hole Reamed hole
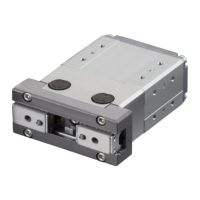
5.4 Installing the Load to the Slider
• Tapped holes are provided on the slider for installing the load. The method of clamping varies according to how
to mount the main body.
• In case of moving the main body with the slider secured, use the same tapped holes on the slider.
• Please use two reamed holes on the slider when repeatability of mounting and dismounting is required. When
fine adjustment of the squareness is necessary, use only one reamed hole to allow adjustment.
Sizes and depths of tapped holes and reamed holes on slider
Model Tap size Depth of thread A B C Reamed hole size
SA5C M4 9 mm 30 mm 19 mm 26 mm
4H7, depth 6 mm
SA6C M5 9 mm 50 mm 32 mm 31 mm
5H7, depth 6 mm
SA7C M5 10 mm 50 mm 32 mm 39 mm
5H7, depth 10 mm
SS7C M5 10 mm 50 mm 32 mm 32 mm
5H7, depth 10 mm
SS8C M8 10 mm 75 mm 45 mm 45 mm
8H7, depth 10 mm
HS8C M8 10 mm 75 mm 45 mm 45 mm
8H7, depth 10 mm
Caution: When installing the load, do not allow adhesives, paints or other viscous substances to
attach to the stainless sheet. Also, avoid applying a concentrated force that will dent the
sheet. It may cause the slider to malfunction or damage the sheet.
 Loading...