2. To install a handle on the storage enclosure, place notch at the bottom of the handle in the opening in
the storage enclosure chassis, and push the handle in and up until the latch at the top of the handle
secures the handle to the chassis.
3. Repeat step 2 for the three remaining handles.
Removing the handles
Before you install the storage enclosure completely into a rack cabinet, you must remove the handles.
Complete the following steps to remove the handles from the storage enclosure:
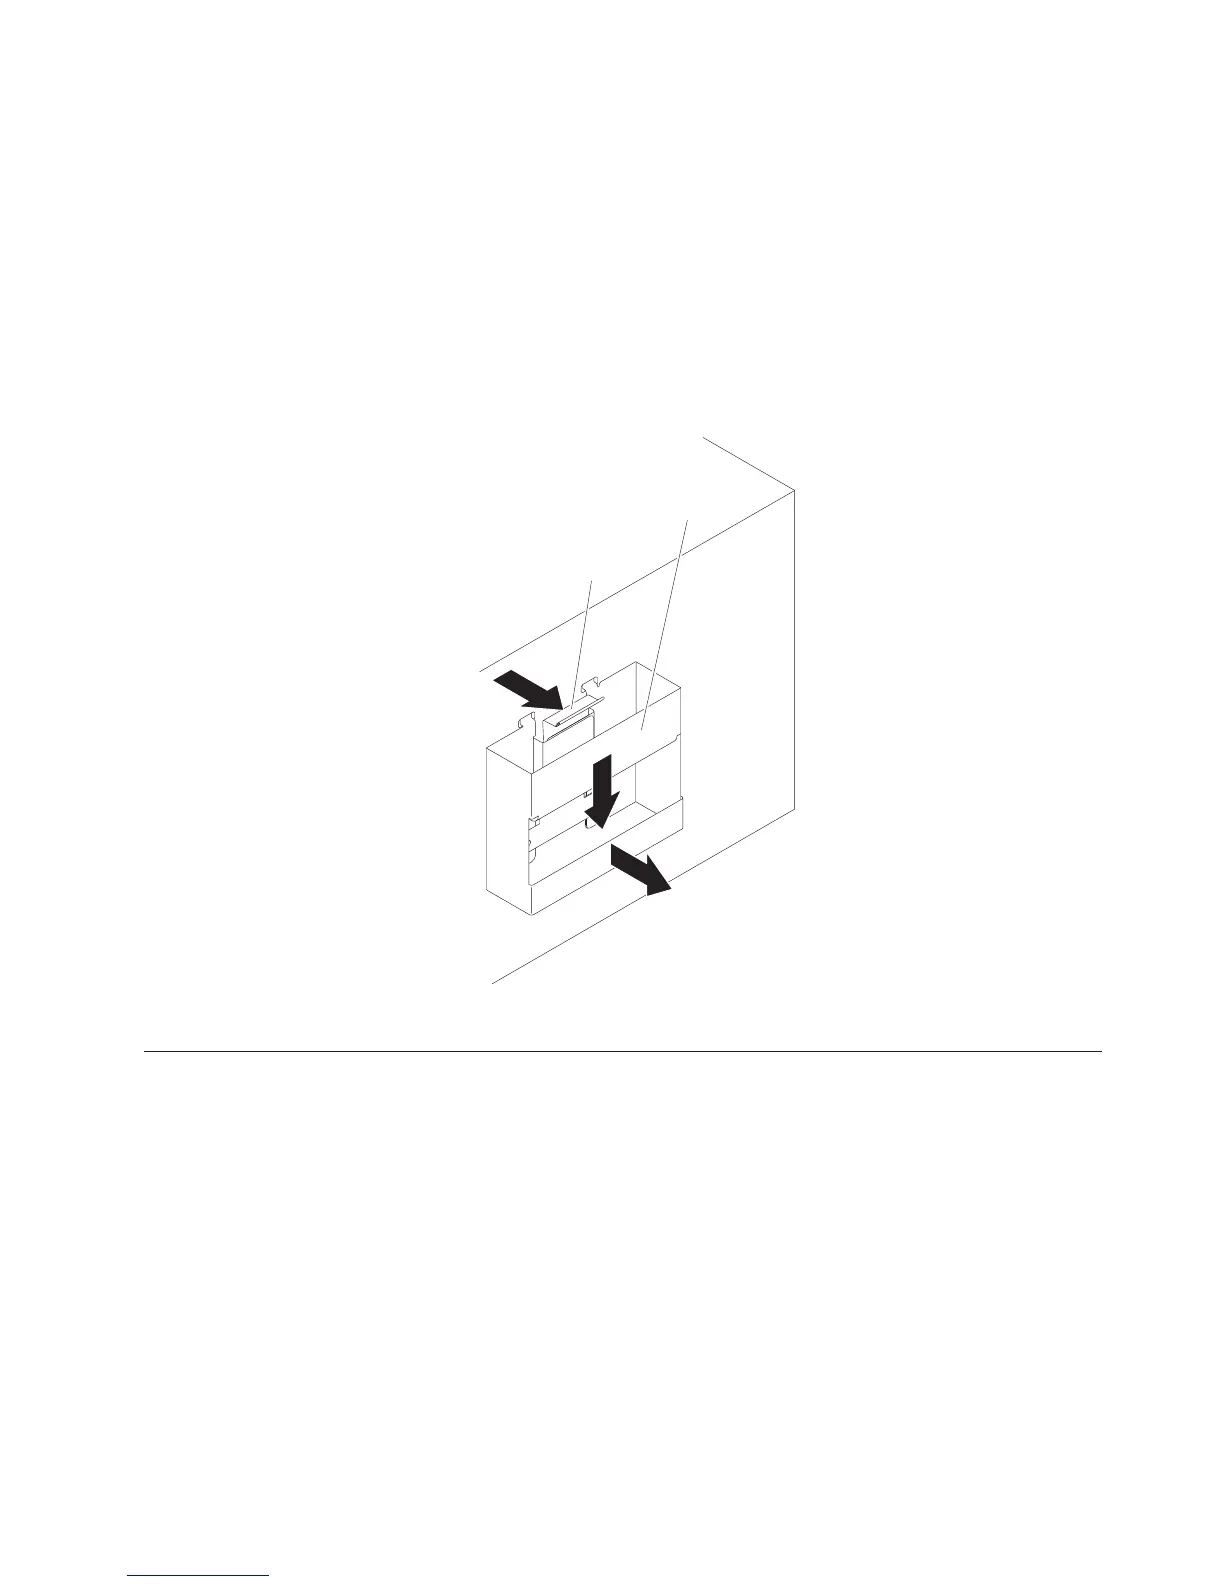
1. To remove a handle to the storage enclosure, release the latch with your thumb and pull down and
away from the unit.
2. Repeat step 1 for the three remaining handles.
Thumb
latch
Handle
3. Store the handles for future use.
Installing the DCS3700 into a rack
To install the storage enclosure, complete the following steps.
Note: For more information about how to use a lift tool, see the documentation that came with the lift
tool.
1. Prepare the storage enclosure for installation:
a. Position the lift tool so that it is facing one side of the shipping box.
b. Remove the foam shipping material from the sides and ends of the storage enclosure.
c. If necessary, cut away sides of the shipping box so that the lift tool has access to the storage
enclosure.
d. Open the plastic bag and tuck it under the storage enclosure. The plastic bag reduces friction and
makes it easier to slide the unit off of the shipping box onto the lift tool, and off of the lift tool
and into the rack cabinet.
e. Install the four handles on the sides of the storage enclosure. See “Installing and removing the
handles” on page 34 for detailed instructions.
Chapter 2. Installing the DCS3700 35