www.ikegps.com/quickstart Page 36 www.ikegps.com/support
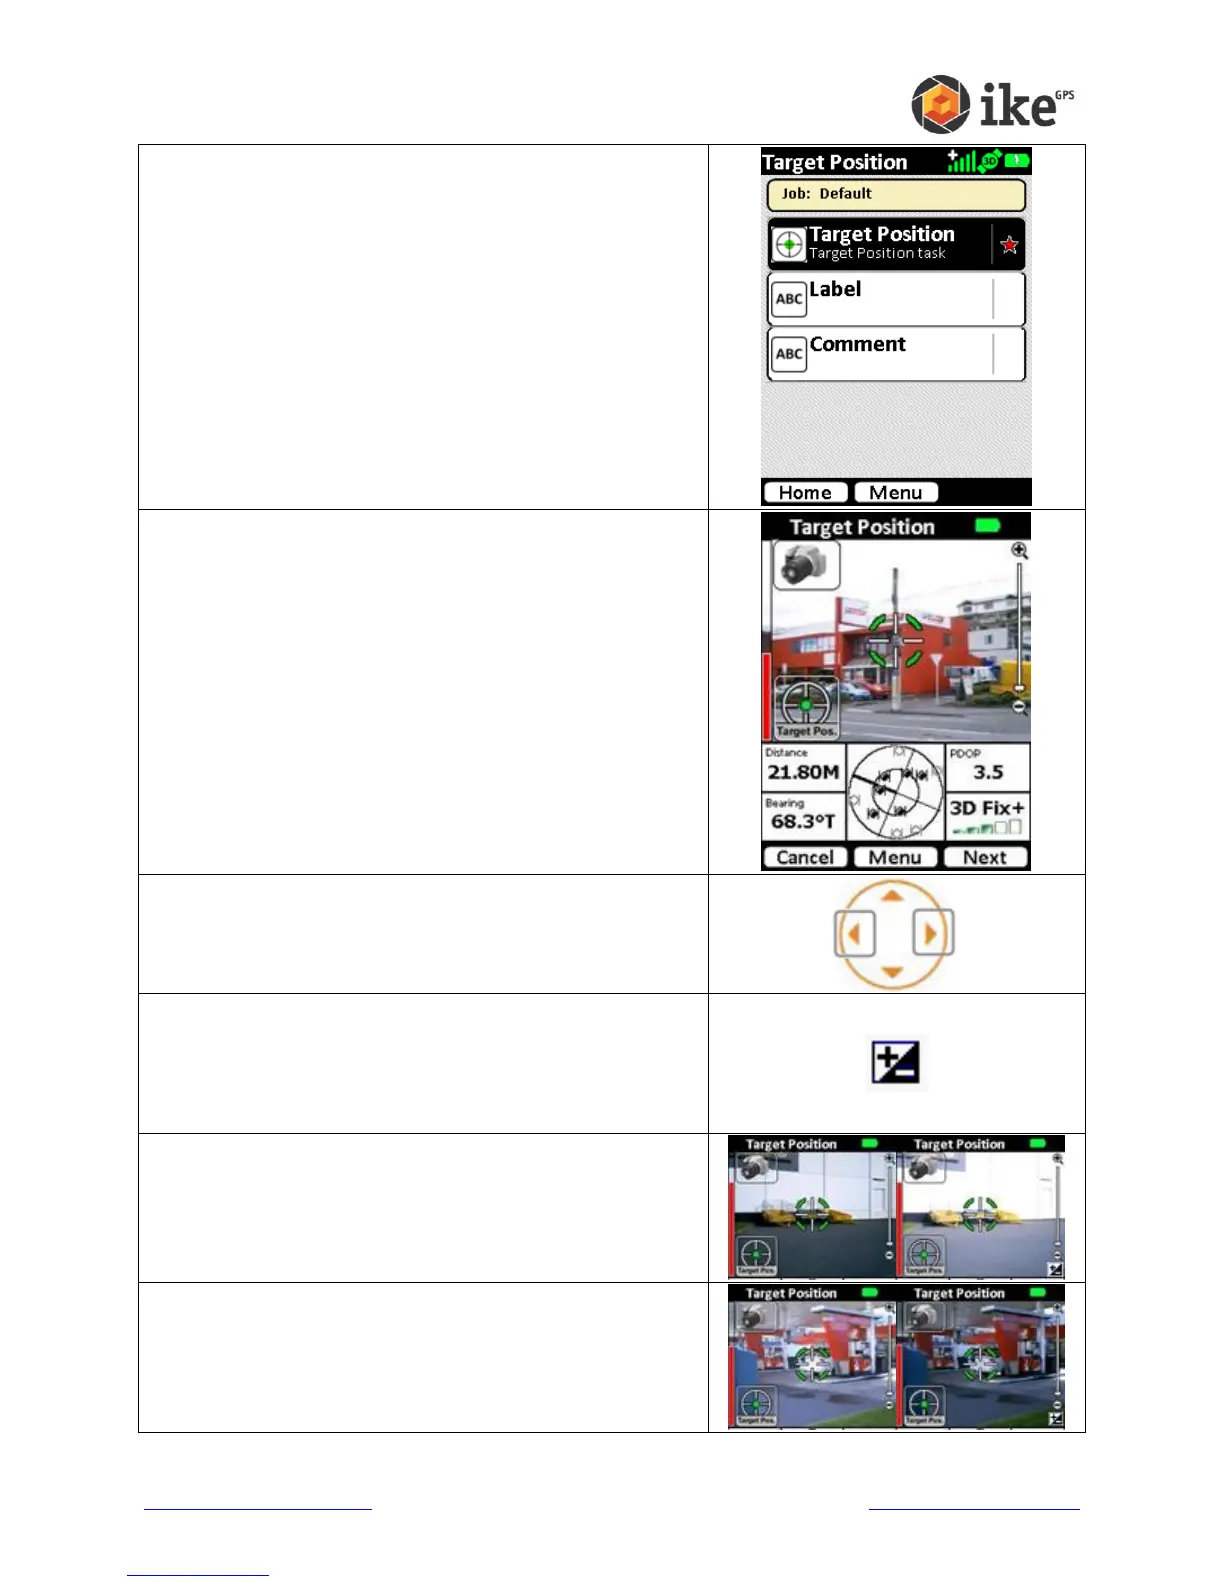
The default tasks for the Target Position ikeTool will be
shown. A red star will indicate the mandatory tasks.
Tap the Target Position task to start the video preview
screen
Move your ike until the crosshairs are centered on the
target object you wish to capture data on.
Check that the PDOP and GPS Fix readings are good.
The border around the instruments readouts will change
in color depending on the quality of the reading.
A red border will indicates that that reading is outside
the limits of the instrument.
An orange border indicates that the reading can be
used, but there may have been manual adjustments
made to allow capture outside the default
recommended settings.
Hold the ike unit steady, ensure you’re still on target and
tap the Next button or capture soft key.
If lighting conditions are an issue, use the Exposure
increase / decrease buttons (Right or Left arrow keys) to
either lighten or darken the target photo.
When the Right or Left arrow keys are pressed the
Manual Exposure icon will appear in the bottom-right of
the Camera Window.
Tapping the icon will return the Camera to Auto
Exposure mode and the icon will disappear.
If the photo is too dark and the target cannot be
distinguished, press the Right key to lighten the
photo.
If the photo is too light and the target cannot be
distinguished, press the Left key to darken the photo.