- 48 - - 49 -
Installing the Device Installing the Device
AppendixPrinting
3
Setting Up
2
Before use
1
Basic Device Operations
4
Index
AppendixPrinting
3
Setting Up
2
Before use
1
Basic Device Operations
4
Index
4
Check that the custom-sized tray is
secured in place.
5
Close the toner replacement cover and
the front cover.
6
Hold the custom-sized tray by the
stacker handle and lift it towards the
printer side.
7
Open the paper supporter and the
auxiliary supporter of the multi-purpose
tray.
8
Lower the stacker towards the custom-
sized tray side.
Removing the Custom-Sized Tray
Memo
�
Check that there are no paper in the custom-sized tray.
1
Pull out the custom-sized tray.
(1)
Open the toner replacement cover
and the front cover of the printer.
(2)
Lift the custom-sized tray by the
handle, and pull out the protrusions
from insertion points.
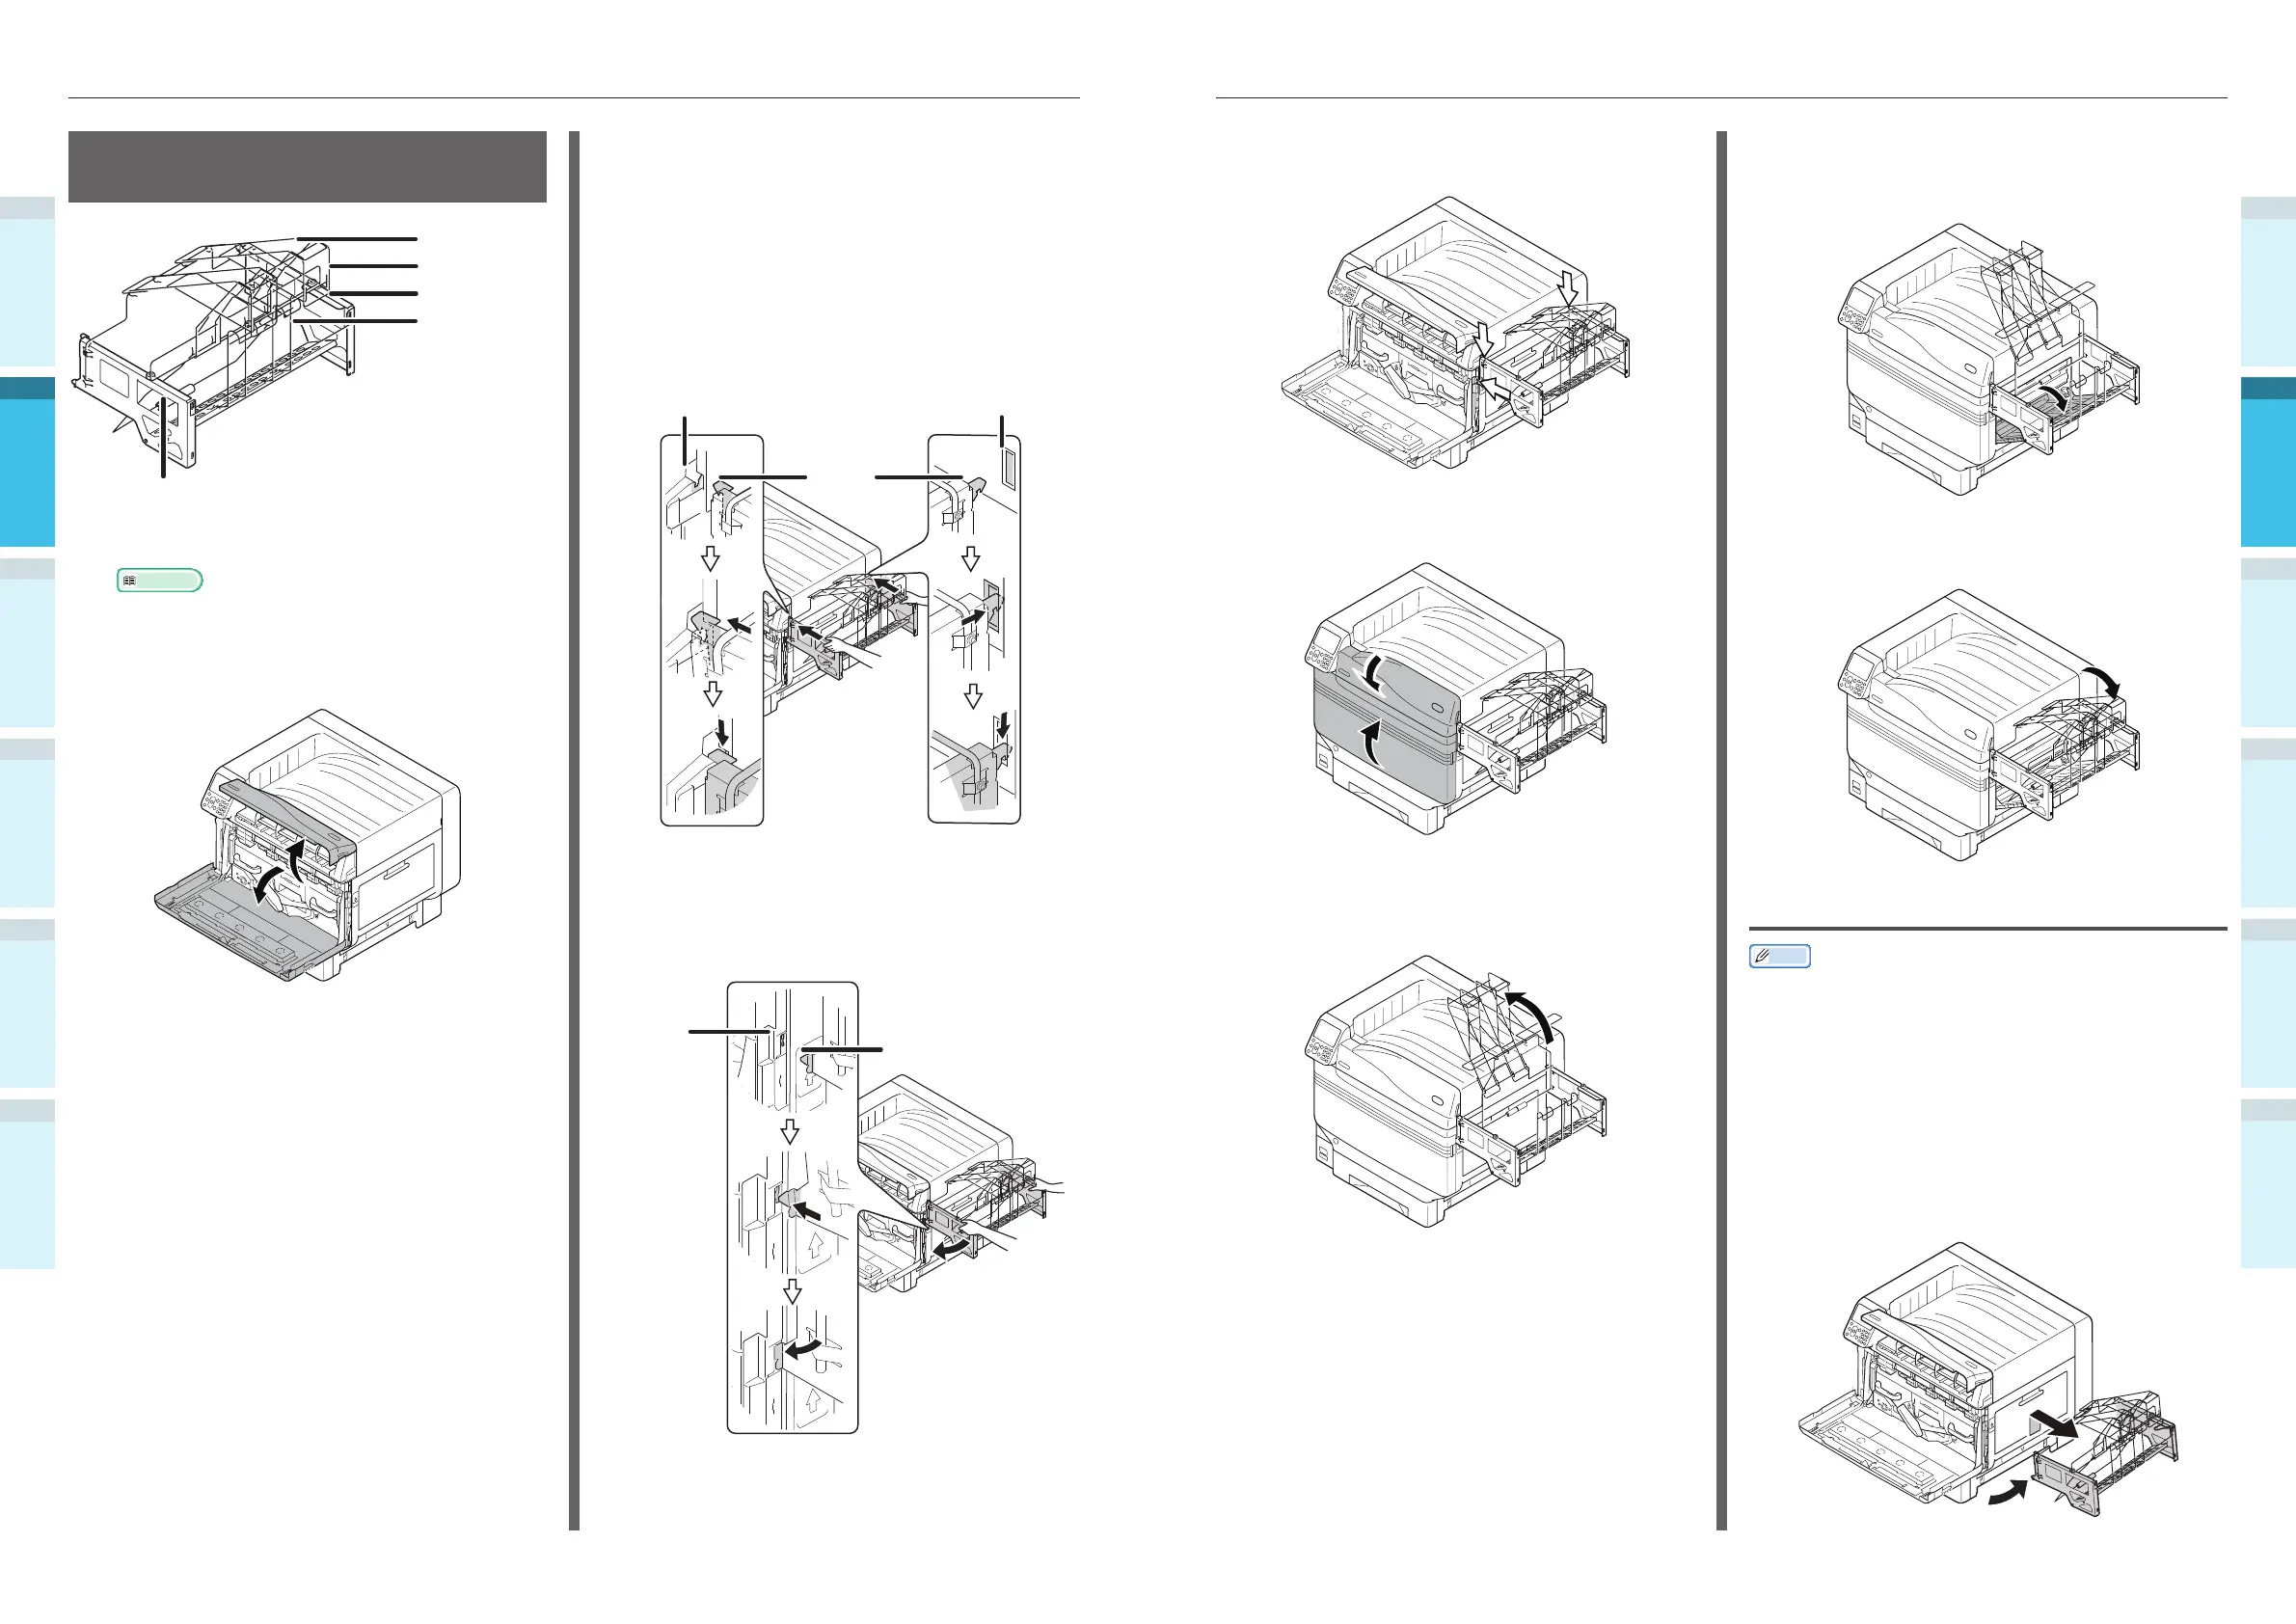
M ounting the Custom-Sized
Tray (Optional)
Stacker
Stacker Handle
Handle
Custom-sized
paper storage
section
Handle
1
Turn off the printer.
Reference
�
“Turning OFF the Power Supply” (P.52)
2
Open the toner replacement cover and
the front cover.
3
Attach the custom-sized tray onto the
multi-purpose tray.
(1)
Hold the handle of custom-sized
tray.
(2)
Latch on the left and right
protrusions at the top of custom-
sized tray to the hooks on both
sides of the multi-purpose tray.
HooksHooks
Protrusions
(3)
Insert the protrusions of custom-
sized tray into the insertion points
on both sides of the multi-purpose
tray.
Protrusions
Insertion
points