- 98 - - 99 -
Printing from the Multi-Purpose Tray Printing from the Multi-Purpose Tray
AppendixSetting Up
2
Before Use
1
Printing
3
Basic Device Operations
4
Index
AppendixSetting Up
2
Before Use
1
Printing
3
Basic Device Operations
4
Index
Printing from the
Custom-Sized Tray
Setting Custom-Sized Paper
Paper will be printed face-side up.
Note
If the ream weight of the custom-sized paper is 128 g/m
2
,
50 sheets of custom-sized paper may be set in the custom-
sized supporter.
Custom-sized paper should be under 328 mm in width and
1321 mm in length.
1
Lift the custom-sized tray stacker
towards the printer side.
2
Open the toner replacement cover.
3
Pull the set lever on the right side of the
paper supporter on the multi-purpose
tray towards yourself, and adjust the
paper guide to the width of custom-
sized paper.
Reference
“Printing from the Multi-Purpose Tray” (P.92)
4
Release the set lever to secure the
paper guide in place.
5
Align the edge of custom-sized paper
with the paper storage section of the
multi-purpose tray, and lower paper to
the storage section.
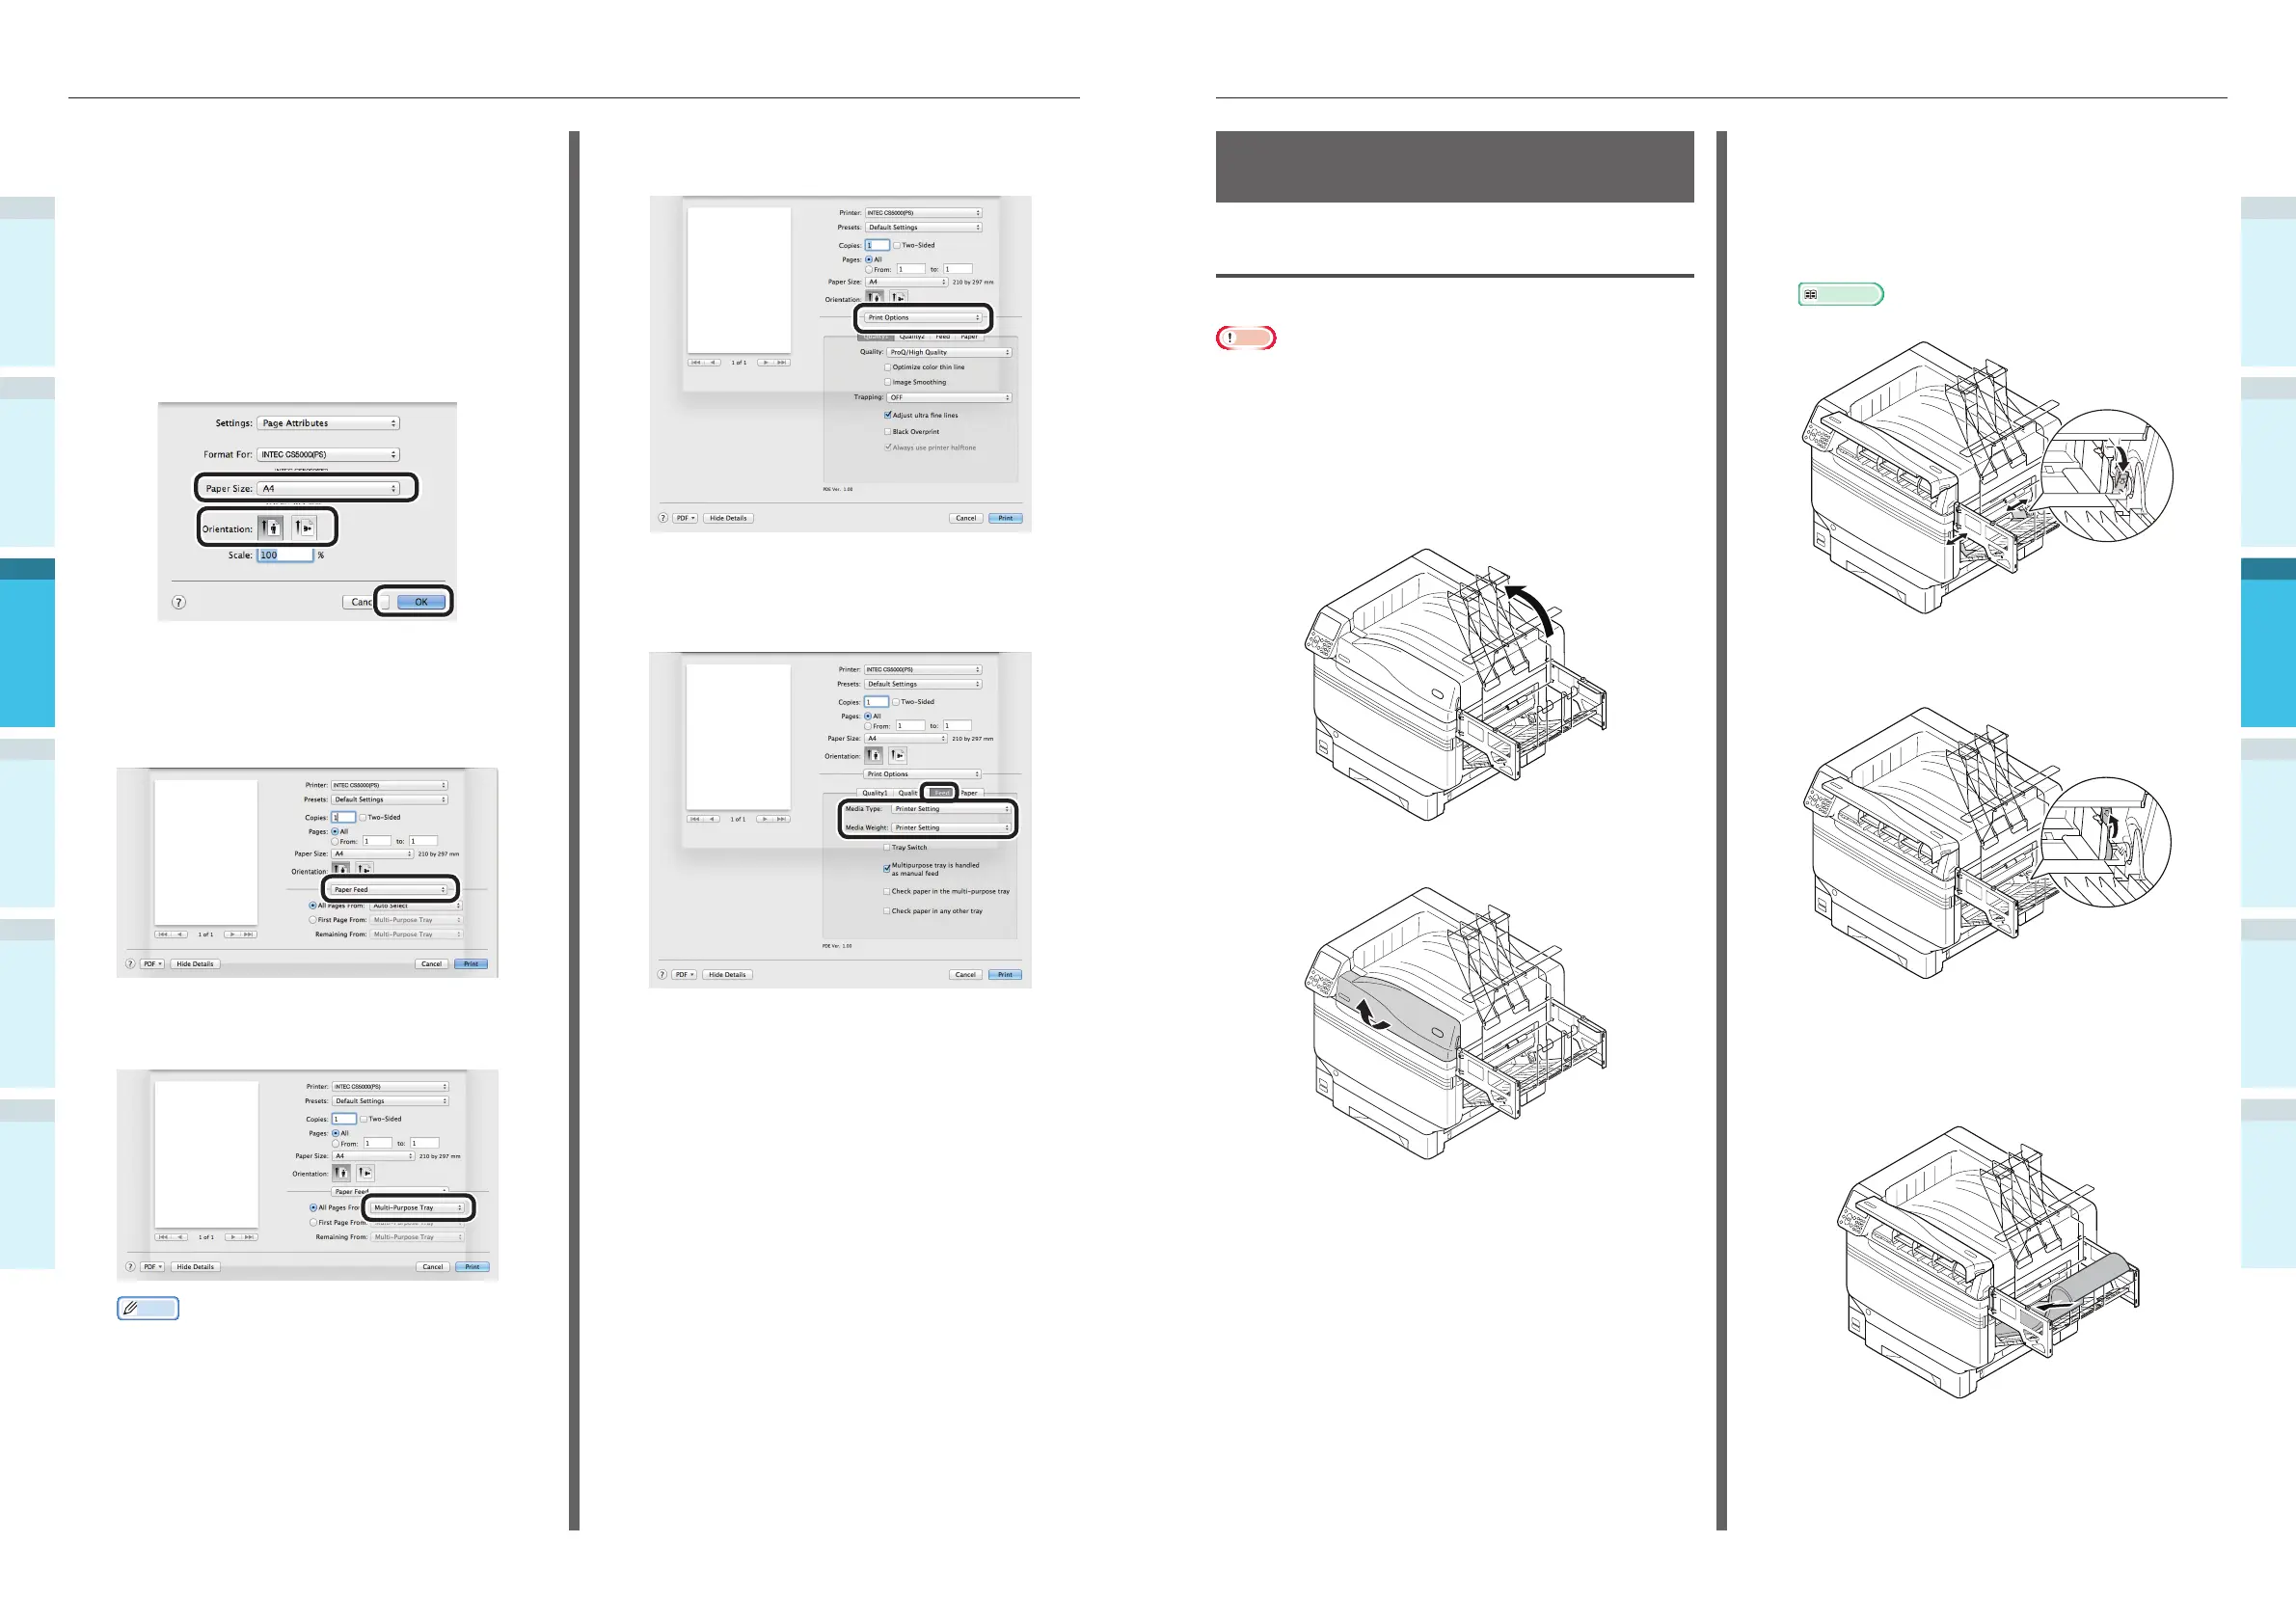
Using Mac OS X Printer Drivers
1
Open the fi le to be printed using
TextEdit.
2
Click [Page Setup] in the [File] menu.
3
Select the paper size and print
orientation using the page setup dialog
box, and click [OK].
4
Select [Print] in the [File] menu.
5
Select [Paper Feed] in the print dialog
box.
6
Select [Multi-Purpose Tray] in [All Pages
From].
Memo
Normally, select [Auto]. Select [Auto] to use the
value set using the printer control panel.
7
Select [Print Options] using the print
dialog box.
8
Chick the [Feed] tab in the printer
setup panel, and select [Media Type]
and [Media Weight].
9
Click [Print] to print.