- 42 - - 43 -
Installing the Device Installing the Device
AppendixPrinting
3
Setting Up
2
Before use
1
Basic Device Operations
4
Index
AppendixPrinting
3
Setting Up
2
Before use
1
Basic Device Operations
4
Index
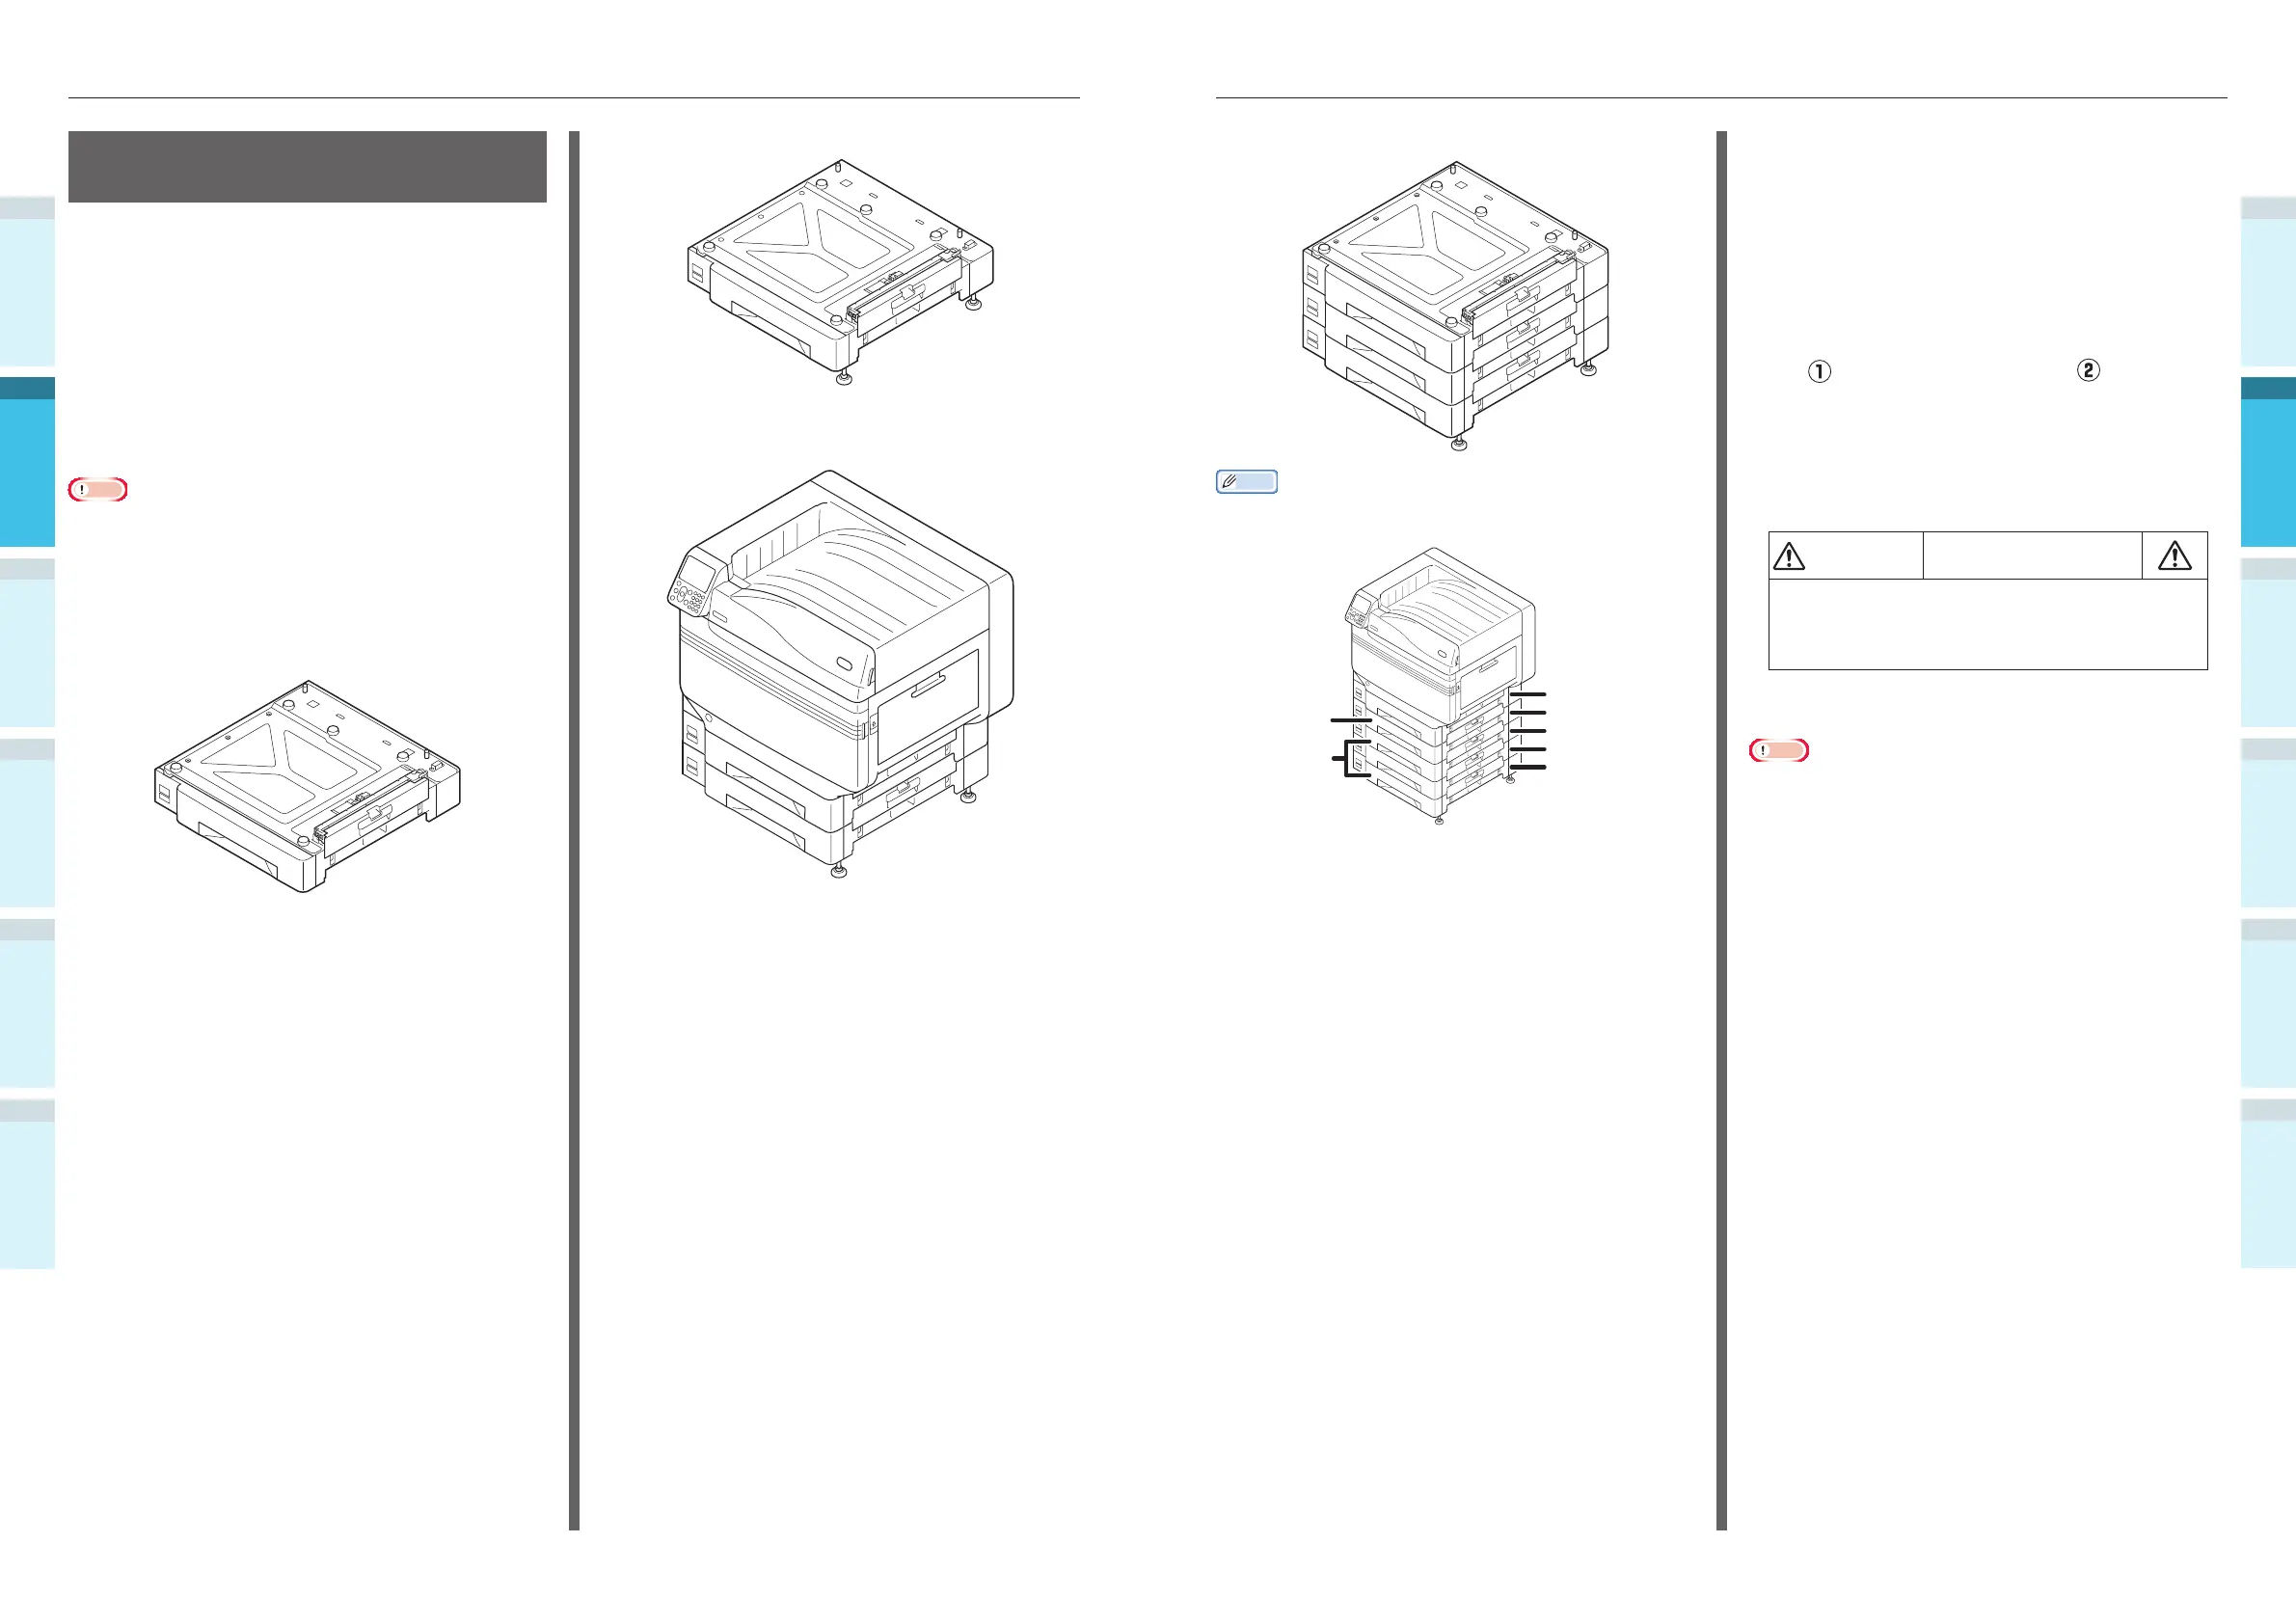
Large-capacity expansion tray unit
Memo
�
The expanded trays are called tray 2, tray 3, tray 4, and
tray 5.
Tray 1 (standard)
Tray 2
Tray 3
Tray 4
Tray 5
Expansion
tray unit
Large-capacity
expansion tray
unit
1
Remove the expansion tray unit from
the package, and remove the buffering
and protective materials.
2
Mount the main printer unit to the
expansion tray unit.
Gently lift the main unit using 4 people
min., and align the holes on the base
(
) to the 2 protrusions ( ) on the
expansion tray unit.
Gently place on the other while
matching the main unit to the position
of the vertical lines on the back of the
expansion tray unit.
CAUTION
There is a risk of injury.
�
The weight of the device is approx. 97kg* for
model CS4000, and approx. 110kg* for model
CS5000, so make sure to use at least 4 people
to lift.
*: Includes consumables such as image drums and toner
cartridges, etc.
Note
�
If the device is connected to a power supply, turn OFF the
device power, and remove the cables. For how to turn OFF
the power supply, see “Turning OFF the Power Supply”
(P.52).
Mounting the Expansion
Tray Unit (Optional)
Mount the (optional) expansion tray unit to
increase the quantity and types of paper that
can be set in the device.
The expansion tray unit has a large-capacity tray
comprising the 1st and 3rd trays.
The device can expand to a maximum of 4 trays
(5 including the standard tray).
The expansion trays can be mounted to either
the main printer unit or the expansion tray unit.
Note
�
If placed on a table, the expansion tray unit can be
expanded to 2 trays (3 including the standard tray).
�
If placed on a table, the large-capacity expansion tray unit
cannot be used.
Expansion tray unit
Expansion tray unit with casters
Mounting the expansion tray unit with
casters to the main printer unit