Version 1.2 (08/2022) en
Translation of original operating instructions 33 of 64
Assembly and installation
8.3 Belt assembly
Belt width / tube length
NOTICE
Risk of overheating if belt is too small!
¾ Ensure that the drum motor is operated with a conveyor belt that covers at least 70 % of the drum tube.
Fordrummotorswithlessthan70%beltcontactanddrummotorswithform-tdrivenbeltsorwithoutbelt,the
requiredoutputshouldbemultipliedby1.2.Thismustbespeciedatthetimeofordering.Ifindoubt,pleasecontact
Interroll.
8.3.1 Belt adjustment
Convex tubes center and guide the belt during regular operation. Nevertheless, the belt should be carefully aligned,
frequently checked during startup and readjusted depending on the load.
NOTICE
Adjustment errors can lead to a shortened service life as well as damages of the belt and the drum motor ball
bearings!
¾ Adjust the drum motor, belt and idler pulleys according to the instructions in this instruction manual.
1. Adjust the belt with the synchronous returning rollers and support rollers and/or (if available) with the idler
pulleys or snub pulleys.
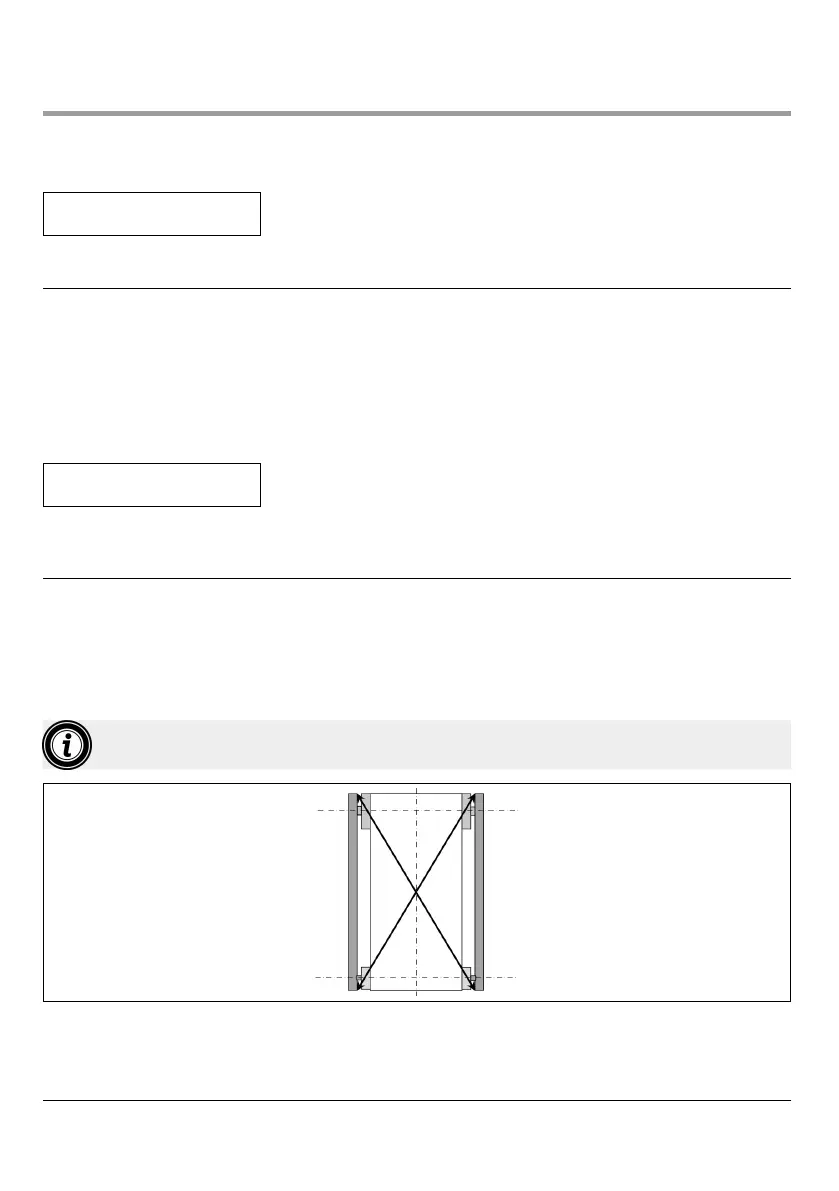
2. Check the diagonal dimensions (between the shafts of the drum motor and the shafts of the end/guide rollers
or from belt edge to belt edge).
Thedierencemustnotbegreaterthan0.5%.
The idler pulley should be cylindrical since a camber in the idler pulley could work against the camber in the
drum motor, thereby causing a belt migration.
Diagonal check
The distance between the belt and the gliding plate must not exceed 3 mm.