38
BACKPROCEDURE 4
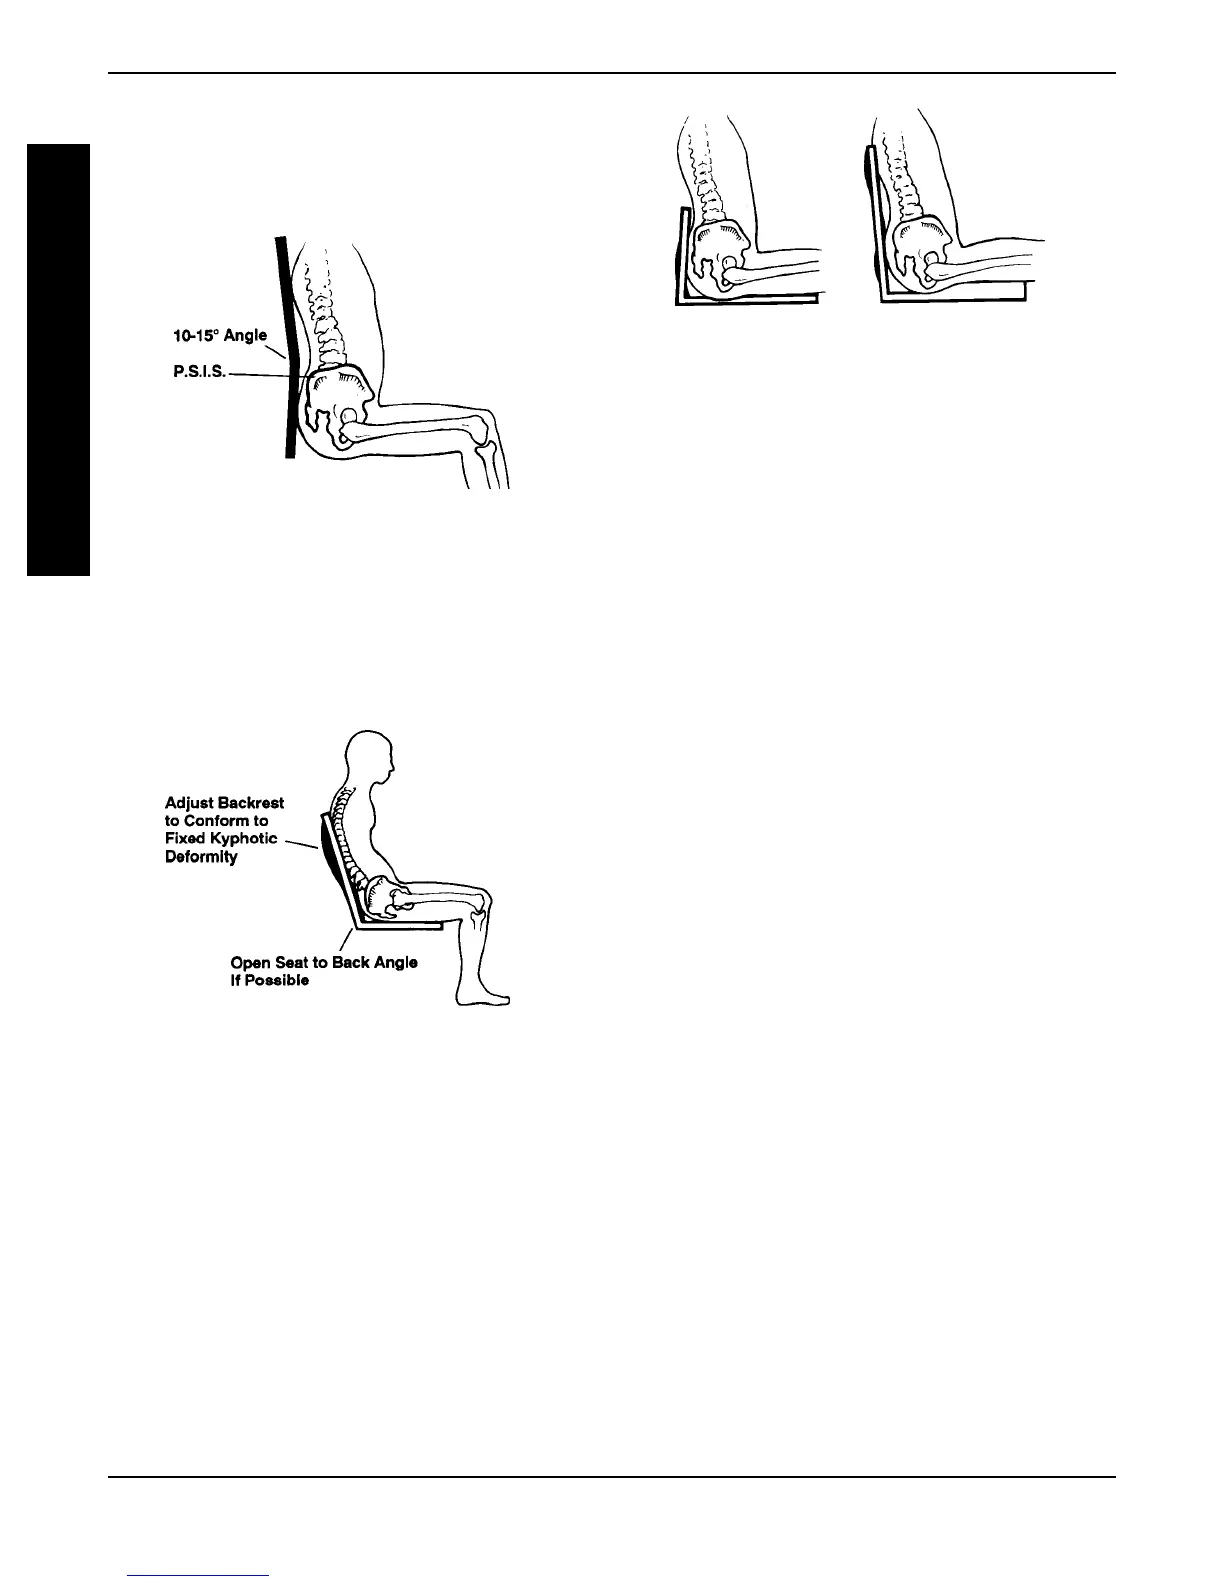
The best point of control for the pelvis is near the
Posterior Superior, Iliac Spine (P.S.I.S.). The upper
trunk should be relined until a balanced posture is
achieved, approximately 10 to 15 degrees (FIGURE
10).
FIGURE 10
FIGURE 11
For individuals who have fixed kyphotic spine, the
backrest can be adjusted to allow for an increased
recline while providing increased contact and support
of the back (FIGURE 11).
The height of the backrest and the amount of control
provided by the adjustable tension upholstery will vary
depending on the abilities of the user. An active
paraplegic (SCI) may require minimal back height
which adds posterior stability to the pelvis and lets
the trunk assume a natural balance over the top edge
of the wheelchair upholstery. A less active para (with
a higher level of injury) or a quadriplegic may require
a higher backrest with an increased level of recline
(FIGURE 12).
FIGURE 12
The effect of back support and the angle of the
backrest are interconnected. Changes to one often
requires change to the other if optimal support and
balance are to be achieved. Use of a wheelchair with
adjustable tension upholstery can significantly in-
crease function, postural condition, balance and com-
fort.
B
A
C
K
B
A
C
K
REPLACING THE SPREADER BAR
Straight Back Canes/ Sportster Back Canes
(FIGURE 13)
NOTE: Make sure the spreader bar is ALWAYS at-
tached to the wheelchair.
1. (Mini Tilt Only) Remove the release handle. RE-
FER TO MINI TILT in PROCEDURE 10 of this
manual.
2. Separate back assembly from the Back Angle
Bracket by removing the hex screws, coved
spacers, washers, and locknuts.
3. Remove the Cantilever arms from the Back As-
sembly, if necessary. Refer to USING/INSTALL-
ING/ADJUSTING CANTILEVER ARMS in PRO-
CEDURE 2 of this manual.
4. Remove the locking mechanisms in the back
canes. Refer to REPLACING THE LOCKING
MECHANISM IN THE BACK CANE in this PRO-
CEDURE of this manual.
5. Loosen, but do not remove the two (2) set
screws that secure the existing spreader bar to
the back canes.
6. Slide the existing spreader bar off of the two (2)
back canes.