42
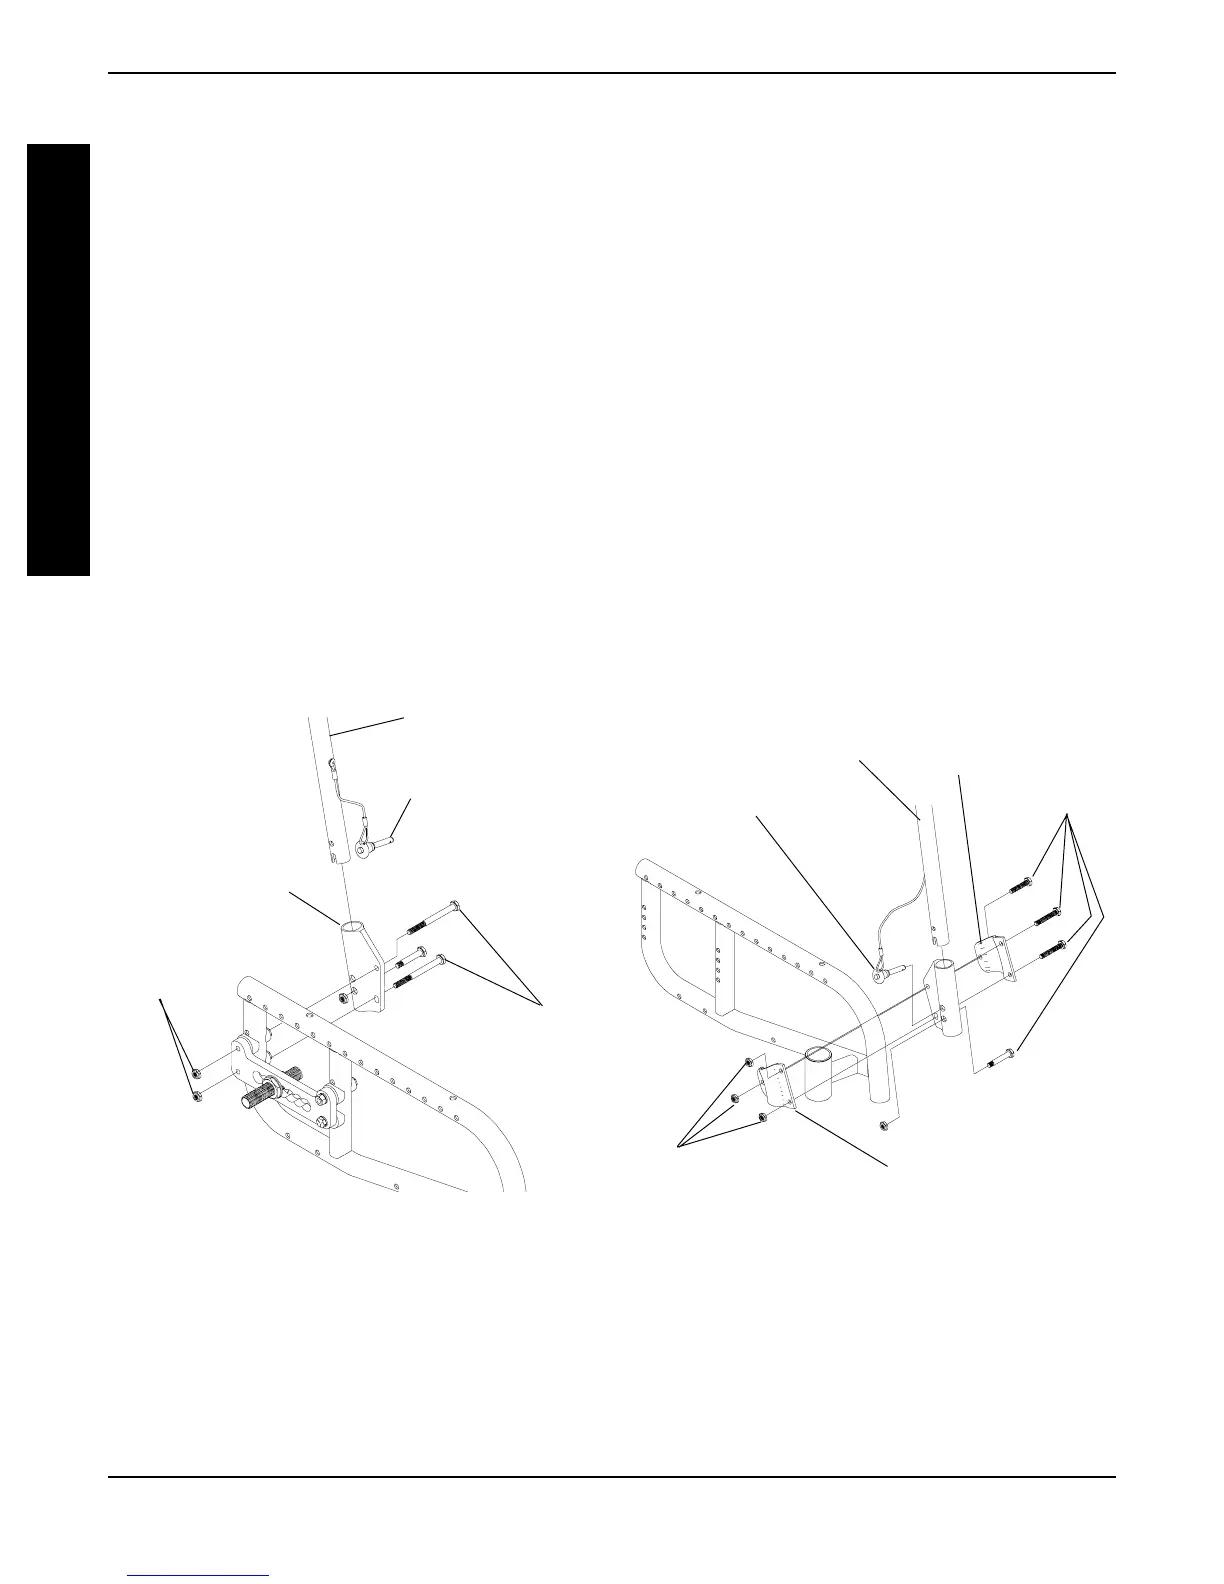
INSTALLING THE CLAMP-ON STROLLER
HANDLES (NON-MINI TILT/SPORTSTER
BACK ONLY)
Standard Position (FIGURE 18)
1. Remove the two hex screws, washers, and lock-
nuts that secure the rear of the axle plate onto
the wheelchair frame.
NOTE: Keep hex screws, these will be needed if
a reverse configuration is desired. Washer and
locknuts will be used in this procedure.
2. Position the mounting bracket on the inside of
the wheelchair frame.
3. Slide the new hex screws through the mount-
ing bracket, the wheelchair frame, and the axle
plate
secure with existing washers, and locknuts.
NOTE: When securing the mounting bracket en-
sure the existing hardware stays in the same
orientation, i.e. washers, coved spacers.
PROCEDURE 4 BACK
Stroller Handle
Quick Release Pin
Locknuts
Hex Screws
Mounting Bracket
Hex
Screws
Quick Release Pin
Stroller Handle
Half
Clamp
Half
Clamp
Locknuts
FIGURE 18 - INSTALLING THE CLAMP-ON
STROLLER HANDLES (NON-MINI TILT/
SPORTSTER BACK ONLY)-STANDARD
POSITION
FIGURE 19 - INSTALLING THE CLAMP-ON
STROLLER HANDLES (NON-MINI TILT/
SPORTSTER BACK ONLY)-REVERSED
POSITION
4. Slide hex screw in lower hole of mounting
bracket and secure with locknut provided.
5. Slide stroller handle into mounting bracket until
it rests on the hex screw installed in STEP 4.
6. Position quick release pin in top hole of the
mounting bracket.
Reversed Position (FIGURE 19)
1. Position the half clamps on each side of the
mounting bracket as shown in FIGURE 19. Se-
cure with the longer hex screws and locknuts.
2. Position the mounting bracket assembly on the
front of the wheelchair and secure with the
shorter hex screw and locknut.
3. Slide hex screw in lower hole of mounting
bracket and secure with locknut provided.
4. Slide stroller handle into mounting bracket until
it rests on the hex screw installed in STEP 3.
5. Position quick release pin in top hole of the
mounting bracket.
B
A
C
K