34
This Procedure includes the following:
Folding/Unfolding the Back
Changing Back Height
Replacing the Back Upholstery
Adjustable Back Upholstery
Replacing the Spreader Bar
Replacing the Locking Mechanism in
the Back Cane
Changing the Back Angle
Installing the Stroller Handles
Installing The Clamp-on Stroller Handles (Non-
Mini Tilt/Sportster Back Only)
WARNING
After adjustments and before use, make sure
all attaching hardware is securely tightened.
PROCEDURE 4
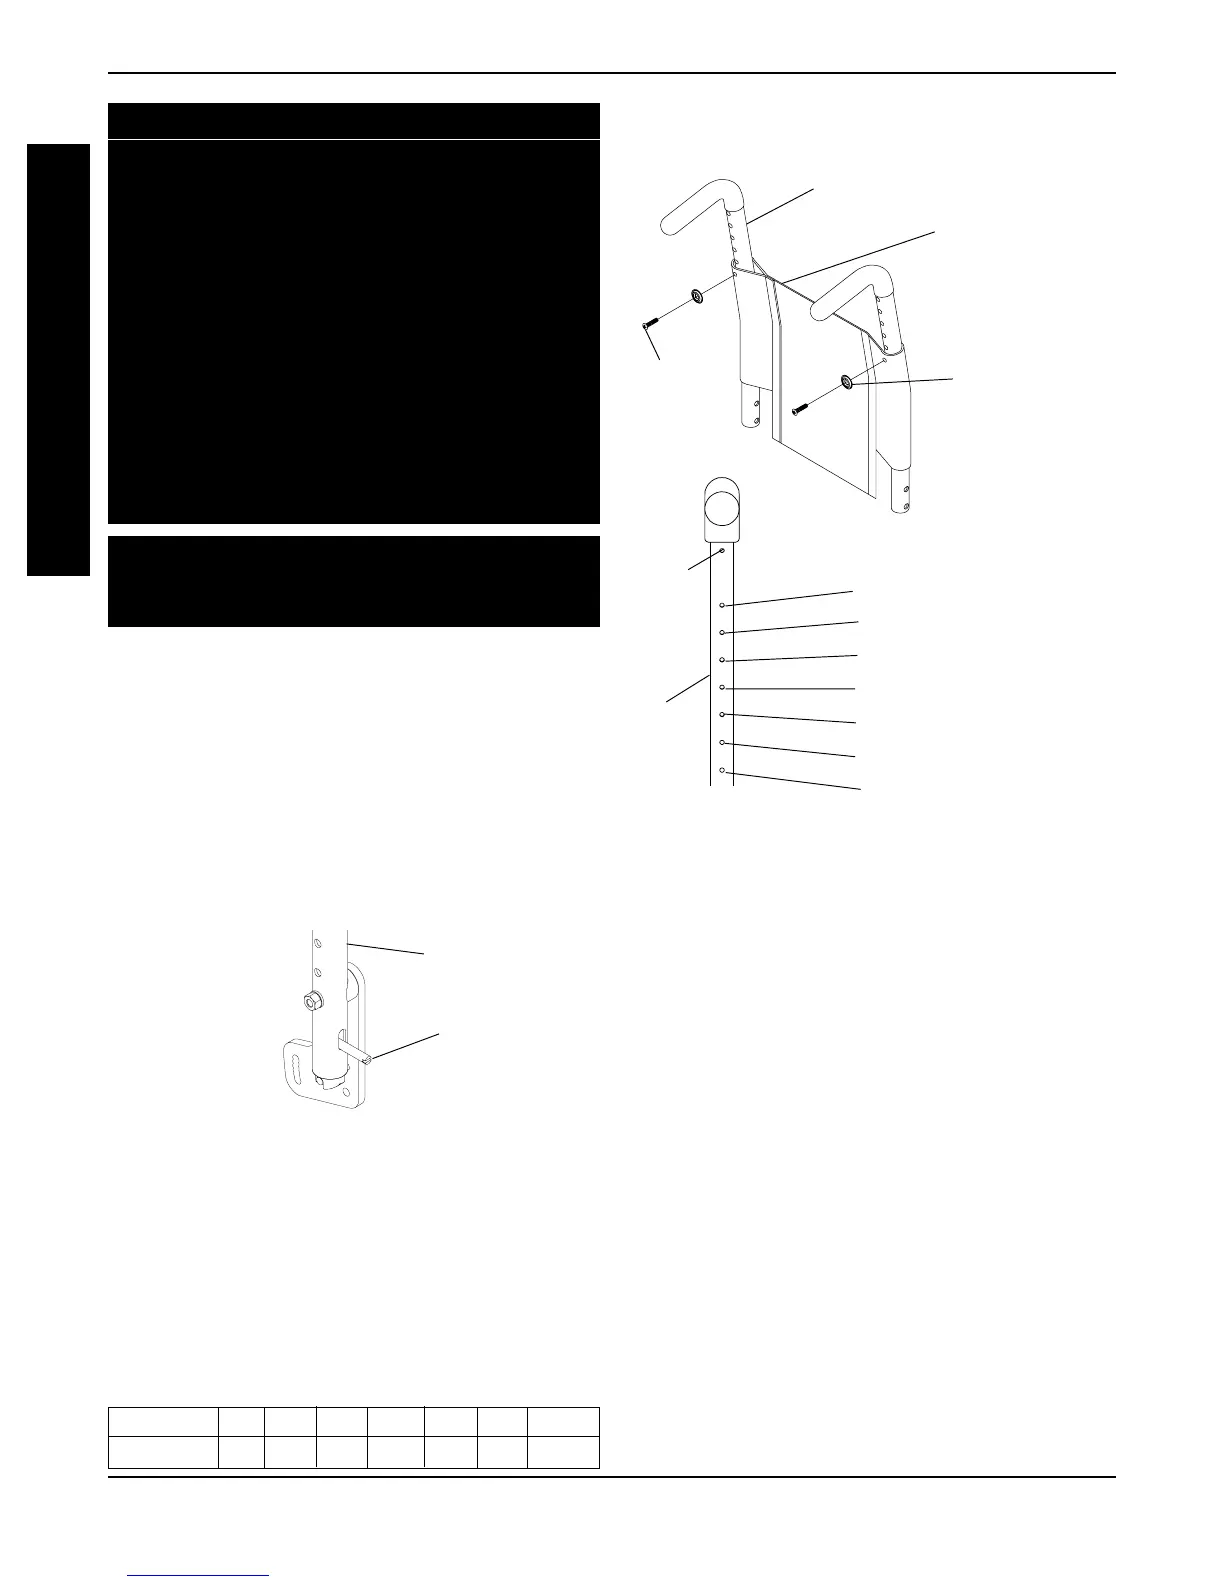
Back Cane
Washer
Phillips
Screw
HOLE # HEIGHT
7 ........... 16 inches
6 ........... 15 inches
5 ........... 14 inches
4 ........... 13 inches
3 ........... 12 inches
2 ........... 11 inches
1 ........... 10 inches
Back
Cane
Do Not
Use
ORIGINAL BACK
REPLACING THE BACK UPHOLSTERY
Straight Back Canes (FIGURE 3)
1. (Mini-Tilt Only) Remove the release handle.
REFER TO MINI TILT in PROCEDURE 10 of
this manual.
2. Disconnect back assembly from the Back Angle
Bracket by removing the hex screw, coved
spacer, washer, and locknut.
3. Remove Cantilever arms from Back Assembly.
Refer to USING/INSTALLING/ADJUSTING
CANTILEVER ARMS in PROCEDURE 2 of this
manual.
4. Remove the locking mechanism in the back
canes. Refer to REPLACING THE LOCKING
MECHANISM IN THE BACK CANE in this sec-
tion of the manual.
5. Remove spreader bar from back assembly. Re-
fer to REPLACING THE SPREADER BAR in
this section of the manual.
BACK
3. Securely tighten the back upholstery to the back
canes with the two (2) phillips screws and wash-
ers.
CHANGING BACK HEIGHT (FIGURE 2)
1. Remove the two (2) phillips screws and washers
that secure the existing back upholstery to the
wheelchair.
2. Position the mounting holes in the back uphol-
stery to one (1) of seven (7) positions:
Original Back Height (in inches)
✪ ✪
✪ ✪
✪ HOLE # 123456 7
HEIGHT 10 11 12 13 14 15 16
Back Cane
Actuator
FOLDING/UNFOLDING THE BACK (FIGURE 1)
1. Pull the actuator of the locking mechanism up to-
wards the top of the wheelchair.
2. While holding the actuator of the locking mecha-
nism, push the back down.
3. To lock the back into place, pull up until there is
an audible click.
4. Push on the back to make sure it is locked in place.
FIGURE 1 - FOLDING/UNFOLDING THE BACK
FIGURE 2 - CHANGING BACK HEIGHT
Back
Upholstery
B
A
C
K