TempScan / MultiScan User's Manual Chapter 9: TempView 133
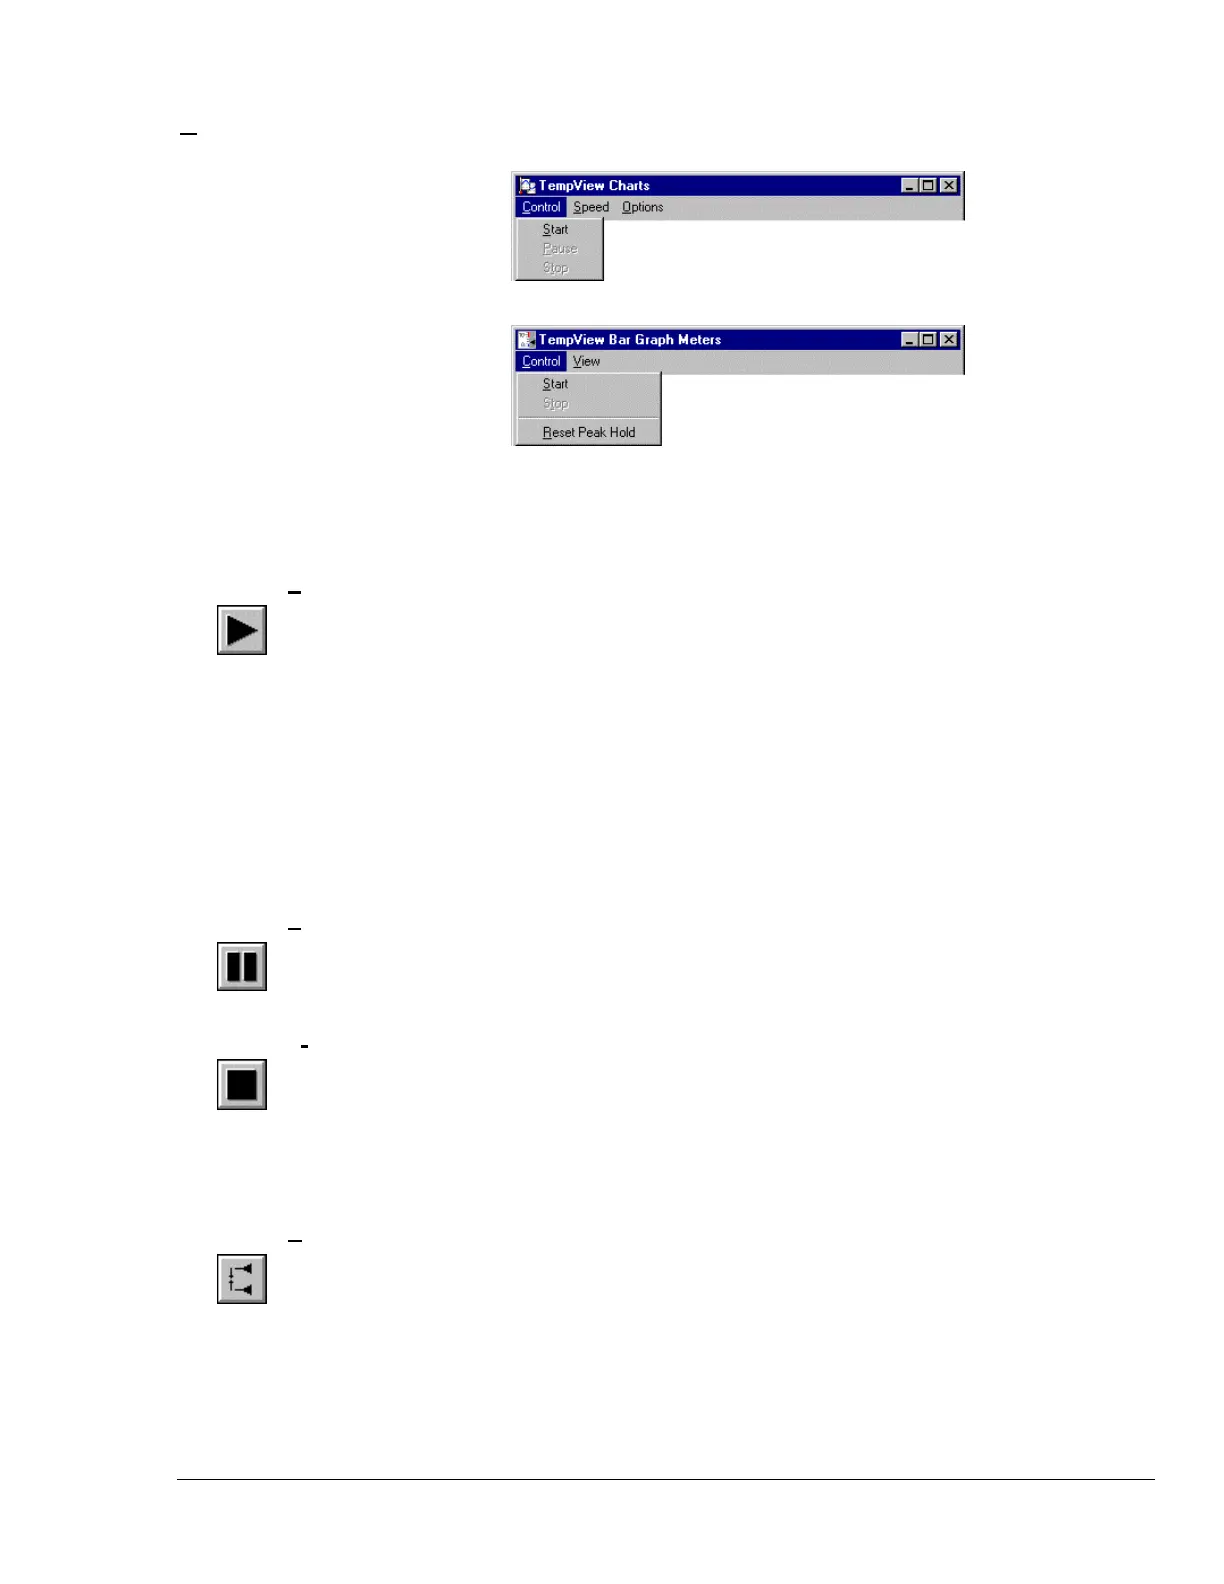
Control Menu Items (Charts & Meters)
Control Menu Items
This menu is similar for all three Meters Windows.
Note: The Reset Peak Hold item does not appear in the Digital Meters menu.
Control Menu Items
Start (All Charts & Meters)
(16)
Enables the Channel Display area
(H)
of any of the TempView Charts and Meters Windows.
With Charts, before the display is started, at least one channel must be enabled from the TempView
Main Window, and at least one chart must be assigned to an active (enabled) channel. To assign an
active channel to a chart, you can use the Active Channel pull-down list
(I)
.
With any of the Meters, before the display is started, at least one channel must be enabled from the
TempView Main Window.
Alternatively, you can also start the Channel Display area in all opened TempView Charts and Meters
Windows by using the Start All Indicators toolbar button
(1)
.
Note:
Prior to changing any channel parameter, the Reading column, and the TempView Charts and
Meters Windows must all be stopped and no data acquisition can be in progress.
Pause (Charts Only)
(17)
Pauses your view of the chart, but does not affect the scan rates of the TempScan/1100 or
MultiScan/1200 acquisition.
Stop (All Charts & Meters)
(18)
Disables the Channel Display area
(H)
of any of the TempView Charts and Meters Windows.
Alternatively, you can also stop the Channel Display area in all opened TempView Charts and Meters
Windows by using the Stop All Indicators toolbar button
(2)
.
Note:
Prior to changing any channel parameter, the Reading column, and the TempView Charts and
Meters Windows must all be stopped and no data acquisition can be in progress.
Reset Peak Hold (Bar Graph & Analog Meters Only)
(19)
Resets the floating markers. Upon reset, the markers will instantly adjust to indicate the highest and
lowest values reached since the time of the reset. This menu item also appears in the Configure Meters
pop-up menu. Note that this feature does not appear in the Digital Meters Control menu.