82 Chapter 8: ChartView & ChartView Plus TempScan / MultiScan User's Manual
Digital Meters
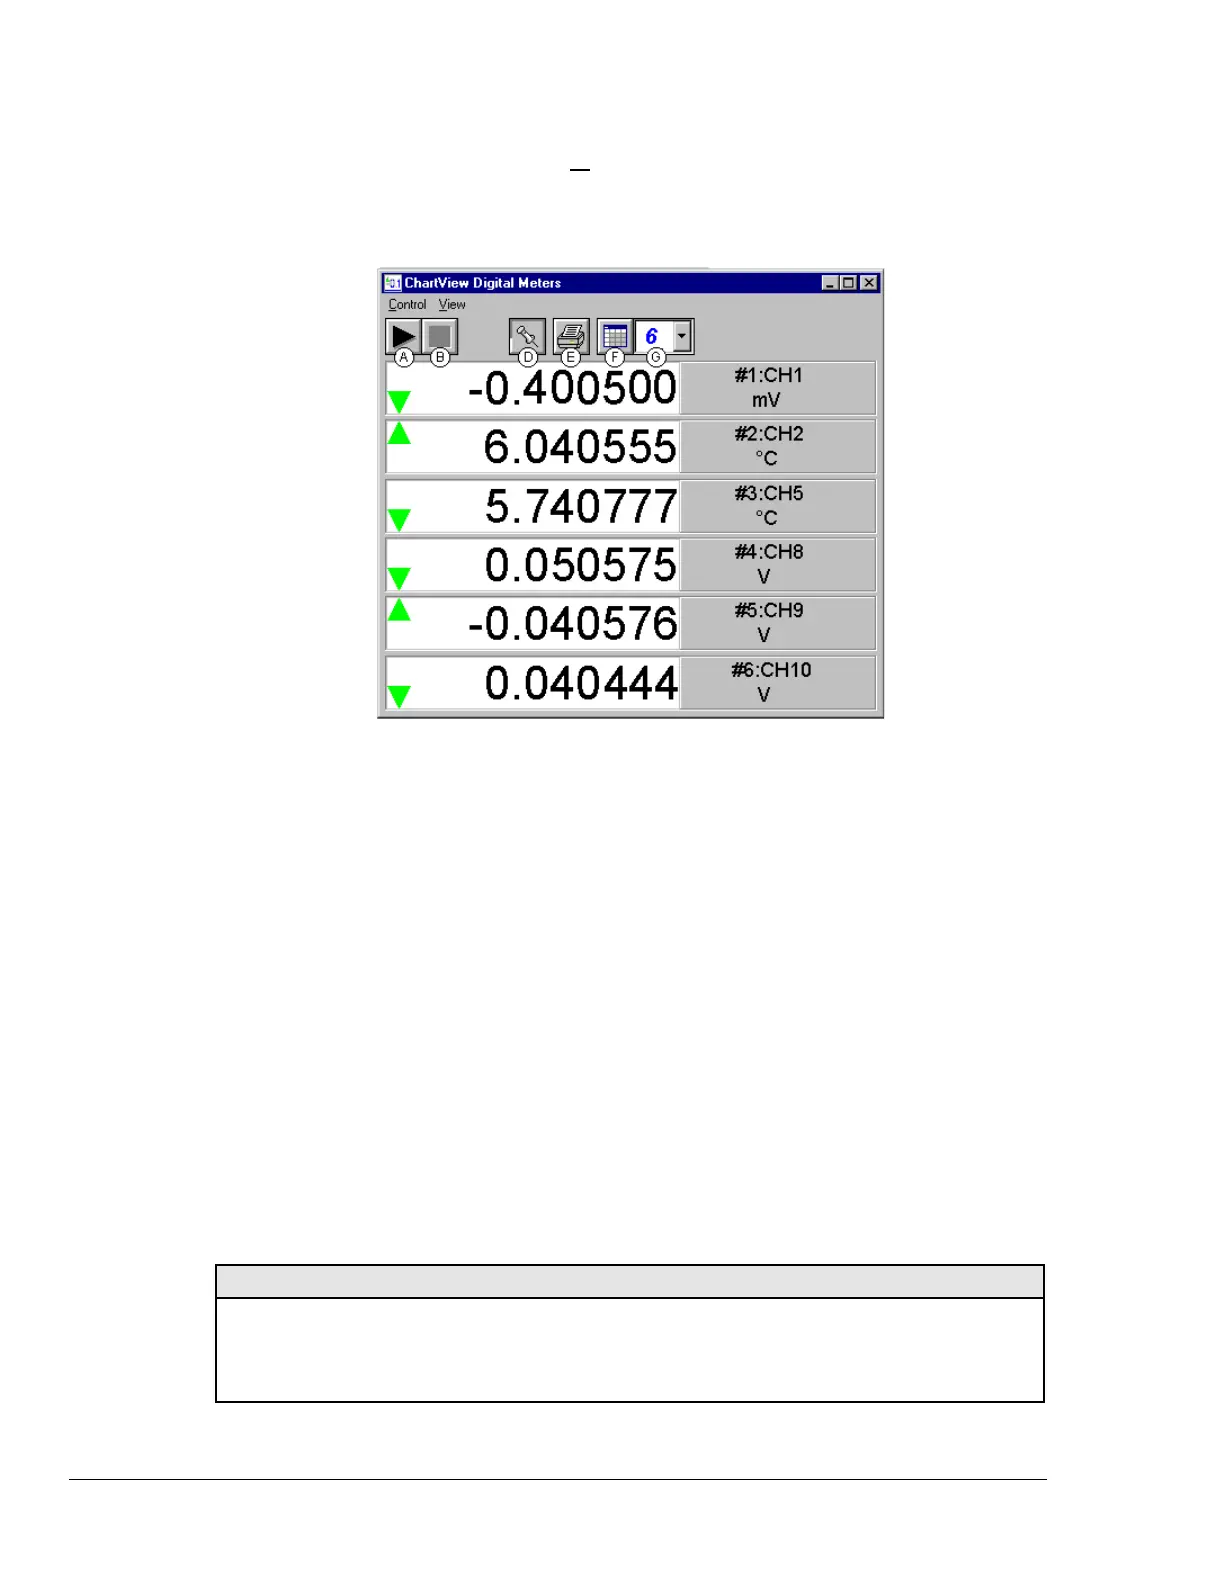
Selecting Digital Meters from ChartView’s Window pull-down menu brings up the Digital Meters
window to display several channels in numeric format. To activate the display, select the Start button
from the toolbar. At least one meter must be assigned to an active (On) channel. You can select to
view up to 32 meters at a given time.
Digital Meters, Shown with 6 Meters Selected for Viewing
Note: Although the Digital Meters instrument is capable of displaying 6 decimal places, there is not 6
place accuracy in the readings. Due to transducer and transient noises, the accuracy of voltage
readings is ± 0.02%. Temperature accuracy varies, depending on thermocouple type; with type J
having ± 0.5°C for a range of -100°C to +760°C. For your application, please refer to
specifications of the signal conditioning card(s) used, as well as the thermocouple type, and the
data acquisition instrument used (TempScan/1100 or MultiScan/1200).
Double-clicking the left mouse button in a meters scale area brings up a channel selection pop-up menu
(not shown). A single-click with the right mouse button in this same area brings up a configuration
pop-up menu (see Bar Graph Meters figure, item H). Both of these pop-up menus are discussed in the
section, Meters Configuration Menu. Note that each of the above channels shows a trend indicator on
the left side of the meter.
The items in this window are as follows:
A - Start C - N/A E - Print G - Number of Meters
B - Stop D - Stay On Top F - Rows x Columns H - Configuration Pop-Up Menu
Toolbar items A through G are discussed in more detail in the following section, Meter Toolbars.
Item H is discussed in the subsequent section, Meters Configuration Menu.
Configuration Note: …. For Digital Meters
Configure the Digital Meters settings by first clicking the right mouse button anywhere within the
digital meter display area. A pop-up menu will appear allowing you to reconfigure the meter in
regard to scale, limits, channel selection, etc. Refer to the section entitled Configure Meter
Settings for more detail.
 Loading...