File Version: 3.4 / JAKA Zu Series Hardware User Manual
Single-step program debugging
Using the buttons at the end requires users to fully assess the possible risks of the sudden start and
stop of the robot, which may cause injury to personnel or damage to the equipment.
8.1.2
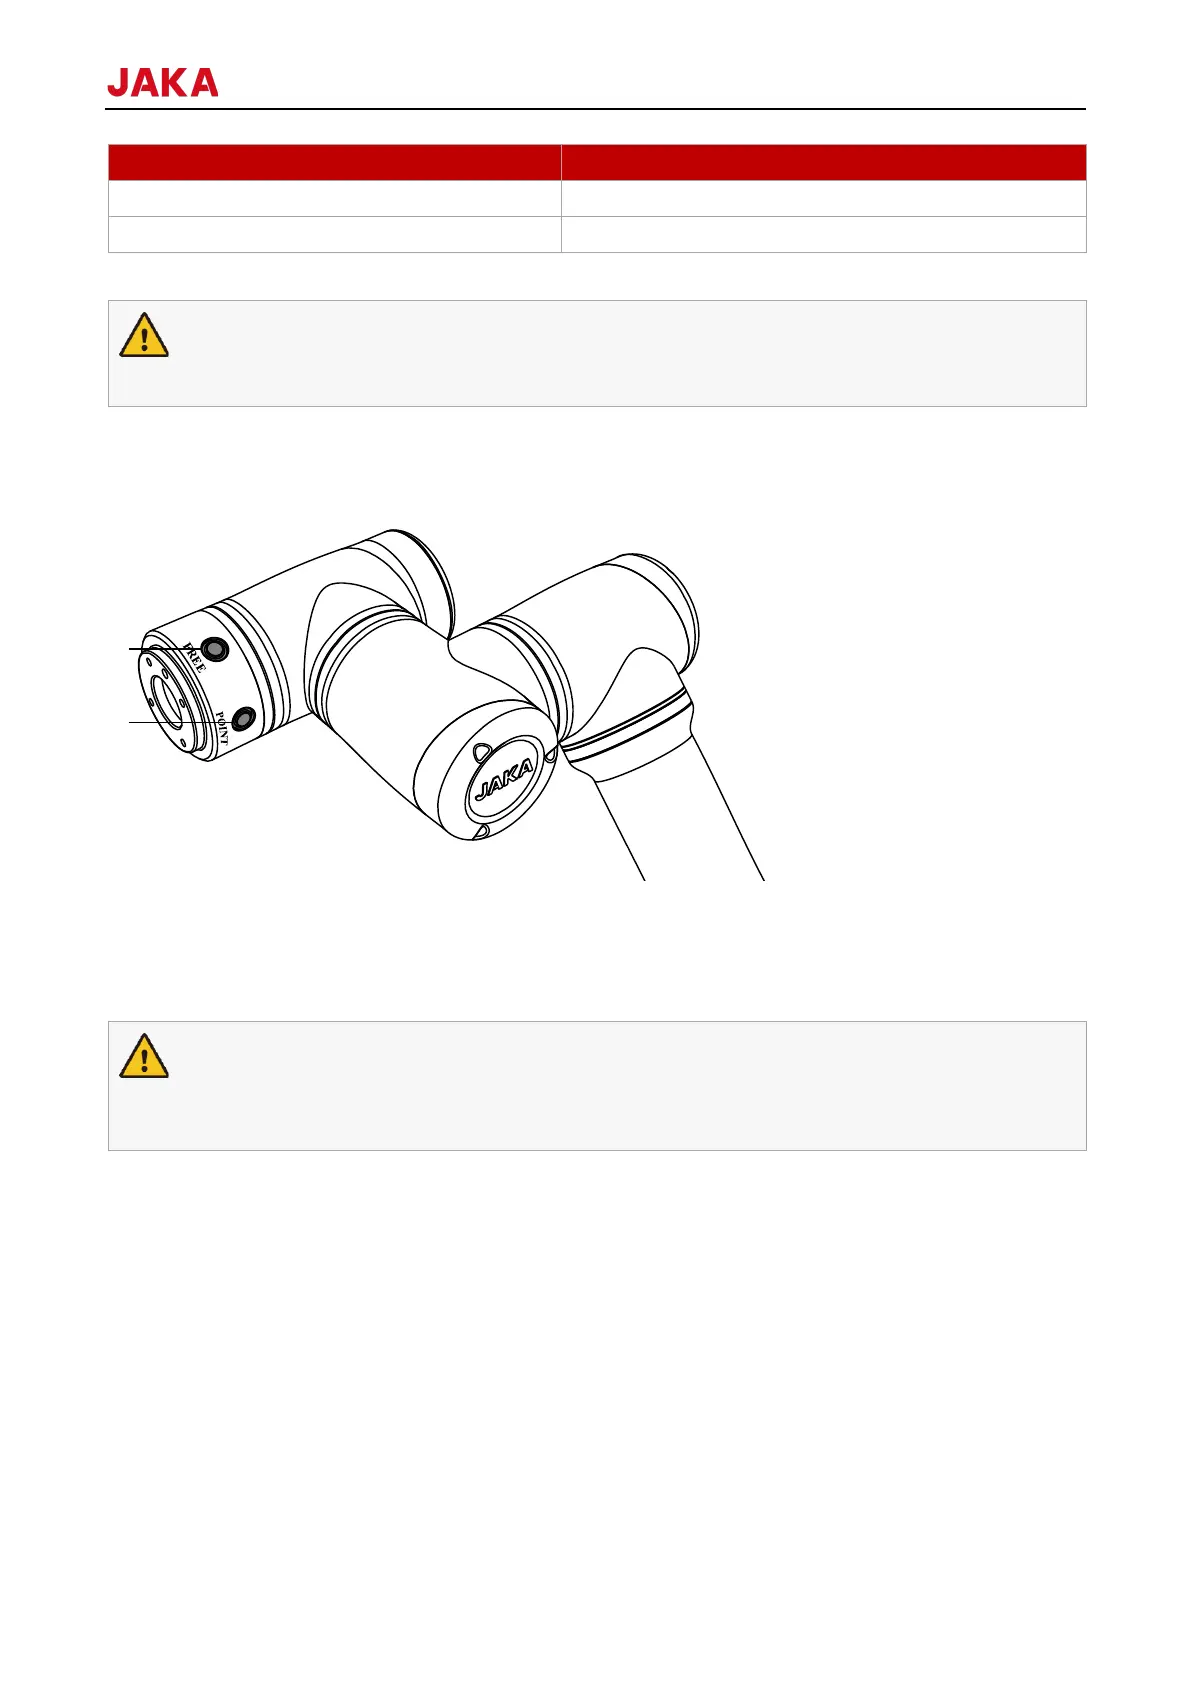
JAKA’s robot comes with a tool I/O interface and two buttons on the side of the flange. The two buttons are a
freedrive button (FREE) and a point recording button (POINT), as shown in figure below.
1. Freedrive button
2. Point recording button
When FREE is pressed, the robot enters freedrive mode that you can directly drag the robot to the expected
position.
POINT button is used with the JAKA Zu App. When this button is pressed, the corresponding position will show
up in the programming interface of App as a command (See 1.5 JAKA Zu App Software User Manual for details).
The use of FREE button requires users to fully assess the possible risks. They must ensure that the
robot’s mounting orientation, end payload, TCP, and other parameters are correctly set, otherwise it
may cause injury to personnel or damage to equipment.
8.1.3
The tool input and output interface is referred to as TIO, installed on the side of the flange of the robot, which
contains two digital inputs, two digital outputs and two analog inputs, and can multiplex the two-channel RS485
signal at the same time. For the definition of the interface, see 8.1.3.1 Definition of End-effector Side.
TIO cable connector is fool-proofing designed. Align the raised part of the cable with the concave groove on the
flange, then insert the cable. The TIO position is as shown in the figure below.
 Loading...