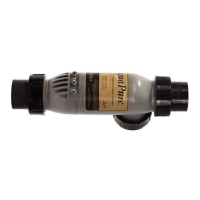
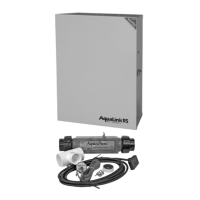
3.7 Installing the Electrolytic Cell and Flow/Temp/Salinity Sensor
Please choose one of the following instructions to either install or replace the cell and sensor assembly.
3.7.1 New Installation
3.7.2 Replacement of Existing 3-Port Cell
3.7.3 Replacement of 2-Port (square) Cell and Sensor Tee with 3-Port Cell
NOTE: Maximum operating Pressure is 345 kPa or 50 PSI.
WARNING
ATTENTIONINSTALLER:Iftheow/temp/salinitysensorisnotinstalledproperly,itmayallowthe
electrolyticcelltooperatewithoutwaterow.Thiswouldcauseabuildupofammablegasesresultingin
FIRE or EXPLOSION.
• Mount as shown in Figure 11. This will result in the most reliable operation.
• Theow/temp/salinitysensormustbemounted:
(1) In one of the available ports in the electrolytic cell
- or -
(2)Inthesamelinepriortothecellwithnovalvesordivertersbetweentheow/temp/salinity
sensor and cell.
• Anytimetheow/temp/salinitysensorisconnectedordisconnectedandreconnected,theACpower
to the unit must be turned off and back on (Cycle Power). If power is not cycled, unreliable operation
oftheow/temp/salinitysensorwillresult.
3.7.1 New Installation
1. Be sure pool pump is turned off.
2. It is recommended that the ow/temp/salinity sensor and electrolytic cell be installed in the pool return
line after the lter and heater. The cell can be installed in either a horizontal or a vertical position. See
Figure 3.
3. Position the ow/temp/salinity sensor and cell in the recommended position (see Figures 1, 3, 4 and 5).
4. Locate a suitable section of pipe, approximately 17 inches (432 mm) long or follow the recommended
plumbing diagrams as shown in Figures 4 and 5. The ow/temp/salinity sensor cable and cell DC cord
must be able to reach from the power center to this section of pipe.
5. Cut out a 13
7
/
8
” (352 mm) section of the 2” (50 mm) pipe to insert the Cell. See Figure 12. Glue on
unions and install cell.
6. Install the ow/temp/salinity sensor into the 3-Port cell. See Figure 11.
7. Install the strain relief provided with the electrolytic cell kit into the low voltage knock out. Feed
the connector end of the ow/temp/salinity sensor cable through the DC cord strain relief tting. Be
certain the connector is clean and dry, then plug the cable into the connector on the power center
printed circuit board as shown in Figures 2a, 2b, and 2c. (Do not pull Flow/Temp/Salinity Sensor
cable too tight, allow a little slack).
8. Plug the DC cord into the cell stud terminals protruding from the cell top. The DC cord can be plugged
into the cell in either direction.
CAUTION
Toavoidriskofdamagetotheequipmentandpossibleinjury,itisimportanttomakesuretheDCcable
connector is fully seated on the cell stud terminals.
Page 17
ENGLISH
Page 17
ENGLISH
Jandy
®
AquaPure
®
/PureLink™ Power Center and Cell Kit
|
Installation and Operation Manual
 Loading...
