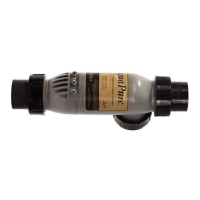
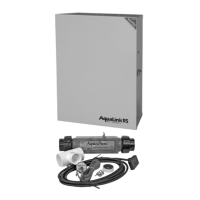
9. Connect the DC cord to the power center. Feed the DC cord through the same strain relief tting as the
ow/temp/salinity sensor. Plug the DC cord into the two spade connectors of the wiring harness located
in the low voltage raceway of the control/power center, see Figure 2a, 2b, and 2c. This wiring harness
establishes the connection between the cell and the power interface PCB.
10. Tighten strain relief tting screws for the ow/temp/salinity sensor and the DC cord. Do not pull
Flow/Temp/Salinity Sensor cable or DC Cord too tight. Allow a little slack for the cable inside of
power center enclosure.
CAUTION
Donotovertightenthestrainrelieftting.Overtighteningcancausedamagetotheow/temp/salinity
sensor cable.
11. Prior to reattaching front cover, check the wiring. Be sure the ow/temp/salinity sensor is plugged in.
The DC cord should be plugged in. Also, check the AC wiring.
12. Plug one end of the ribbon cable into the back of the user interface and the other end into the J1
connector on the power interface PCB (see Figures 2a, 2b, 2c, and 10).
WARNING
Toavoidpropertydamage,seriousinjuryordeath,donotoperatetheelectrolyticcellwithoutwater
circulation.AbuildupofammablegasescanresultinFIREorEXPLOSION.
3.7.2 Replacement of Existing 3-Port Cell (Universal or 2” PVC Unions)
1. Be sure pool pump is turned off.
2. Unplug DC cable from existing cell. Disconnect the DC cord from the wiring harness as shown in
Figure 2a, 2b, and 2c. Loosen the strain relief tting that also contains the cable for ow/temp/salinity
sensor. Pull the DC cord out through the strain relief.
CAUTION
DonotallowtheDCCordtopulltootightlyonow/temp/salinitysensorcableasitisbeingpulled
throughthestrainrelief.Thismaydamagetheow/temp/salinitysensorcableanditsconnectiontothe
printed circuit board.
3. Remove ow/temp/salinity sensor from cell by unscrewing coupling nut on sensor port. The sensor
should pull straight out after nut is removed.
4. Remove old 3-port cell body by unscrewing coupling nuts on ow ports. The cell body will be free to
pull out after nuts are clear of the threads.
5. Replace existing union o-rings with new o-rings provided with cell kit.
6. Install new cell and tighten coupling nuts.
7. Install the ow/temp/salinity sensor into the available sensor port (See Figure 11).
8. Plug the new DC cord provided with the cell kit, in either direction, into the cell stud terminals
protruding from the cell top. Make sure that the plug is fully inserted and bottomed out on the housing.
CAUTION
Toavoidriskofdamagetotheequipmentandpossibleinjury,itisimportanttomakesuretheDCcable
connector is fully seated on the cell stud terminals.
Page 18
ENGLISH
Page 18
ENGLISH
Jandy
®
AquaPure
®
/PureLink™ Power Center and Cell Kit
|
Installation and Operation Manual
 Loading...
