EasyManua.ls Logo

JRC JAN-7202 - User Manual

JRC JAN-7202
332 pages
Print Icon
To Next Page IconTo Next Page
Loading...
Overview
1
Name and Function of Each Unit
2
Basic Operations
3
Each Block of Conning Display
4
Setting Up Screen View
5
Setting Up Alerts
6
Setting Up the Operation Mode
7
Adjusting and Setting Up Equipment
(for Services)
8
Maintenance & Inspection
9
Failures and After-Sale Services
10
About Disposal
11
Specifications
12
Alert List
APP A
Menu List and Materials
APP B
JAN-7202/9202
Conning Display
Instruction Manual

Table of Contents

Other manuals for JRC JAN-7202

Questions and Answers

  • A
    Amber WalkerNov 25, 2025
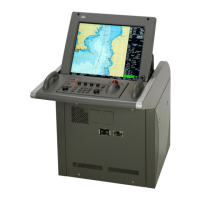
    How do I fix JRC Monitor when the azimuth of the Gyro compass is not displayed?
    • K
      Kathy GloverNov 25, 2025
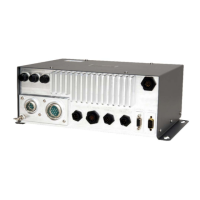
      If the azimuth of the Gyro compass isn't displaying correctly on your JRC Monitor, or the rotation direction is wrong: * Verify that the communication is set correctly. * Ensure the power supply for the Gyro compass equipment is turned on. * Check the connection with the Gyro compass equipment, looking for the LED indicator at signal reception if connected to the serial LAN or gyro interface circuit. * If using the serial-LAN interface circuit (CMH-2370), confirm its power supply is on. * If using the Gyro interface circuit (CMJ-554), ensure it is set correctly and check its fuse. If the issue persists, the serial-LAN interface circuit (CMH-2370), the Gyro interface circuit (CMJ-554), internal wiring, or the central control unit (NDC-1590) may be faulty, requiring a repair requ...
  • E
    Eugene LawrenceAug 23, 2025
    What to do if position information (GPS) is not displayed on JRC Monitor?
    • C
      Christopher MarksAug 25, 2025
      If the GPS information isn't showing on your JRC Monitor, verify these items: 1. Ensure the communication is correctly set. 2. Check that the power supply for the GPS equipment is on. 3. Confirm the GPS equipment is performing positioning. 4. Verify the connection with the GPS equipment, checking the LED of the corresponding port if connected to the serial LAN interface circuit. 5. If connected to the serial-LAN interface circuit (CMH-2370), ensure its power supply is on. If problems persist, the serial-LAN interface circuit (CMH-2370), internal wiring, or the central control unit (NDC-1590) might be faulty, requiring a repair request from the distributor.
  • C
    Cathy WilliamsonAug 25, 2025
    Why is my JRC Monitor screen not displaying even though the power is on?
    • A
      Anna MaddenAug 26, 2025
      If your JRC Monitor has power but the screen remains blank, first, check the brightness setting and adjust it to an appropriate level. If adjusting the brightness doesn't solve the problem, the internal wiring or the display unit (NWZ-208/ NWZ-207/NWZ-214) may be faulty, and you should request a repair from the distributor.
  • K
    Kyle VanceAug 27, 2025
    Why is the Log not displayed correctly on my JRC Monitor?
    • J
      James PowellAug 27, 2025
      If the log isn't displayed correctly on your JRC Monitor, ensure the communication is set correctly. Also, check that the power supply for the log equipment is turned on and verify the connection with the log equipment, looking for the LED blinking at signal reception if connected to the serial LAN interface circuit or gyro interface circuit.
  • K
    Kimberly SilvaAug 29, 2025
    How to troubleshoot rudder angle display issues on JRC Monitor?
    • D
      Dana PenaAug 29, 2025
      If the rudder angles are not displayed correctly on the JRC Monitor, verify that the communication is correctly set. Also, ensure that the power supply for the rudder angle indicator is turned on and check the connection with the rudder angle indicator, looking for the LED at data reception if connected to the serial LAN interface circuit. If connected to the serial-LAN interface circuit (CMH-2370), ensure its power supply is on.
  • C
    Christopher WebsterSep 18, 2025
    Why is my JRC Monitor display frozen?
    • C
      Caleb ChaneySep 18, 2025
      If your JRC Monitor's display is frozen, preventing access to the task menu, the central control unit (NDC-1590) may be abnormal, and you should request a repair from the distributor.
  • M
    Mrs. Cynthia Johnson MDSep 14, 2025
    What does it mean when JRC Monitor displays 'Sub LAN is disabled'?
    • S
      Shannon ChaseSep 14, 2025
      If the JRC Monitor displays the popup 'Sub LAN is disabled. This system is operating with Main LAN only,' it indicates a network failure has occurred on the sub LAN. Make a request to the distributor for repair.
  • P
    Pamela WrightSep 16, 2025
    What to do when JRC Monitor shows 'Main/Sub LAN is disabled'?
    • S
      Samantha RosarioSep 16, 2025
      If your JRC Monitor displays the popup 'Main/Sub LAN is disabled. This system is operating with serial in CCU only,' it means a network failure has occurred on both the main and sub LANs. Make a request to the distributor for repair.
  • G
    Gregory MartinSep 7, 2025
    Why are contact signals not outputting from my JRC Monitor?
    • S
      Sue MccartySep 7, 2025
      If contact signals are not outputting from your JRC Monitor, and the signal output is acquired from the serial-LAN interface circuit, ensure the power supply for the serial-LAN interface circuit (CMH-2370) is turned on. If the problem persists, the serial-LAN interface circuit (CMH-2370) may be faulty, and you should request a repair from the distributor.
  • R
    reynoldsjohnSep 4, 2025
    Why can't I adjust the brightness on my JRC Monitor?
    • S
      Stacey GrahamSep 4, 2025
      If you cannot adjust the brightness of your JRC Monitor, the display unit (NWZ-208/ NWZ-207/NWZ-214) may be faulty, and you should request a repair from the distributor.

Summary

Safety Cautions

Cautions for High Voltage

Details hazards and precautions related to high voltages in electronic apparatus and safe handling practices.

Precautions for Rescue of Victim of Electric Shock

Provides guidance on immediate actions and first aid for individuals suffering from electric shock.

Emergency Measures

Method of First-Aid Treatment

Outlines the systematic steps for administering first-aid treatment to an injured person.

Precautions for First-Aid Treatments

Lists essential safety considerations and preventive measures to be taken during first-aid procedures.

Specific Procedures for Cardiopulmonary Resuscitation (CPR)

1. Check the scene for safety to prevent secondary disasters

Emphasizes securing the scene and preventing further harm to individuals involved in CPR.

2. Check for responsiveness

Describes how to assess the consciousness and responsiveness of a collapsed person.

5. Open the airway

Details the procedure for opening the airway to ensure a clear passage for breathing.

6. Check for breathing

Explains how to check for the presence of breathing in an unresponsive individual.

7. Give 2 rescue breaths (omittable)

Provides instructions on administering rescue breaths, including when it can be omitted.

8. Cardiopulmonary resuscitation (CPR) (combination of chest compressions and rescue breaths)

Outlines the combined procedure of chest compressions and rescue breaths for CPR.

Precautions upon Equipment Operation

DANGER

Highlights severe risks and critical safety instructions to prevent death or serious injury.

WARNING

Points out potential dangers that could lead to serious injury or equipment failure if neglected.

CAUTION

Warns about potential minor injuries or property damage if instructions are not followed correctly.

Section 2 Name and Function of Each Unit

2.1 Name and Main Function of the Operation Unit

Identifies and explains the primary functions of the main operation unit components.

2.2 Names and Main Functions of the Top Screen

Identifies and describes the main elements and functions presented on the Conning Display's top screen.

Section 3 Basic Operations

3.1 Powering On and Starting

Provides a step-by-step guide for powering on and starting the equipment, including pre-heating procedures.

3.2 Starting Each Mode

Explains how to select and start different operational modes from the task menu.

3.3 Basic Operations when using a Trackball

Details the functions of the trackball and its basic operations for navigating and interacting with the system.

3.6 Confirming and Acknowledging an Alert

Guides users on how to confirm, acknowledge, and handle alerts generated by the system.

3.8 Adjusting the Brightness of the Screen and Operation Unit

Explains how to adjust the brightness levels for both the screen display and the operation unit.

3.9 MOB (Man Over Board)

Covers the Man Over Board function, used for monitoring and marking the position of a person overboard.

3.18 Terminating this Equipment

Provides the correct procedure for safely turning off and terminating the operation of the equipment.

Section 4 Each Block of Conning Display

4.1 Display mode

Explains the different display modes available for the Conning Display and how they are presented.

4.2 How to view each block

Describes how to interpret the information displayed in each block on the Conning Display screen.

4.2.3 Description of each block

Provides detailed explanations for the information indicated in each specific block on the Conning Display.

Section 5 Setting Up Screen View

5.1 Setting Screen Display Options

Allows users to configure various screen display options and settings through dialog boxes.

Section 6 Setting Up Alerts

6.1 Selecting Setting Items

Guides users on selecting and configuring alert settings within the [Alert] dialog box.

6.2 Depth;Safety Contour Alert Generation Conditions

Details how to set conditions for generating Depth Below Keel alarms to prevent grounding.

6.3 Position Integrity Alert Generation Conditions

Covers setting conditions for position monitor warnings and HDOP limit cautions.

6.4 Setting Up Alert Processing

Explains how to configure alert processing actions, such as reactivation and transfer to BNWAS.

Section 7 Setting Up the Operation Mode

7.1 Basic Operation of the [Settings] Dialog Box

Provides an overview of basic operations within the [Settings] dialog box for configuring modes.

7.2 Setting Color and Brightness

Explains how to set the display colors and brightness levels for various modes and elements.

7.4 Setting Key Assignment

Covers how to assign functions to user keys and the [MULTI] dial for customized operation.

Section 8 Adjusting and Setting Up Equipment (for Services)

8.1 Service Menu

Describes how to access the Service menu, which requires a password, for installation and maintenance.

8.2 Verifying Installation and Initial Setting

Guides users on verifying the equipment installation and performing initial settings using the [Installation] dialog.

8.2.2 Verifying;Setting CCRP (Consistent Common Reference Point)

Explains how to set the Consistent Common Reference Point (CCRP) on the ship using the [CCRP] dialog.

8.2.3 Setting a Serial Port

Details how to verify and configure serial port settings for equipment communication.

8.2.4 Setting ships parameters

Covers how to set the ship's specific parameters, such as dimensions and performance limits.

8.3 Maintenance

Explains how to use the [Maintenance] dialog box for performing maintenance operations on the equipment.

Section 9 Maintenance & Inspection

9.1 Maintenance Functions Executed from Menu

Describes how to access and execute various maintenance functions through the equipment's menu system.

9.1.5 Setting and confirming the sensor source

Guides users on selecting and confirming the appropriate sensor sources for different data inputs.

9.2 General Maintenance

Provides general guidelines and procedures for cleaning and maintaining the equipment.

9.3 Maintenance on Unit

Details specific maintenance procedures for the display unit, including screen and trackball cleaning.

9.4 Performance Check

Outlines procedures for performing performance checks, including self-tests and component status verification.

9.5 Replacement of Major Parts

Lists parts that require periodic replacement and their expected service life.

9.6 Software Update

Explains the process for updating the equipment's software via local or remote methods.

9.7 Firmware Update

Details the steps for updating the product's firmware.

9.9 Data Backup;Restore

Covers the procedures for backing up and restoring customer data using external media.

9.10 Recovery of the Images in the C Drive

Explains the process for recovering system images in the C drive, including OS recovery and C-MAP reset.

Section 10 Failures and After-Sale Services

10.1 Failure Detection

Explains how failures can be detected through alerts and outlines initial steps for fuse inspection.

10.2 Countermeasures for Failures

Provides a guide to troubleshooting common failures by identifying circuit blocks and model names.

10.3 Troubleshooting

Offers a systematic approach to diagnosing and resolving equipment malfunctions based on symptoms, causes, and actions.

Appendix A Alert List

Appendix B Menu List and Materials

B.1.5 Maintenance

Details the menu items for maintenance tasks, including date/time settings and system information.

B.1.8 Service

Lists the menu items related to service operations, including installation, system configuration, and device installation.

JRC JAN-7202 Specifications

General IconGeneral
TypeMarine Radar
Power Output25 kW
Antenna TypeSlotted waveguide array
Power Supply24 V DC
Transmitter Frequency9410 MHz
Transmitter Peak Power25 kW
Frequency9410 MHz
Antenna Length6 feet (1.8 meters)

Related product manuals