112 Chapter 8 Set Up Geode Connect for Windows PC
Geode GNS3 Real-Time Sub-Meter GPS Receiver
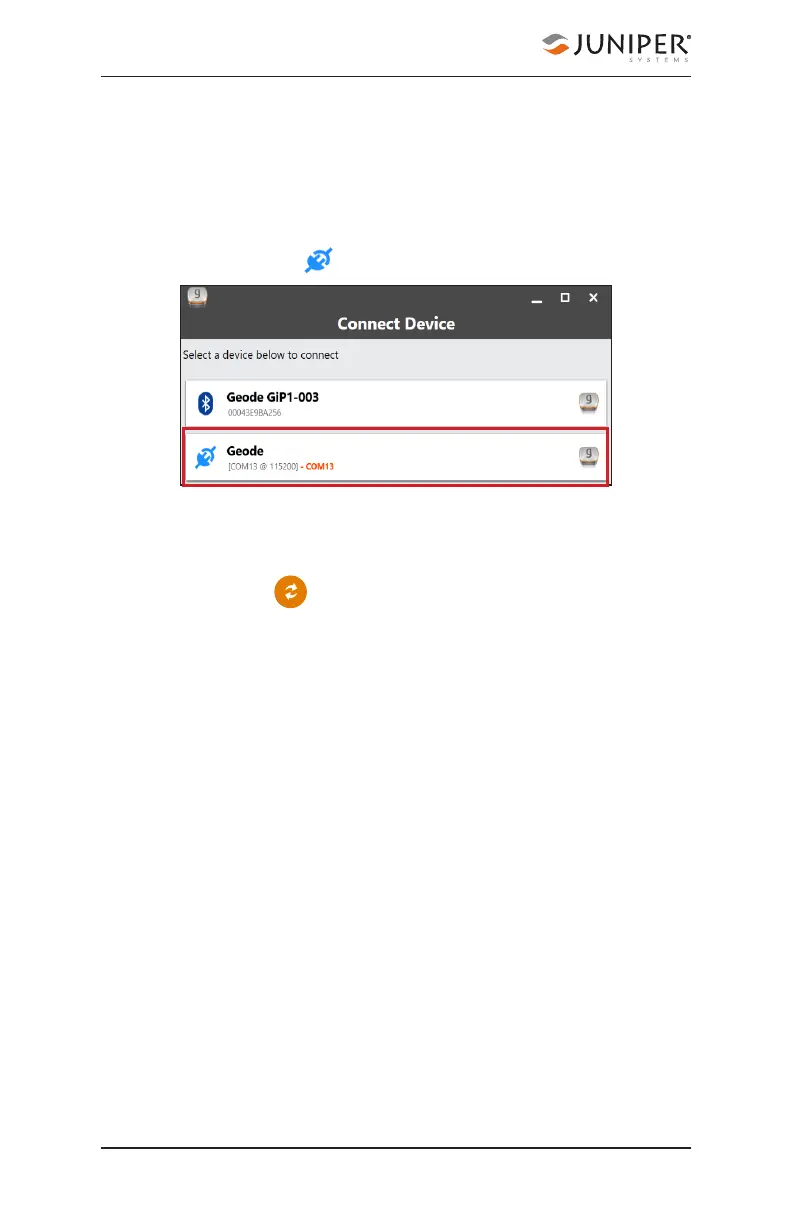
5. Tap Change Device. This opens the Device Setup page.
6. The app will display a list of local wireless and connected
devices. It may list the same Geode twice, once as a
Bluetooth wireless device and once as a physically
connected device. The Geode connected via USB will
have a plug icon next to it. Select this Geode.
Note: If your Geode doesn’t show up in the list of devices,
check to make sure it is turned on and not paired with
another device. Then tap the refresh icon at the bottom of
the list of devices .
For subsequent connections, the Geode may connect to
the same device using a different COM port. This is normal.
Connect via Serial Port
The Geode has a 9-pin RS-232C serial port. This allows
the Geode to be mounted to a piece of equipment while
maintaining a constant connection for data and power. Use
a straight-through 9-pin cable to communicate with the
Geode. For a list of functions for each pin, refer to Appendix
A: Serial Port Configuration, on page 153.
To communicate between a PC and a Geode over a
straight-through serial cable: