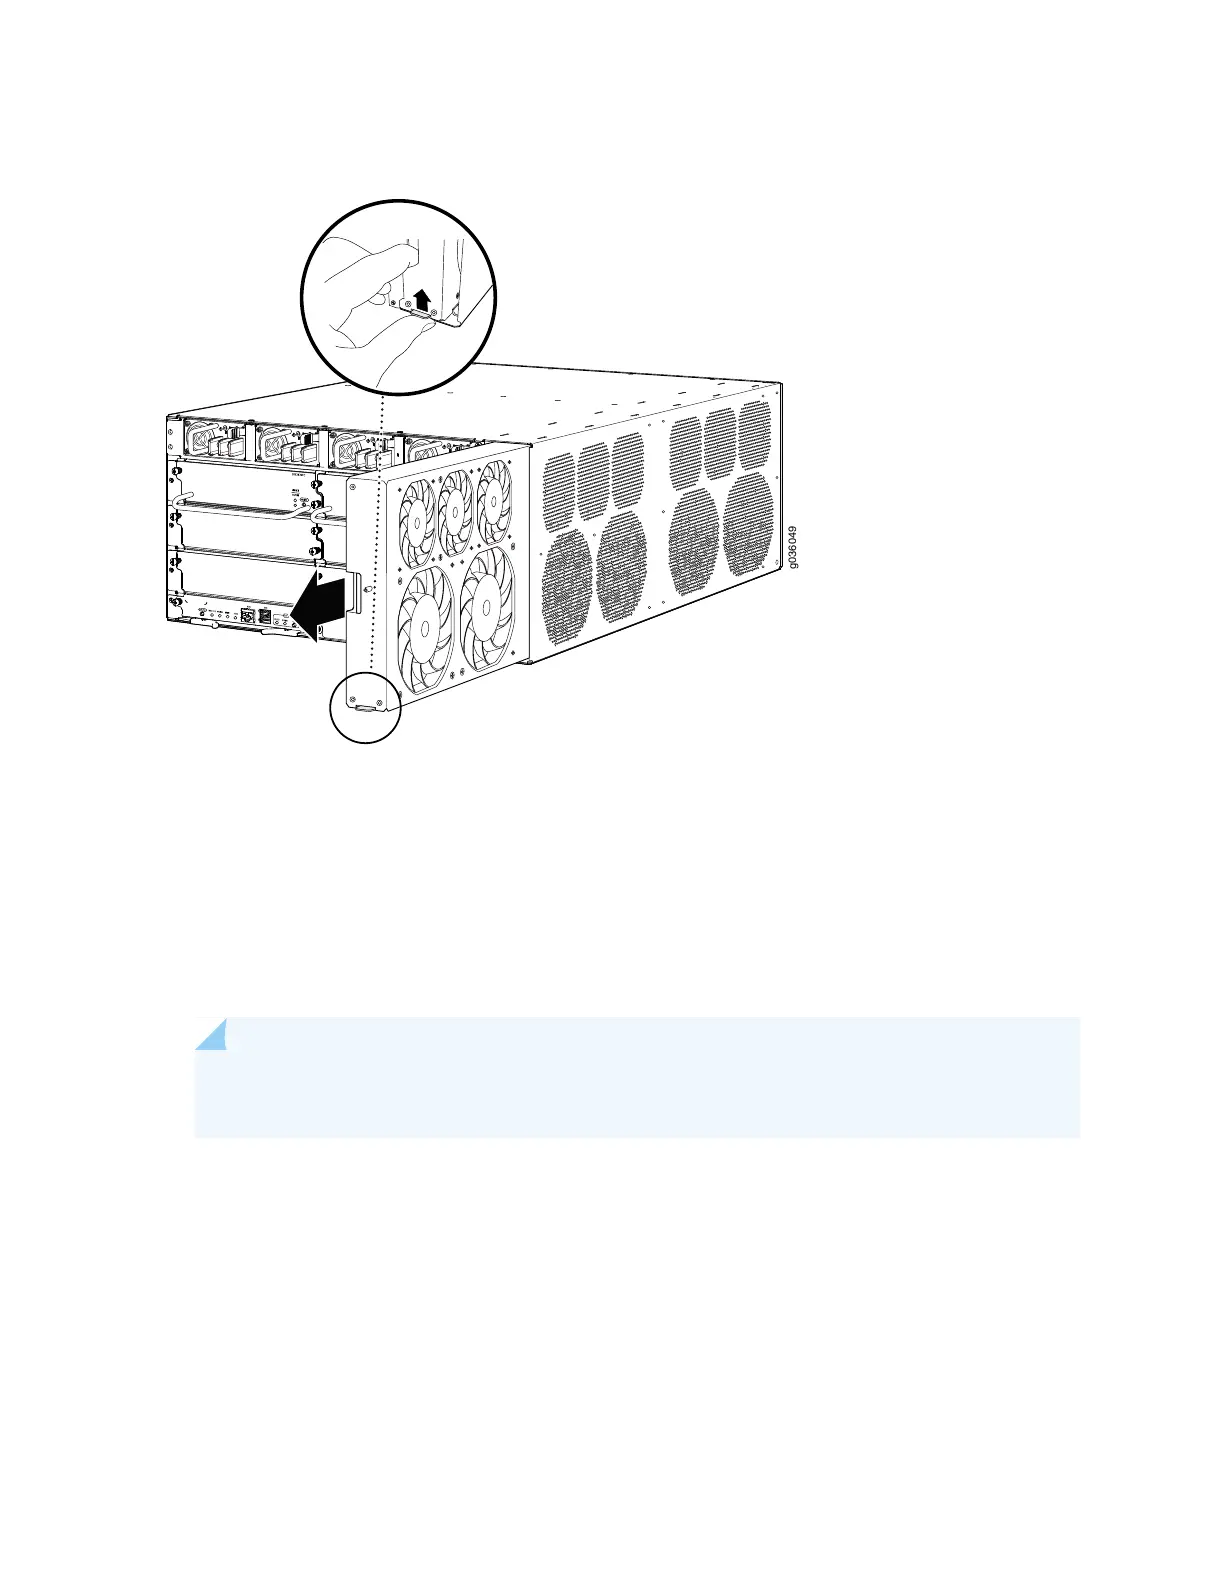
Figure 73: Removing the Fan Tray
6. Grasp the fan tray and pull it out approximately 6 in. (15 cm).
7. Place one hand under the fan tray to support it and pull the fan tray completely out of the chassis and
set it aside.
8. Grasp the replacement fan tray and insert it straight into the chassis until you hear a click, indicating
the latch has closed.
NOTE: Be sure the fan tray is correctly oriented in the slot, with the latch on the bottom of the
vertically aligned fan tray.
9. Press the fan tray into the chassis about 1 in. (2.5 cm) beyond where the latch closes to engage the
power connection.
225
 Loading...


