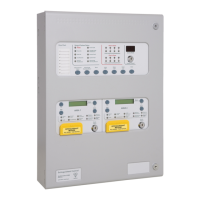
Product Manuals/Man-1096M_SyncroAS Marine 16 Page 33 of 38
22.9 Remote Control Inputs (see also Section 16)
Unmonitored digital inputs, activated when connected to the Remote Control 0V terminal with an in line resistance of less
than 50 ohms.
Note: Remote control inputs must be restricted by the Access level requirements of EN54-2. Therefore it should not be
possible to remotely reset, silence or operate the alarm devices without some means of gaining access to this function.
22.10 Auxiliary 24 Volt monitored output (see also Section 18.1)
Permanent 24 volt output protected by a 500mA self-resetting electronic fuse, monitored for fuse failure.
22.11 Fuse ratings
All panel power supplies, monitored outputs and auxiliary power outputs are protected by non-serviceable self resetting
electronic fuses.
Detection circuits are protected using digital current monitoring circuits and FET switching techniques.
The Syncro ASM panel has a serviceable fuse to protect the incoming mains supply. This fuse is a T1.6A 250HRC 20mm
type and must be replaced with a fuse of the same type only.
The battery supply is protected by a 3.15A, 20mm glass fuse (F4) mounted on the reverse of the circuit board. This fuse
must only be replaced with one of the same type.
23. Additional features
23.1. Loop Data Test
The data signalling between the control panel and detection devices has some level of data error checking built into the protocol. The
purpose of this data checking is to ensure that any spurious signals received by the control panel are not incorrectly interpreted as
fire signals, thus avoiding an unwanted activation. Information received at the control panel that is not exactly as it is expected to
be is known as bad data.
There are a number of sources of signalling errors. The most common is due to electrical interference resulting in current spikes
induced on the detection circuit. Other possible causes are poor loop wiring connections, earth leakage between loops, cross- talk
between circuits, defective devices installed on the detection circuit and incorrect devices connected on the detection circuit.
Excessive loop resistance is the cause of many bad data faults. These tend to be from devices located nearest the Loop In terminals.
If loop resistance is suspected, swap the loop in and loop out cables and see if the bad data faults start occurring from devices fitted
at the other end of the loop.
Also excessive Loop Sounder Current will cause bad data faults to occur when the sounders are operated
In general, the user is unaware of problems on the detection circuit, as the panel has some “software filtering” built in, to reject
invalid data returned from devices. However, if a single devices returns invalid data on four consecutive polls, the panel will report a
bad data fault for that device. If a single device returns invalid data for three polls, followed by a single good poll, then the panel will
report no faults for that device.
The purpose of the system diagnostics facility is to see what level of invalid data signalling is occurring on the loops, to get a “feel”
for the quality of the signalling and to predict any potential problems that may affect the end user.
The diagnostics facility comprises of two counters for each loop. These counters have a maximum value of 9,999,999. There is a
“good” counter, which is incremented for every successful detection device poll and a “bad” counter, which is incremented every
time there is an error in the signalling when a device is polled.
This good/bad counter selection allows an engineer to see the proportion of bad readings versus good readings, and compare these
between loops for a system. From this information, it should be possible to make a judgement on the signalling quality for each
detection circuit on any control panel.
To activate the diagnostics, select the Loop Data Test menu option at Access Level 3. This menu will then allow the user to start the
testing for each loop in turn. When started, the user may view the good and bad counters, plus the time that the test was started.
At any time it is possible to view the counters or cancel the testing.
When either of the two counters reaches the maximum value, the test for that loop is halted.
23.2. Network Panel Menu Control
When Syncro ASM control panels are connected as a network, it is possible to perform Access 2 Menu commands on remote panels
from any panel on the network. This facility is executed by use of an interim “select panel” menu option whenever the Syncro ASM is
installed on a networked system.
23.2.1. Network Disablements
On a networked system, select the access 2 menu from any control panel. Move the selection cursor to be next to the Disablements
menu option. Press the right arrow navigation key to choose the menu selection.