Keysight M9036A PXIe Embedded Controller User Guide 61
Replacing the Hard Drive Service
Replacement Procedure
To replace the hard drive, perform the following steps:
The replacement hard drive must
conform to the same dimensions and mounting
as the original.
1 Power off the PXIe chassis.
2 Remove the M9036A controller from the PXIe chassis.
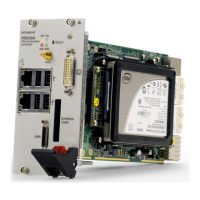
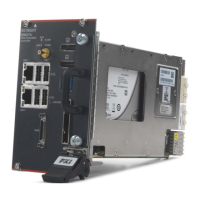
3 Position the controller, top side up on the workbench. Locate and remove the
four SSD mounting screws as indicated in Figure 16.
BACK UP YOUR HARD DRIVE BEFORE PROCEEDING! There are
several ways to transfer files from your old drive to the new one.
One possible way of doing this is with disk-imagining software. A
disk image is an exact duplicate of your existing hard drive
including the operating systems, user settings, all data files and
application software. The imaging software should also create an
“emergency” bootable CD or USB drive.
Always observe ESD precautions. See “Electrostatic Discharge” on
page 53.
If you purchase a replacement hard or SSD drive, it must be the
same size or larger than the original (160 GB) SSD in your
M9036A. You cannot create a system image of one size of hard
drive and then try to restore it to a smaller hard drive.
Always use the latest BIOS and drivers available from Keysight.
When replacing the SSD in you M9036A, you should update the
BIOS and drivers. Refer to “Updating the M9036A BIOS” on
page 51 for information on updating the BIOS. Refer to “Updating
Drivers and Firmware” on page 37 for information on updating
drivers.