Keysight Agile Signal Generator Service Guide 95
Assembly Replacement
Assembly Removal and Installation Overview
Assembly Removal and Installation Procedure
1. Faulty/bad assembly is identified by using the troubleshooting information
in Chapter 1.
2. If replacing the CPU assembly, before removing the bad assembly, use the
Remove Assembly service menu to transfer the assembly’s array
information. Refer to Figure 3-2. Press System, More, Service, Remove
Assembly, Prepare CPU Assembly, Confirm Removal.
3. Replace the faulty/bad assembly.
4. If the CPU was replaced, it will be necessary to recover the installed
options information.Press System, More, Service, Install Assembly,
Finalize CPU, Confirm Installation as shown in Figure 3-2.
This section is meant to be a high level overview of the process for replacing an assembly.
Do not proceed with CPU assembly replacement until step 2 has been completed. Failure to
perform this step can result in the hardware not functioning optimally, resulting in instrument
errors and possibly self-test failures.
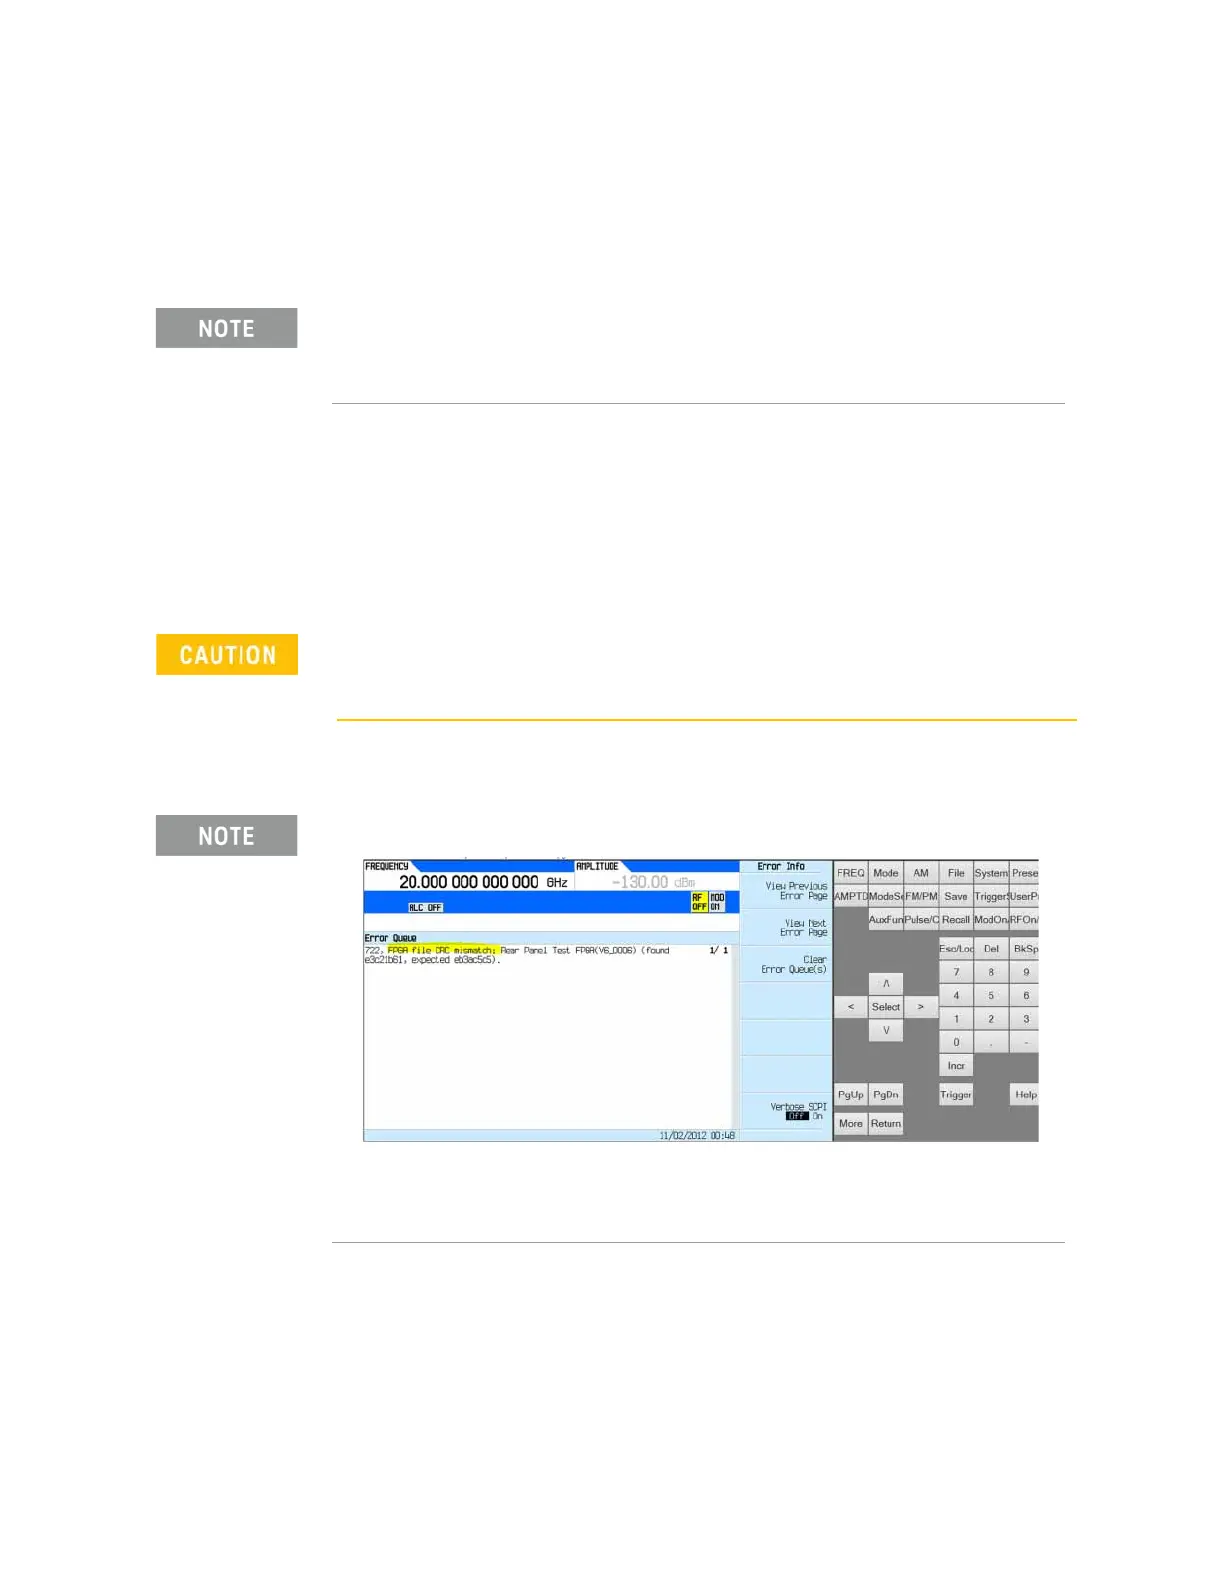
After power on, check to see if there is a message about the FPGA not matching, similar to the
screen shown below. If there is, you must upgrade your instrument firmware.
Go to:
www.Keysight.com/find/upgradeassistant
for information on upgrading instrument firmware.