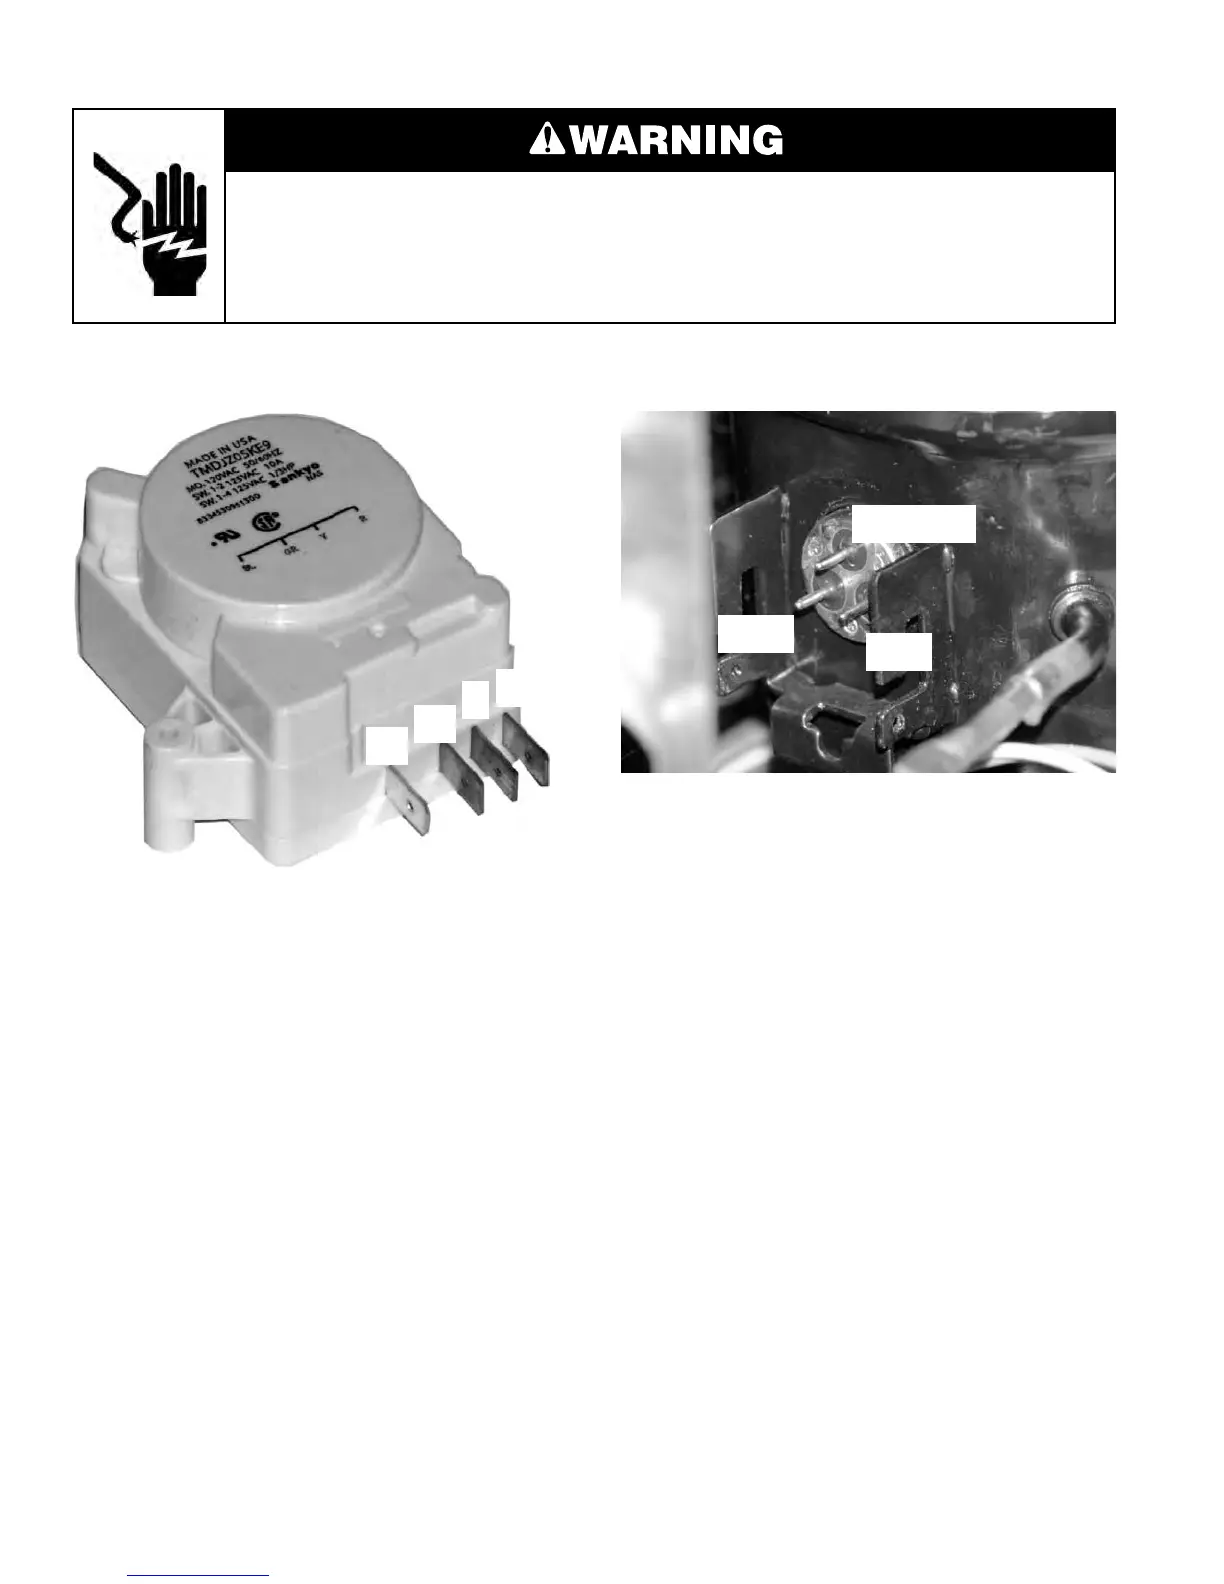
5-4
See Page 4-16 for access and removal pro-
cedures for the defrost timer.
Manually advance the timer by inserting a
small flat head screwdriver into the access
hole on the defrost timer. Turn it until you
hear one “click” closely followed by anoth-
er. Continue turning 360 degrees until one
“click” is heard. This places the timer in the
defrost mode.
An ohmmeter should indicate continuity be-
tween terminals “Y” to “R”. “Y” to “GR” should
indicate no continuity.
Manually advance the timer until it “clicks”
out of the defrost mode.
Measure for continuity again. “Y” to “R”
should have no continuity, “Y” to “GR” should
have continuity. If these readings are not
correct, replace the defrost timer.
1.
2.
3.
4.
5.
DEFROST TIMER
Electrical Shock Hazard
Disconnect power before servicing.
Replace all parts and panels before operating.
Failure to do so can result in death or electrical shock.
See Page 4-22 for access and removal pro-
cedures for the compressor.
Touch the leads of an ohmmeter to the Com-
mon and Run terminals of the compressor.
The meter should indicate 15 ohms.
Touch the leads of an ohmmeter to the Com-
mon and Start terminals of the compressor.
The meter should indicate 15 ohms.
Touch the leads of an ohmmeter to the Start
and Run terminals of the compressor. The
meter should indicate 30 ohms.
With meter set to the highest ohms scale,
touch one lead to an exposed copper tubing
and the other lead to each compressor termi-
nal in turn. The meter should indicate zero
ohms (open circuit)
1.
2.
3.
4.
5.
COMPRESSOR
BL
GR
Y
R
Common
Run
Start