SECTION 7
HIGH PRESSURE WATER
p. 7-25
80078868
7.3.6 Hydraulic Seal Cartridge
Carefully remove worn seals and O-rings from cartridge by pushing them with a
dowel or similar object. Remove seals positioned close to the open ends first,
working toward the interior. Examine seals for unusual wear, deformation or cuts.
Note any unusual buildups of solid material or debris causing possible leak paths.
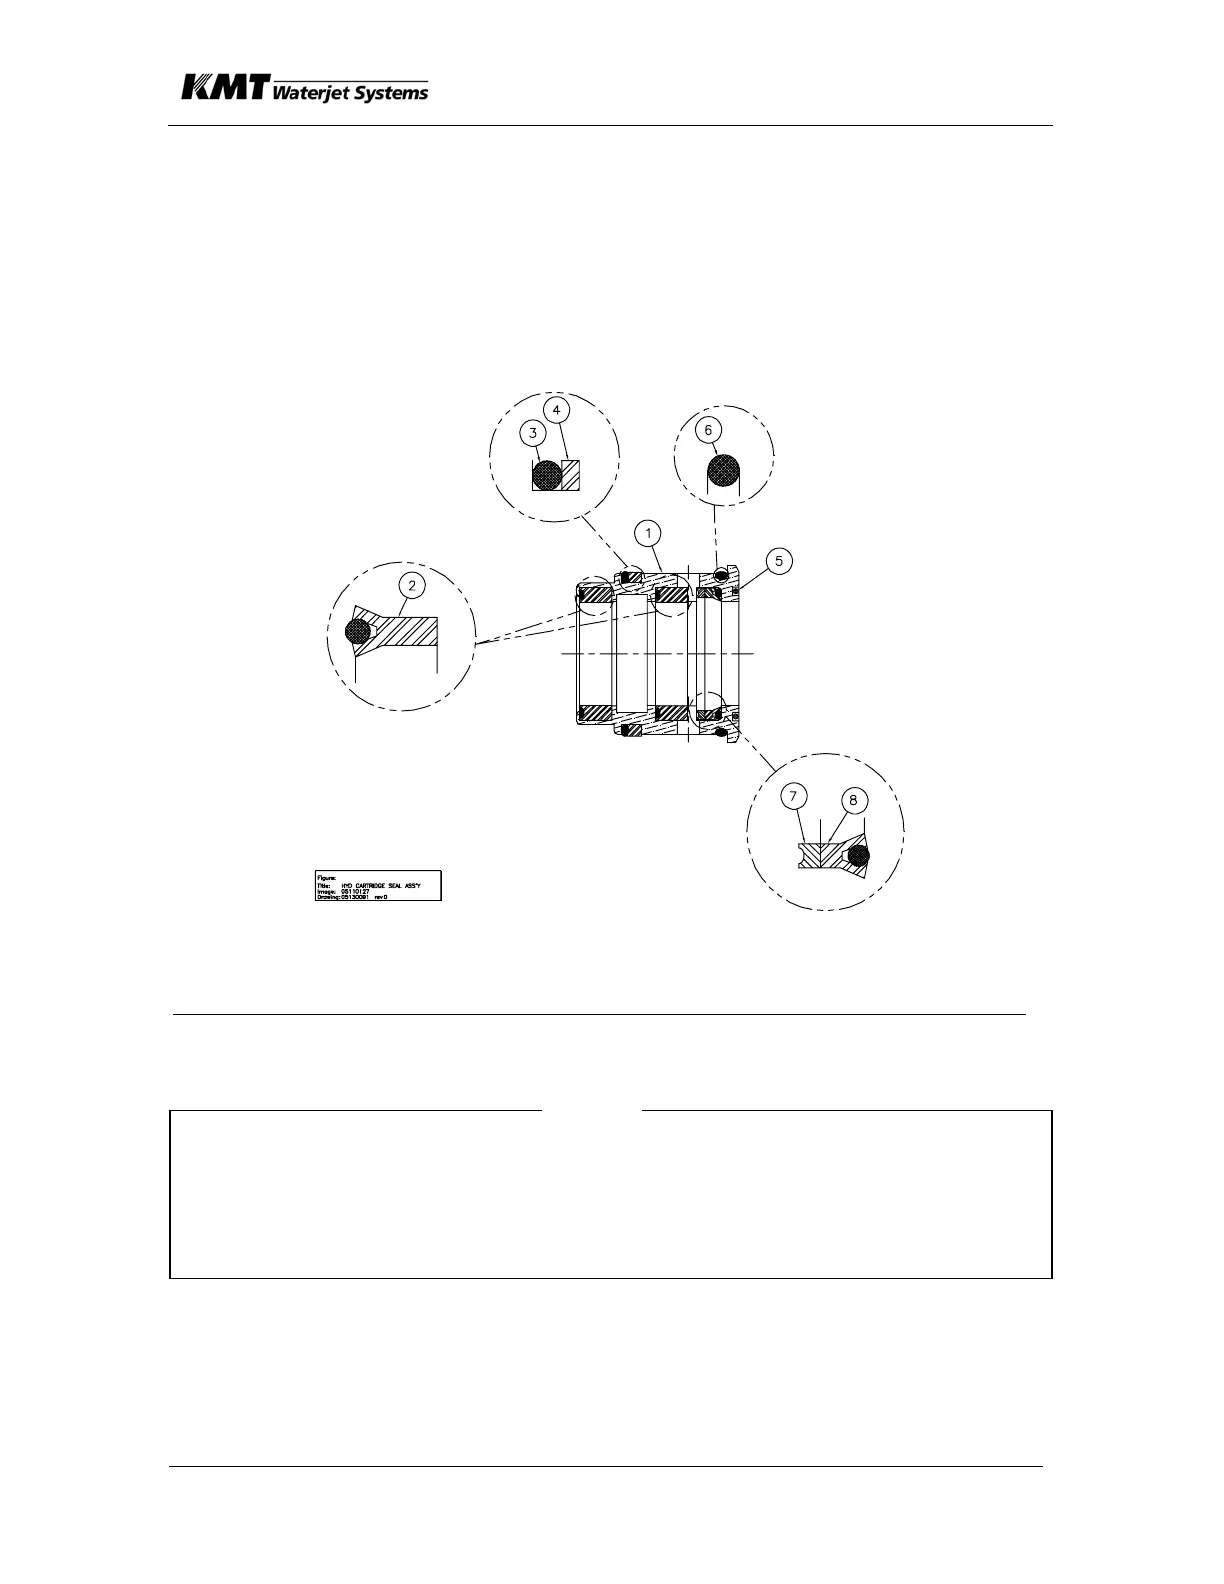
Examine the cartridge body (1) surfaces for scratches, signs of metal-to-metal
contact, deformation or other unusual wear.
Figure 7-14
Item Description
(1) Cartridge Body (2) U-cup Seal (3) O-Ring
(4) Back-Up Ring (5) O-ring (6) O-Ring
(7) Back-Up Ring (8) U-cup Seal
NOTE
It is important to examine the inside diameter surfaces of cartridge seal grooves for
scratches, especially any scratches in the axial direction that might offer a leak path.
Use caution during seal removal and installation to avoid scratching these surfaces.
Do not use metal screwdrivers, wires, etc. to remove inside diameter seals. Plastic or
wood should be used for seal removal and installation.
1. During seal installation, orient U-cup packing seals (2) (8) so that they match
figure above.
2. Apply food grade grease to seals and cartridge seal components to aid in
installation and seal seating. Use installation tool, if available, for
installation of U-cup seals (2) (8). Verify that U-cup O-rings are in place in
their respective U-cup seals after installation.
 Loading...