P03022 Automatic Lubrication System P3-9
INJECTORS (SL-1 Series "H")
Injector Specifications
• Each lube injector services only one grease
point. In case of pump malfunction, each injector
is equipped with a covered grease fitting to allow
the use of external lubricating equipment.
• Injector output is adjustable:
Maximum output = 0.08 in³ (1.31 cc).
Minimum output = 0.008 in³ (0.13 cc).
• Operating Pressure:
Minimum - 1850 psi (12 755 kPa)
Maximum - 3500 psi (24 133 kPa)
Recommended - 2500 psi (17 238 kPa)
Maximum Vent Pressure - (Recharge)
600 psi (4 137 kPa)
Injector Adjustment
The injectors may be adjusted to supply from 0.008
in³ to 0.08 in³ (0.13 cc to 1.31 cc) of lubricant per
injection cycle. The injector piston travel distance
determines the amount of lubricant supplied. This
travel is in turn controlled by an adjusting screw in
the top of the injector housing.
Turn the adjusting screw (1, Figure 3-7) counter-
clockwise to increase lubricant amount delivered and
clockwise to decrease the lubricant amount.
When the injector is not pressurized, maximum injec-
tor delivery volume is attained by turning the adjust-
ing screw (1) fully counterclockwise until the
indicating pin (8) just touches the adjusting screw. At
the maximum delivery point, about 0.38 inch (9.7
mm) adjusting screw threads should be showing.
Decrease the delivered lubricant amount by turning
the adjusting screw clockwise to limit injector piston
travel. If only half the lubricant is needed, turn the
adjusting screw to the point where about 0.19 inch
(4.8 mm) threads are showing. The injector will be
set at minimum delivery point with about 0.009 inch
(0.22 mm) thread showing.
NOTE: The above information concerns adjustment
of injector delivery volume. The timer adjustment
should also be changed, if overall lubricant delivery is
too little or too much. Injector output should NOT be
adjusted to less than one-fourth capacity.
NOTE: The Piston Assembly (8) has a visible
indicator pin at the top of the assembly to verify the
injector operation.
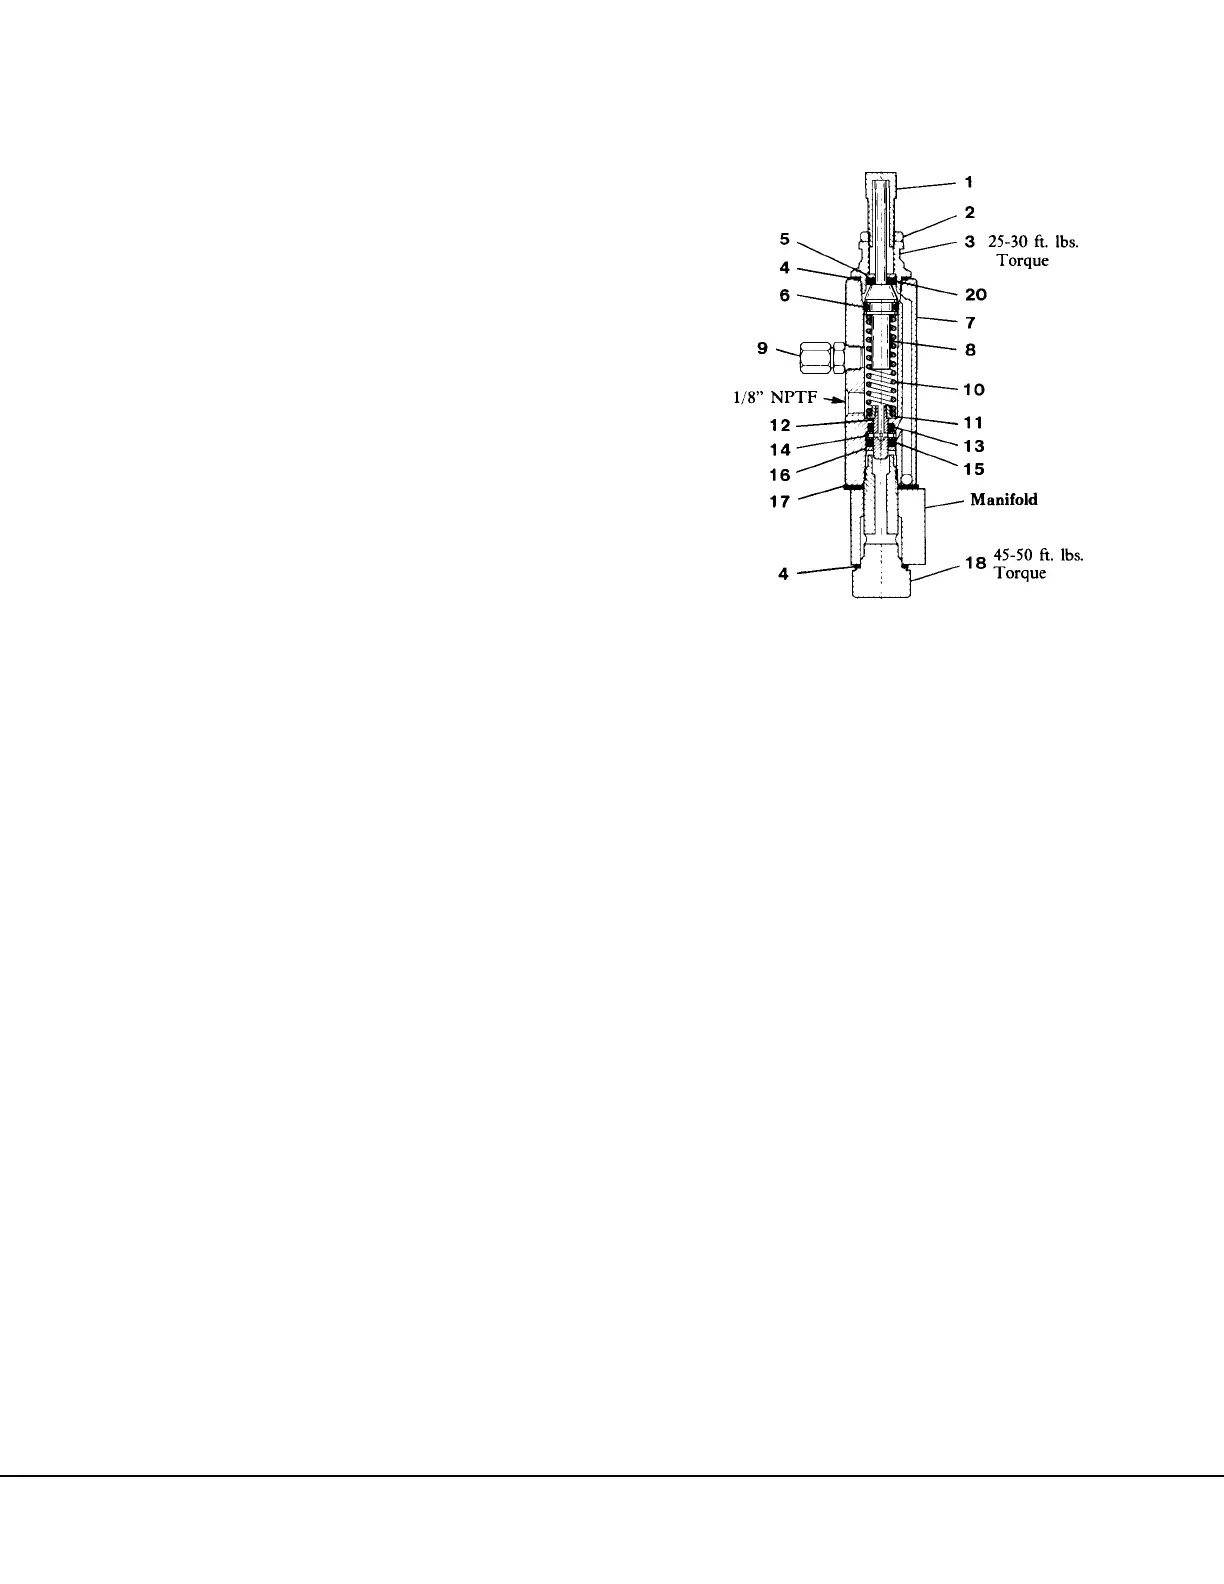
FIGURE 3-7. TYPE SL-1 INJECTOR
1. Adjusting Screw
2. Locknut
3. Piston Stop Plug
4. Gasket
5. Washer
6. Viton O-Ring
7. Injector Body Assy.
8. Piston Assembly
9. Fitting Assembly
10. Plunger Spring
11. Spring Seat
12. Plunger
13. Viton Packing
14. Inlet Disc
15. Viton Packing
16. Washer
17. Gasket
18. Adapter Bolt
19. Adapter
20. Viton Packing