10
Performance Modes
Playing two sounds at the same time
(Layer Mode)
You can play two sounds at the same time on the keyboard.
This is called the Layer Mode.
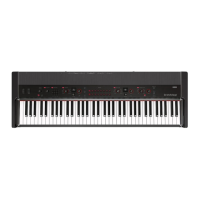
Whileholdingdownthebuonofasoundtobelayered,
pressanothersoundbuon.Thetwoselectedsoundbut-
tons light up.
The sounds are labeled layer 1 and layer 2 in the order that
theirbuonsarepressed.
Forexample,ifthesoundfromtheG.PIANObuonisto
belayer1andthesoundfromtheOTHERSbuonistobe
layer2,holddowntheG.PIANObuon,andthenpressthe
OTHERSbuon.
Previously,eachSoundBuonshouldhavebeenusedin
the Single Mode to select the correct sound.
For example, to layer the German Concert Piano and Clav
sounds,rstselect“
”fortheG.PIANObuonand
“
”fortheOTHERSbuon.Thenpressbothbuons
simultaneously to enter the Layer Mode.
When selecting Layer Mode, the total number of voices
that can play at the same time is reduced, depending
on the total number of oscillators used per voice by the
selected sounds. (refer to “About maximum polypho-
ny” on page 16.)
SoundsaccessedbythesameSoundBuoncannotbe
layered. For example, Classic Piano and Pop piano are
bothaccessedviatheG.PIANObuonandthuscannot
be layered.
Returning to the Single Mode
ToreturntoSingleMode,pressanysingleSoundBuon.
Layer Mode settings
In Layer Mode, adjusting the volume balance between
sounds, shifting the octave for each sound, as well as en-
abling/disabling the damper pedal for each sound can
be performed from the Function Mode (starting with the
“Layer Mode: Volume balance” function on page 13).
Using split sounds (Split Mode)
WhentheSPLITbuonispressedandlightsup,youcan
play a bass sound in the lower section of the keyboard and
another sound in the higher section of the keyboard. This
is called the Split Mode.
In Split Mode, you can select any split point (key that splits
the keyboard) for the high notes and low notes.
TheseseingswillnotbesavedwhentheG1/G1Airis
turnedo;however,theG1/G1Aircanbesettosave
these seings (refer to “Save parameter seings” on
page 13).
When Split Mode is selected, the total number of notes
that can be played simultaneously is reduced, depend-
ing on the total number of oscillators used by the se-
lected sounds. (refer to “About maximum polyphony”
on page 16.)
If the performance is added to the same part, all
original data after the start of recording is deleted.
For example, if a new recording is added to mea-
sures 2 to 4 of a song with measures 1 to 8, the re-
cording in measures 5 to 8 will be deleted.
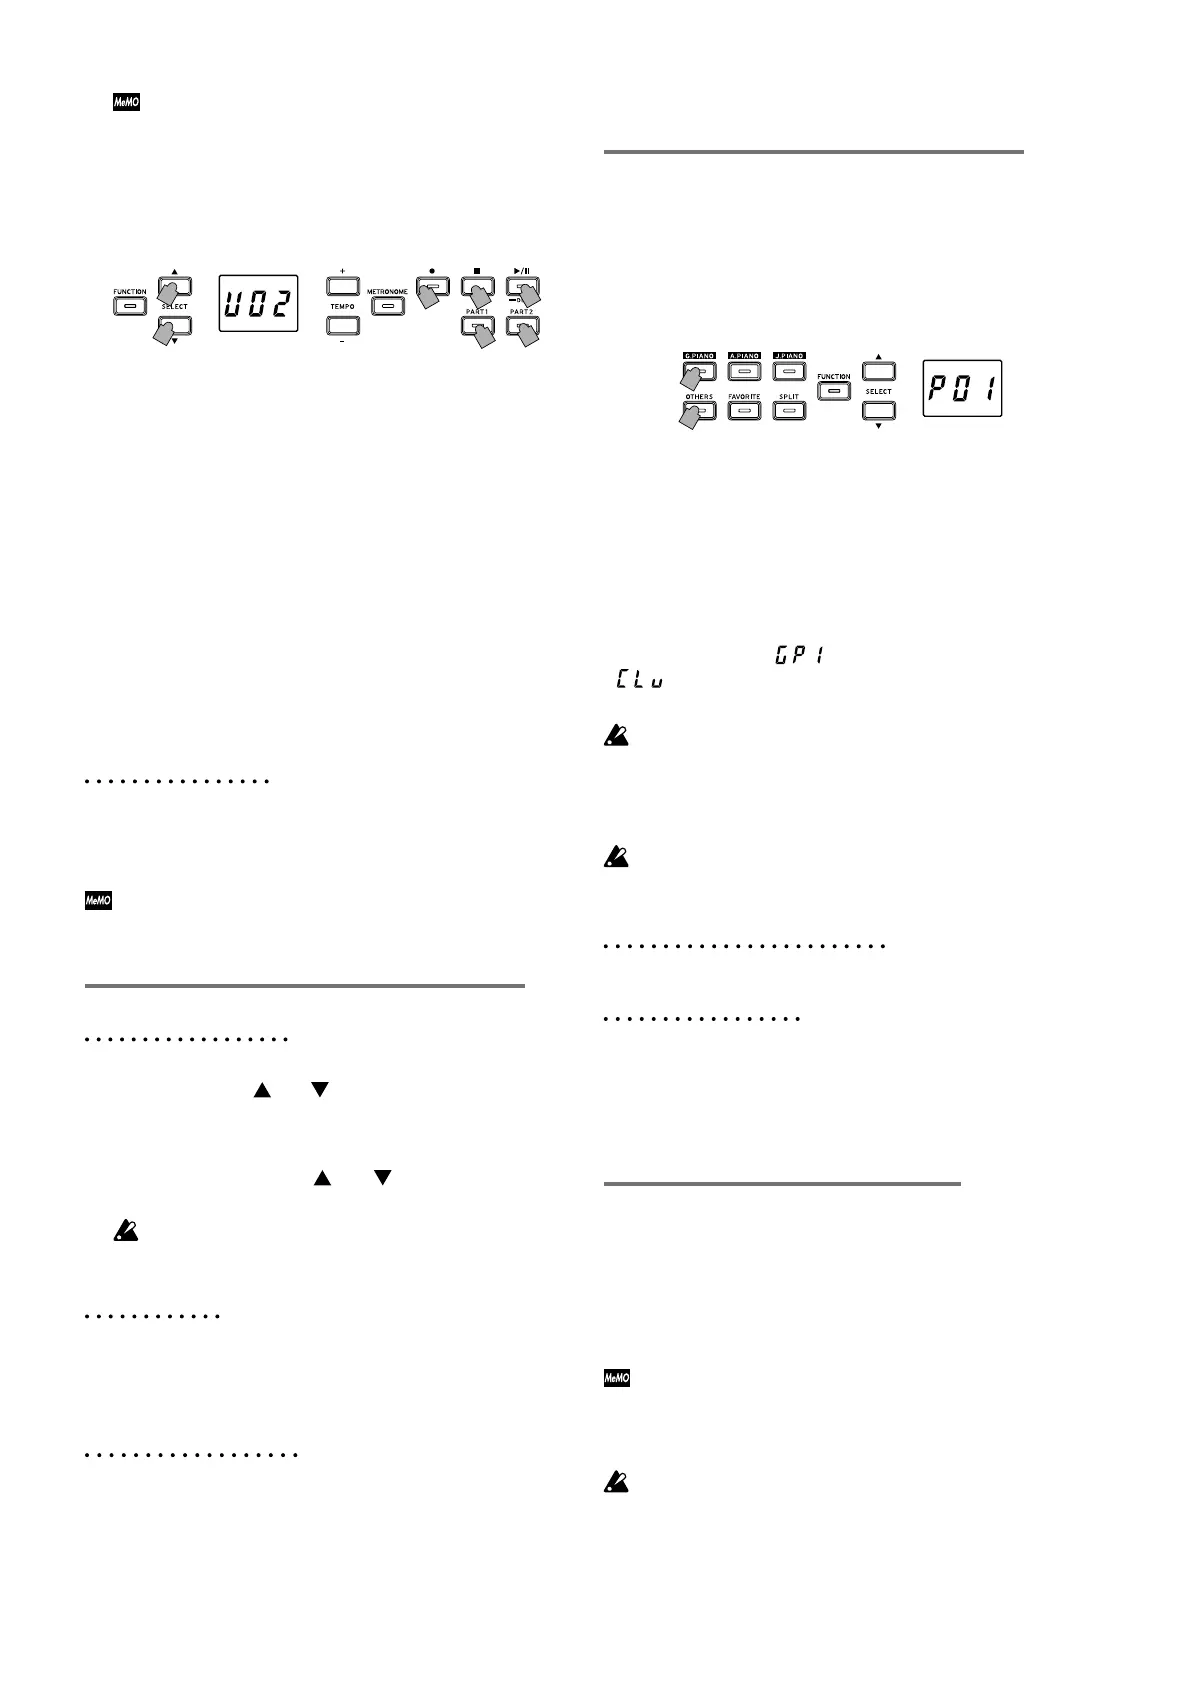
3. Press the PART buon corresponding to the part to be
recorded; the buon will blink.
2,5
5
4,
3
1
1
4. Recording will begin immediately when you play
a note on the keyboard. Or, you can press the Play/
Pause buon to receive a two-measure count-o be-
fore recording begins.
If you wish to record to the metronome, press the MET-
RONOMEbuon.Recordingcanalsostartinresponse
to a MIDI message (refer to “About MIDI” on page 14).
5. To stop recording, press the Stop, Play/Pause, or Re-
cord buons.
<Recording Tips>
• When a new part or performance is added to an existing
User Song, it will have the originally recorded sound.
• The Tempo cannot be changed while recording.
•
The Time Signature of a recorded Song cannot be changed.
However, when recording an addition to an existing song,
measureswithadierenttimesignaturecanbeadded.
Saving User Songs
When recording is stopped, the song is automatically saved.
The name of the User Song will be the number chosen be-
fore recording began.
A maximum of 99 User Songs can be saved. In addi-
tion, a maximum of 999 measures or 45,000 notes can
be saved in each song.
Playing Back a Recorded Performance
Select the User Song
1. Use the SELECT and buons to select a dierent
User Song by its number.
The User Songs are numbered “U01” to “U99”. While
a User Song number appears in the display, simultane-
ously press the SELECT
and buonstoreturnto
“U01”
If no User Songs have been saved, no User Song
number appears.
2. Press the Play/Pause buon to begin playback.
Playback Tips
SelectingtheParttobeplayedbackorskippingtoaspecic
measure can be done using the same procedures previous-
ly detailed for Piano Songs. For details, refer to “Working
with Songs” on page 8.
Other Song Functions
Specifying the mute volume for parts as well as copying
and deleting User Songs can be performed from the Func-
tion Mode (starting with the “Song: Delete selected part or
entire song” function on page 13).