29
Operating Instructions 10/2020 2010045v10
7.2 OCPP
In this area you can parameterise the OCPP-J 1.6 client on several pages.
Further documentation on the OCPP description can be found on the Internet.
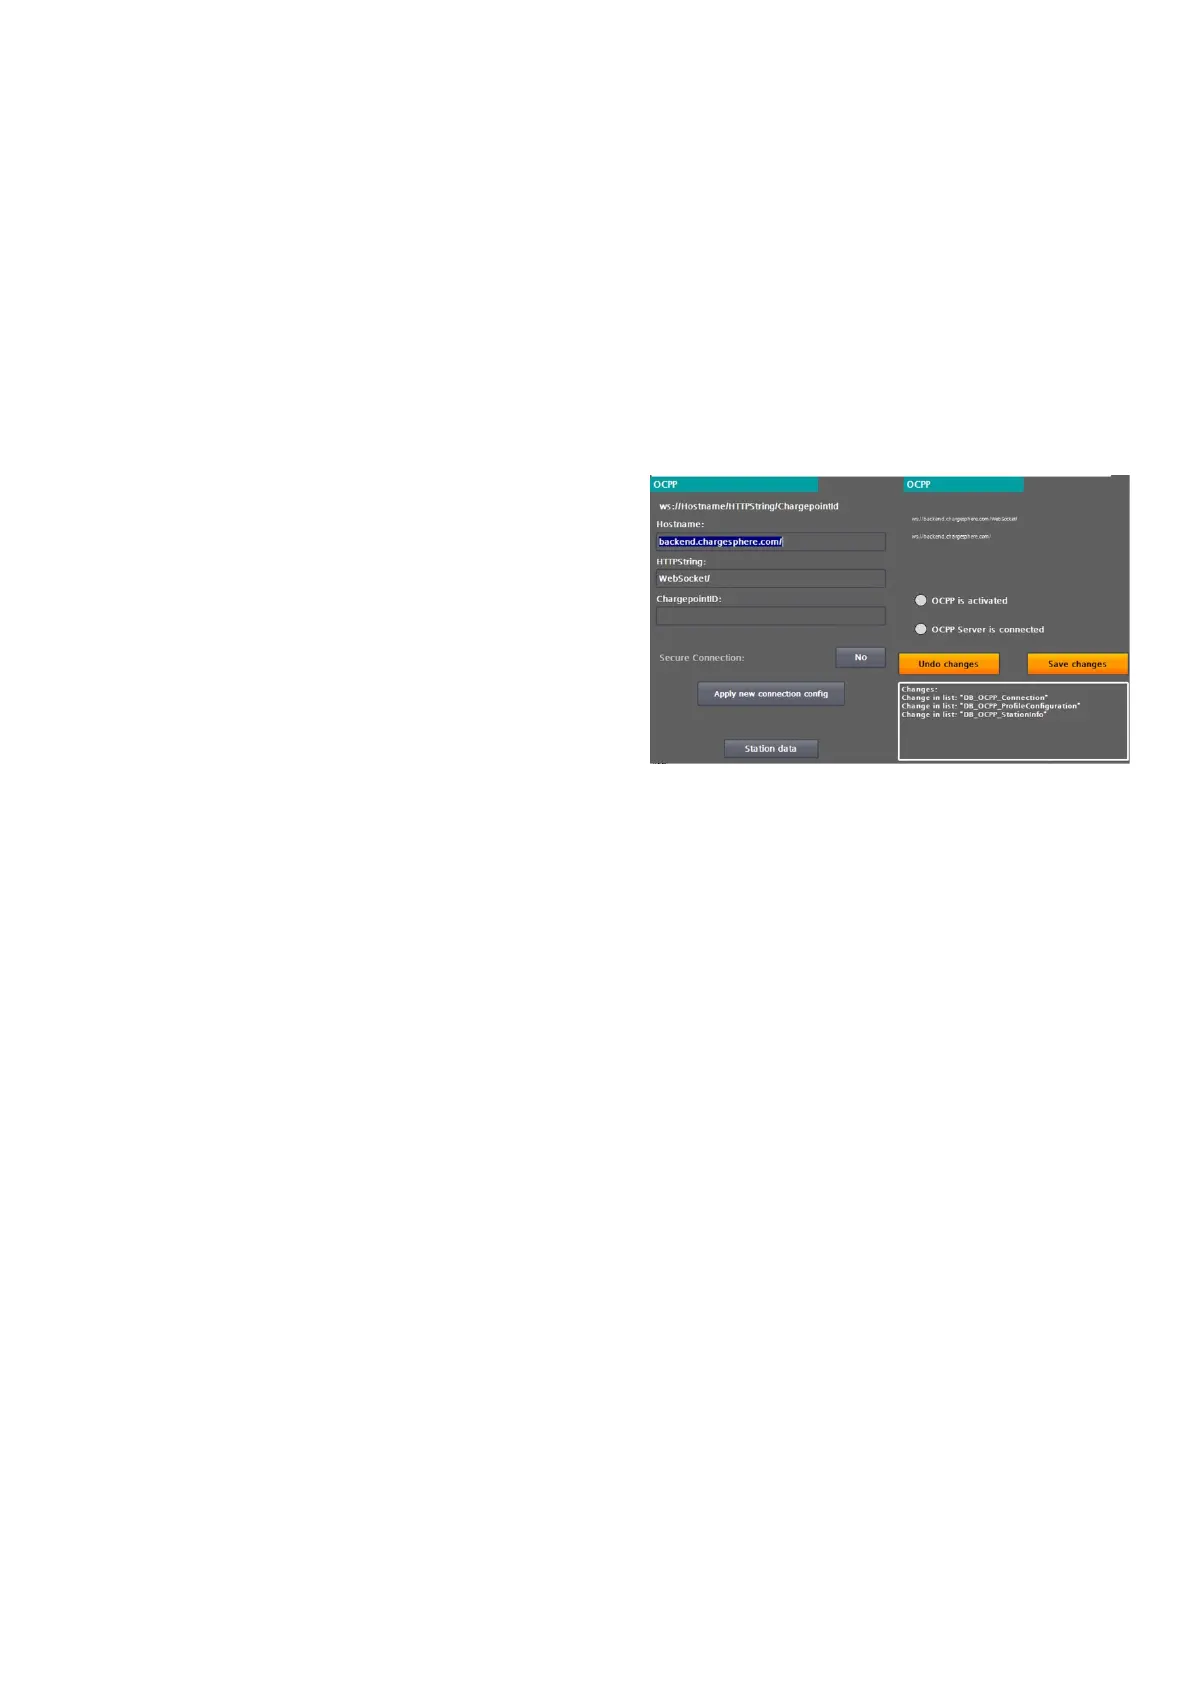
On the basic page, the communication settings are made and all OCPP-related parameters are saved.
To parameterise a back-end connection, proceed as
follows:
1. Enter the IP address or the name to be
resolved in the "Hostname" field. If necessary,
enter a port
2. after a preceding ':'. The final slash is added
automatically.
3. Enter the server path under "HTTPString". The
final slash is added automatically.
4. Enter the name intended for this charging point
under ChargepointID. This is automatically
appended to the "HTTPString".
5. Check the displayed composite address, pay
attention to upper and lower case.
6. By pressing "Accept connection data", the
entered data is accepted and all OCPP
parameters are automatically saved.
7. If the authorisation mode in the operator
settings is set to OCPP, a connection to the
backend is established immediately.
By pressing the <Apply new connection data> button, the entered connection data is taken over. I.e. an already
active connection would be disconnected. Regardless of the following connection status (connected/not
connected), all OCPP parameters are stored fail-safe.
Only OCPP 1.6J is currently supported.
The following OCPP profiles can be used:
• Core
• Local Auth List Management
• Reservation
• Smart Charging
• Remote trigger
• Firmware Management (partial)
• User (backend adjustments)
Fig 29: OCPP basic settings
 Loading...