Product Service 1-800-522-7658
Installation Procedure-
Units with the Ventus Canopy Connection
Axiom Type C1 cabinets
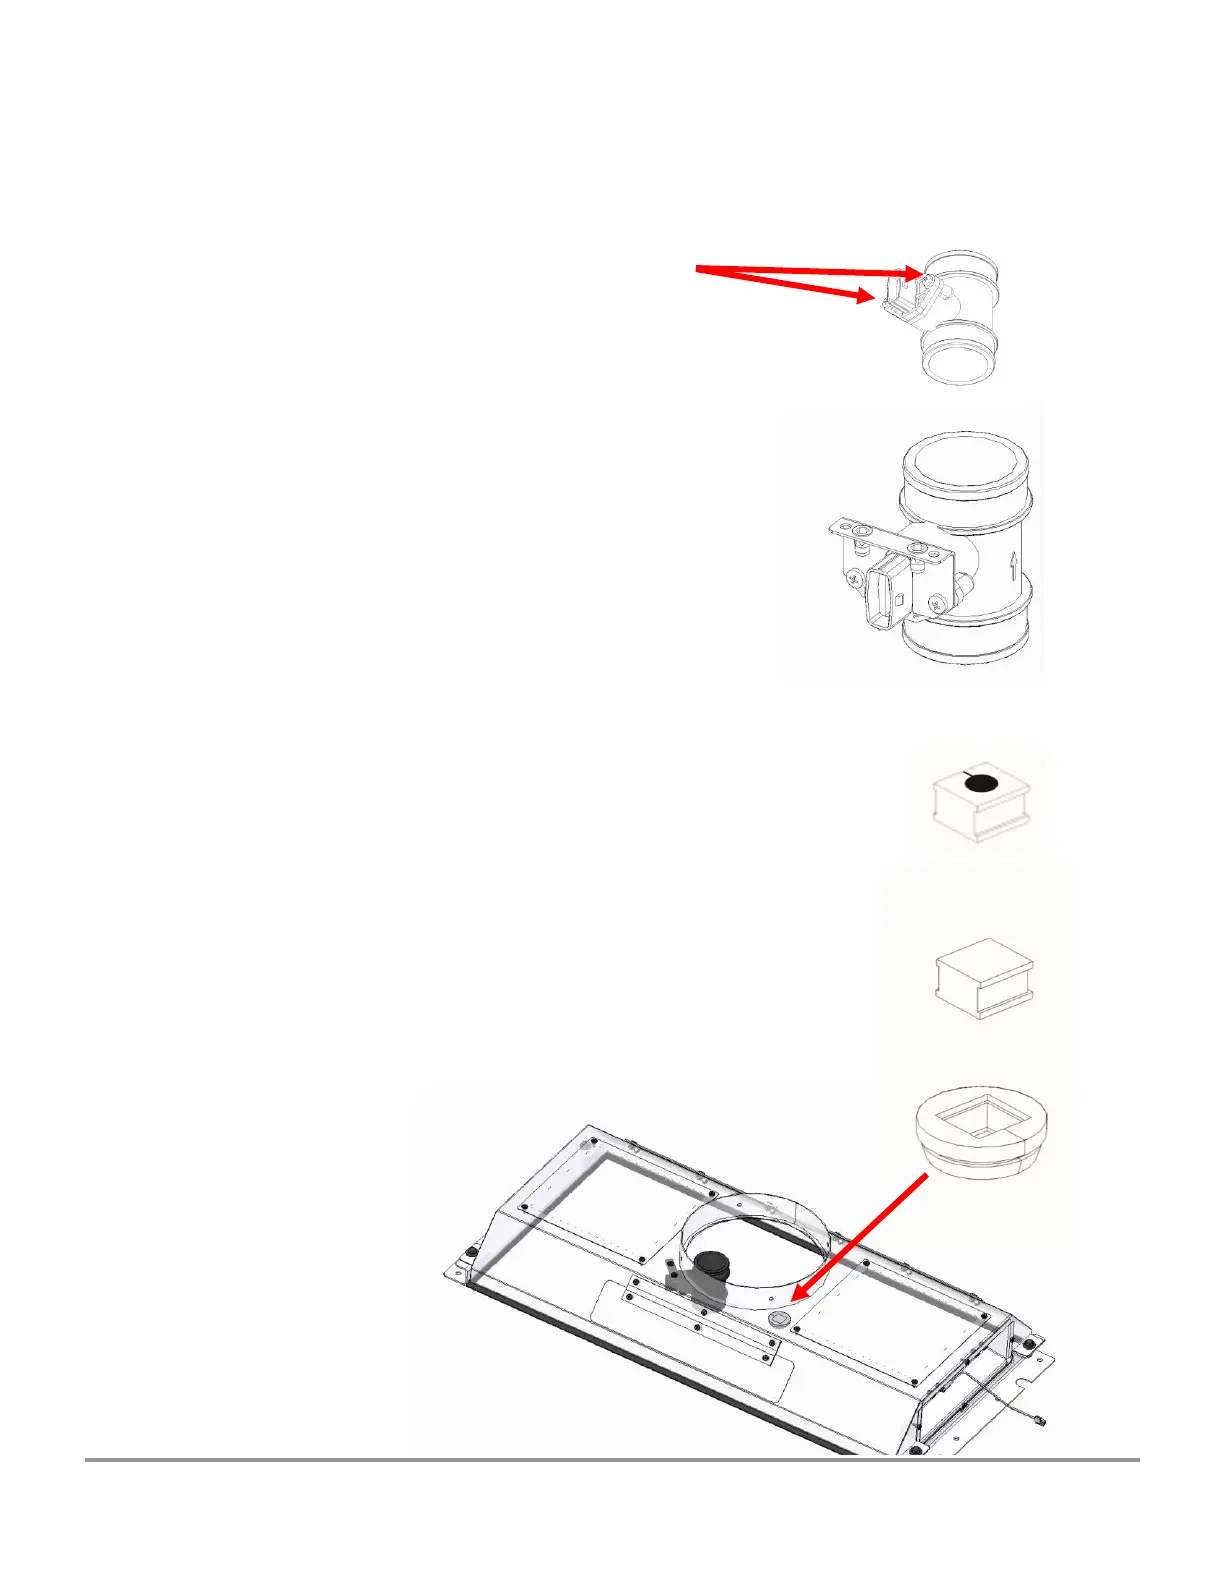
1. Remove the two screws that hold the airflow
sensor into its body, as shown. DO NOT pull the
sensor out of the body.
2. If you are installing the canopy airflow sensor into a
canopy connection, install the bracket onto the airflow
sensor as shown.
3. Gently remove the Cable Sealing grommet, located on the top
of the canopy or the Axiom’s exhaust transition. Remove the solid
square plug. Locate the replacement plug in the air sensor kit,
and push the sensor wiring harness through the slit in the plug.
NOTE: The grommet and plugs are keyed – they only fit
together properly when oriented as shown in the illustration.
Ensure both the replacement plug and the canopy are oriented
properly in the grommet before installation.
4. For the canopy, route the sensor cable from the sensor,
through the grommet, and outside of the canopy. Reinstall the
grommet. Ensure
the cable does
not hinder the
operation of the
front relief valve,
and does not
touch the surface
of the HEPA filter.