LaCie Network Space MAX • DESIGN BY NEIL POULTON Administering Your LaCie Network Space MAX
User Manual page 56
To install a disk:
Replacing a drive involves two main steps, installing the new drive
and initializing the new disk on the Dashboard > RAID page (see
below).
IMPORTANT INFO: It is strongly advised to replace a failed disk
with a new disk of equal capacity. If the new disk is smaller than the
one it’s replacing, you will receive an error on the Dashboard. If it’s
larger, the additional capacity will be unusable.
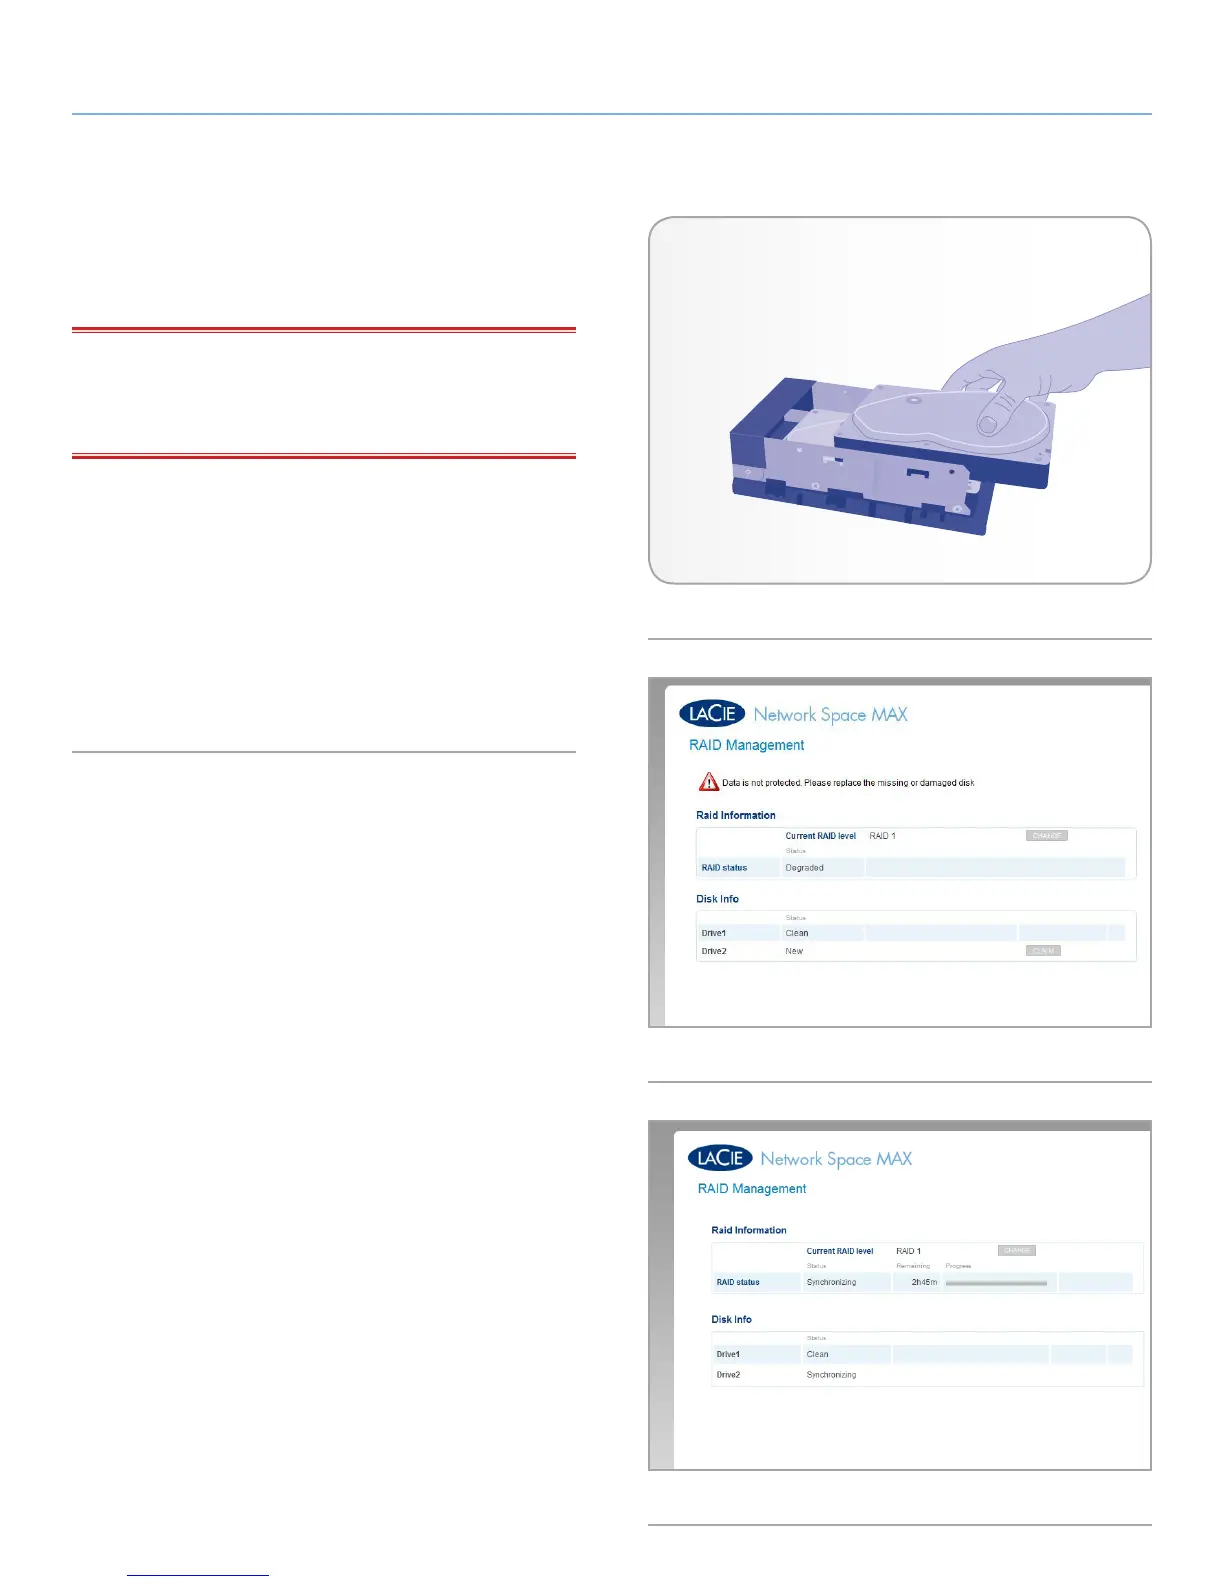
1. Turn off and unplug the LaCie hard disk MAX.
2. If you removed disk 2 (the top disk), carefully insert the replace-
ment drive into the top empty bay (Fig. 91). If you removed disk
1, first carefully insert the replacement drive into the bottom bay,
then replace disk 2 into the top bay.
3. In the Dashboard > RAID page, the new disk will be recognized
and a button Claim will appear (Fig. 92). Click the button and
rebuilding will begin (Fig. 93).
Fig. 91
Fig. 92
Fig. 93