LaCie Network Space MAX • DESIGN BY NEIL POULTON Connecting to a Network
User Manual page 15
2.4. STEP 4: Completing the Setup
Wizard
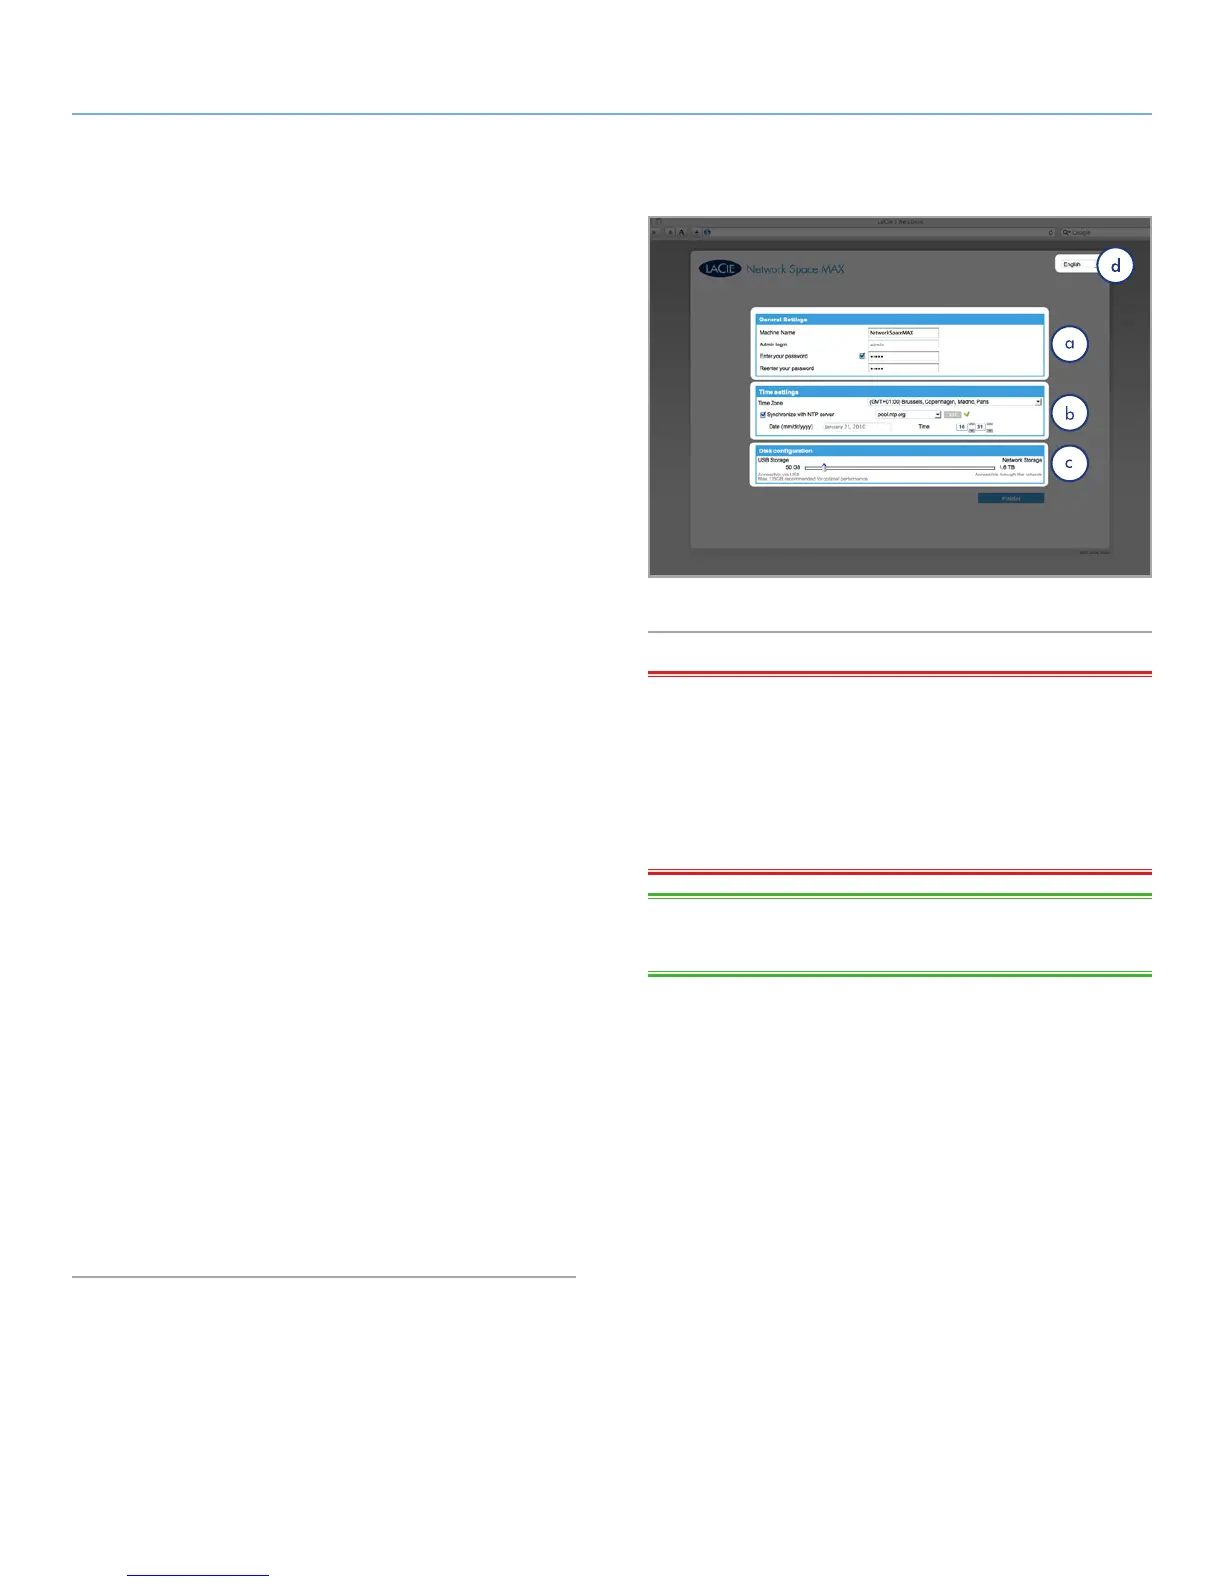
The first time you log in to the Dashboard, the Setup Wizard will
load in you browser (Fig. 14). The Setup Wizard consists of four
sections to be filled out that will help you to configure your Network
Space MAX.
a. General Settings:
✦ Machine Name (optional) - Maximum 15 characters; letters
(case insensitive), numbers, or a hyphen.
✦ Create and confirm a password (from four to 20 characters).
✦ While the Admin login cannot be changed during setup, you
can change it on the Users page (4.7. Dashboard: Users)
once setup is complete. If for whatever reason you do not
complete the Setup Wizard, the default login credentials will
be admin/admin.
b. Time Configuration: Select whether the time and date should be
set manually or synchronized with a third party Network Time Pro-
tocol (NTP) server. The default NTP server, pool.ntp.org, links to
a website that is open to the public. You may use the default or
enter the address of a preferred NTP server. Press the Test but-
ton to ensure synchronization is working. You will not be able
to modify the time and date settings if the time synchronization
option is selected.
c. Disk Configuration: Specify how much of the total storage should
be allotted to the Network Space MAX network and USB shares.
While both are accessible to users on the network, when the Net-
work Space MAX is connected to a computer via USB, only USB-
Share will be accessible. You will be able to modify this value later
if you change your mind.
If you choose to allocate space to USBShare on the Setup Wizard,
it is necessary to format the share. After completing the Setup
Wizard, navigate to Drive Information > USB Drive and select
Format (for details, see 4.9. Dashboard: Drive Information).
d. Dashboard Language Selection
Once you’ve finished, you can proceed to the Dashboard by clicking
Finish (Fig. 14). Your Network Space MAX is configured and ready
to use. Proceed to the following sections: 3. Accessing and Trans-
ferring Files and 4. Administering Your LaCie Network Space MAX.
Fig. 14
IMPORTANT INFO: While USBShare can be set as high as 500
GB, LaCie strongly recommends that you do not increase the size
to more than 128 GB unless you reformat USBShare, using your
operating system’s disk utility, into NTFS (Windows) or HFS+ (Mac).
Since USBShare is formatted by default in MS-DOS (FAT32), refor-
matting to NTFS or HFS+ additionally sidesteps FAT32’s restrictions
(4GB maximum file size).
TECHNICAL NOTE: If you need to assign a static IP address, refer
to section 2.5. Assign a Static IP Address for details.