Manual Leapfrog Creatr
68 Leapfrog BV
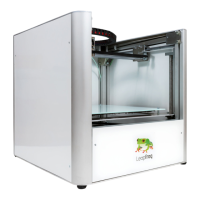
o Step 2: Loosening the bearing plate
The plate where the bearing is attached to, is fastened with two bolts as shown in the
pictures below. Loosen these bolts a little to be able to change the distance between the
driver gear and the bearing. Do not take them out.
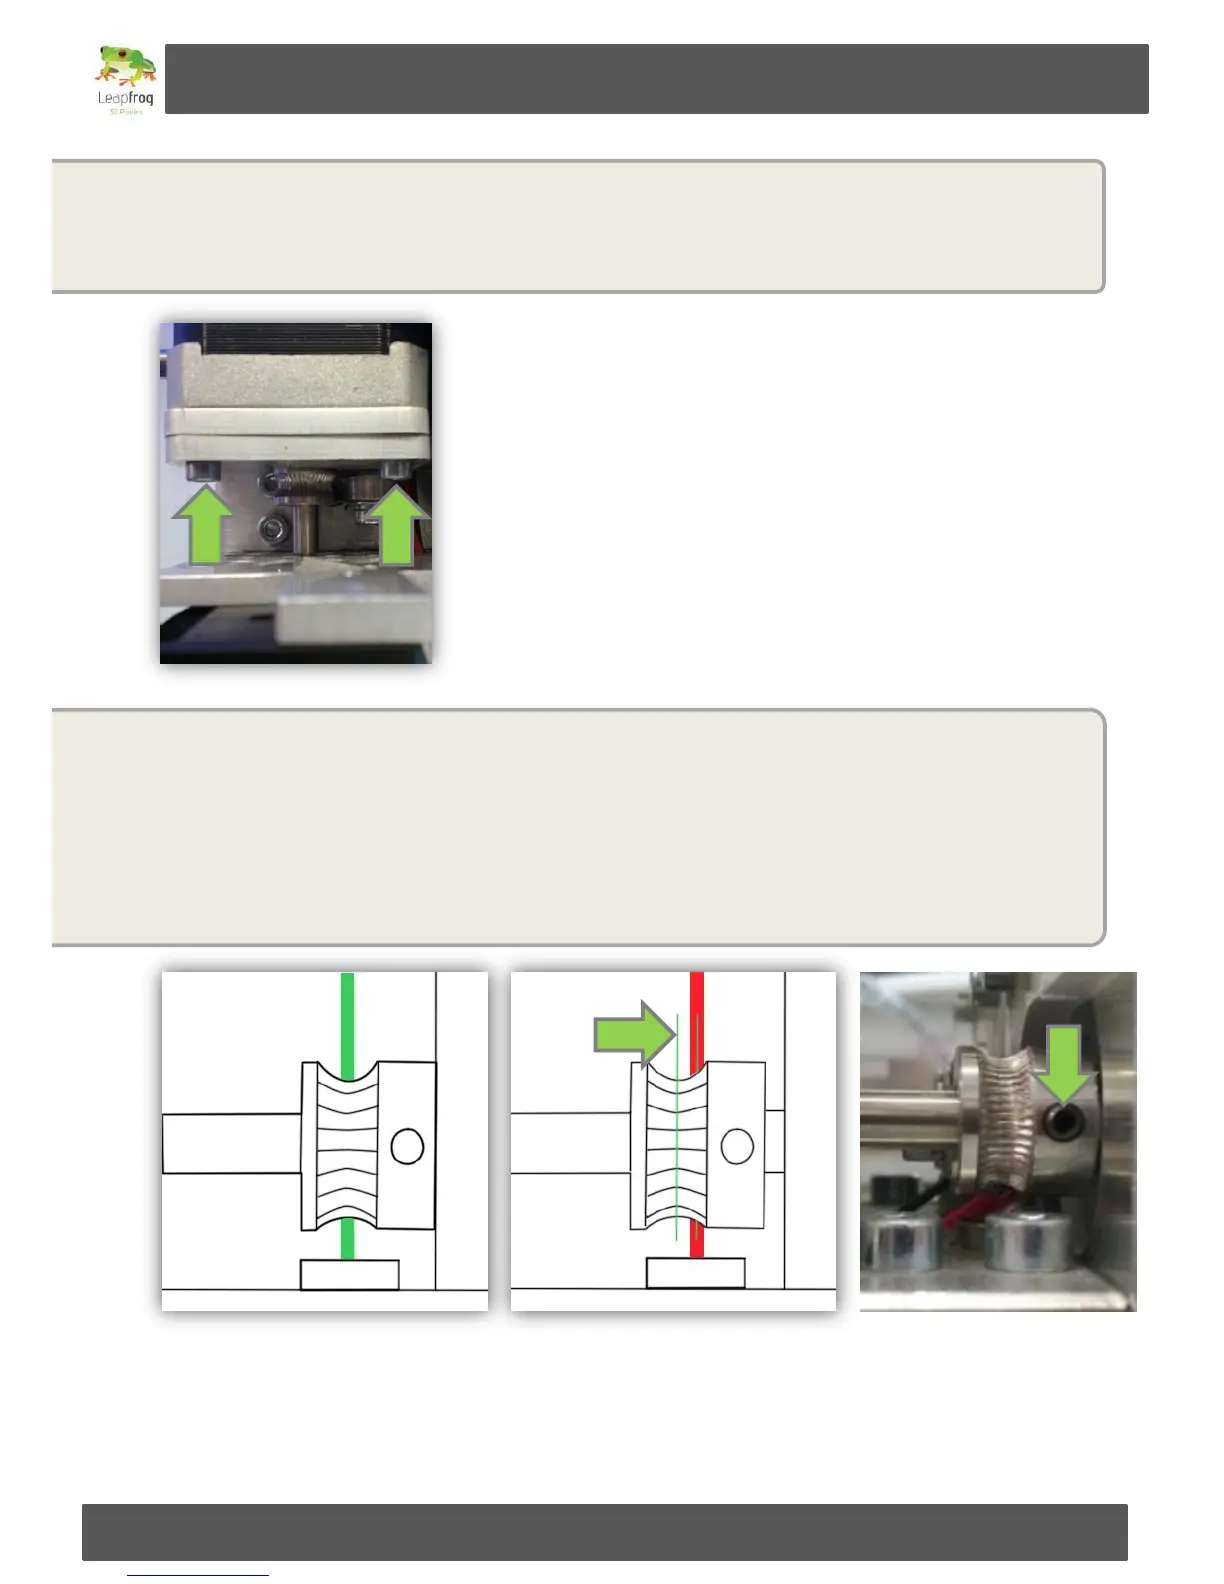
o Step 3: Checking the driver gear
Now is a good time to check if the groove of the driver gear is neatly in line with the entry
of the hot end tube. The left picture displays a good alignment; the middle picture
displays a misaligned driver gear. Here, the green lines should be on top of each other.
If your driver is misaligned, please loosen the small index bolt [see right picture] and slide
tighten it
again.