Care and Maintenance
45Leica HM500/Ref. 10 715 697/Version B
Battery calibration via key combination
B
attery calibration is carried out every time a battery is
changed. The power pack must be plugged in and the
battery fully charged.
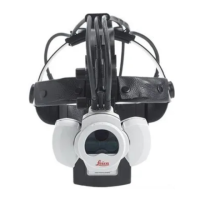
Leica HM500 footswitch:
➩Simultaneously press the ZOOM + (33), FOCUS – (30) and
C
AMERA OFF (29) buttons.
You will hear a long audible signal and all 5 yellow LEDs on
the charge level indicator (34) will flash.
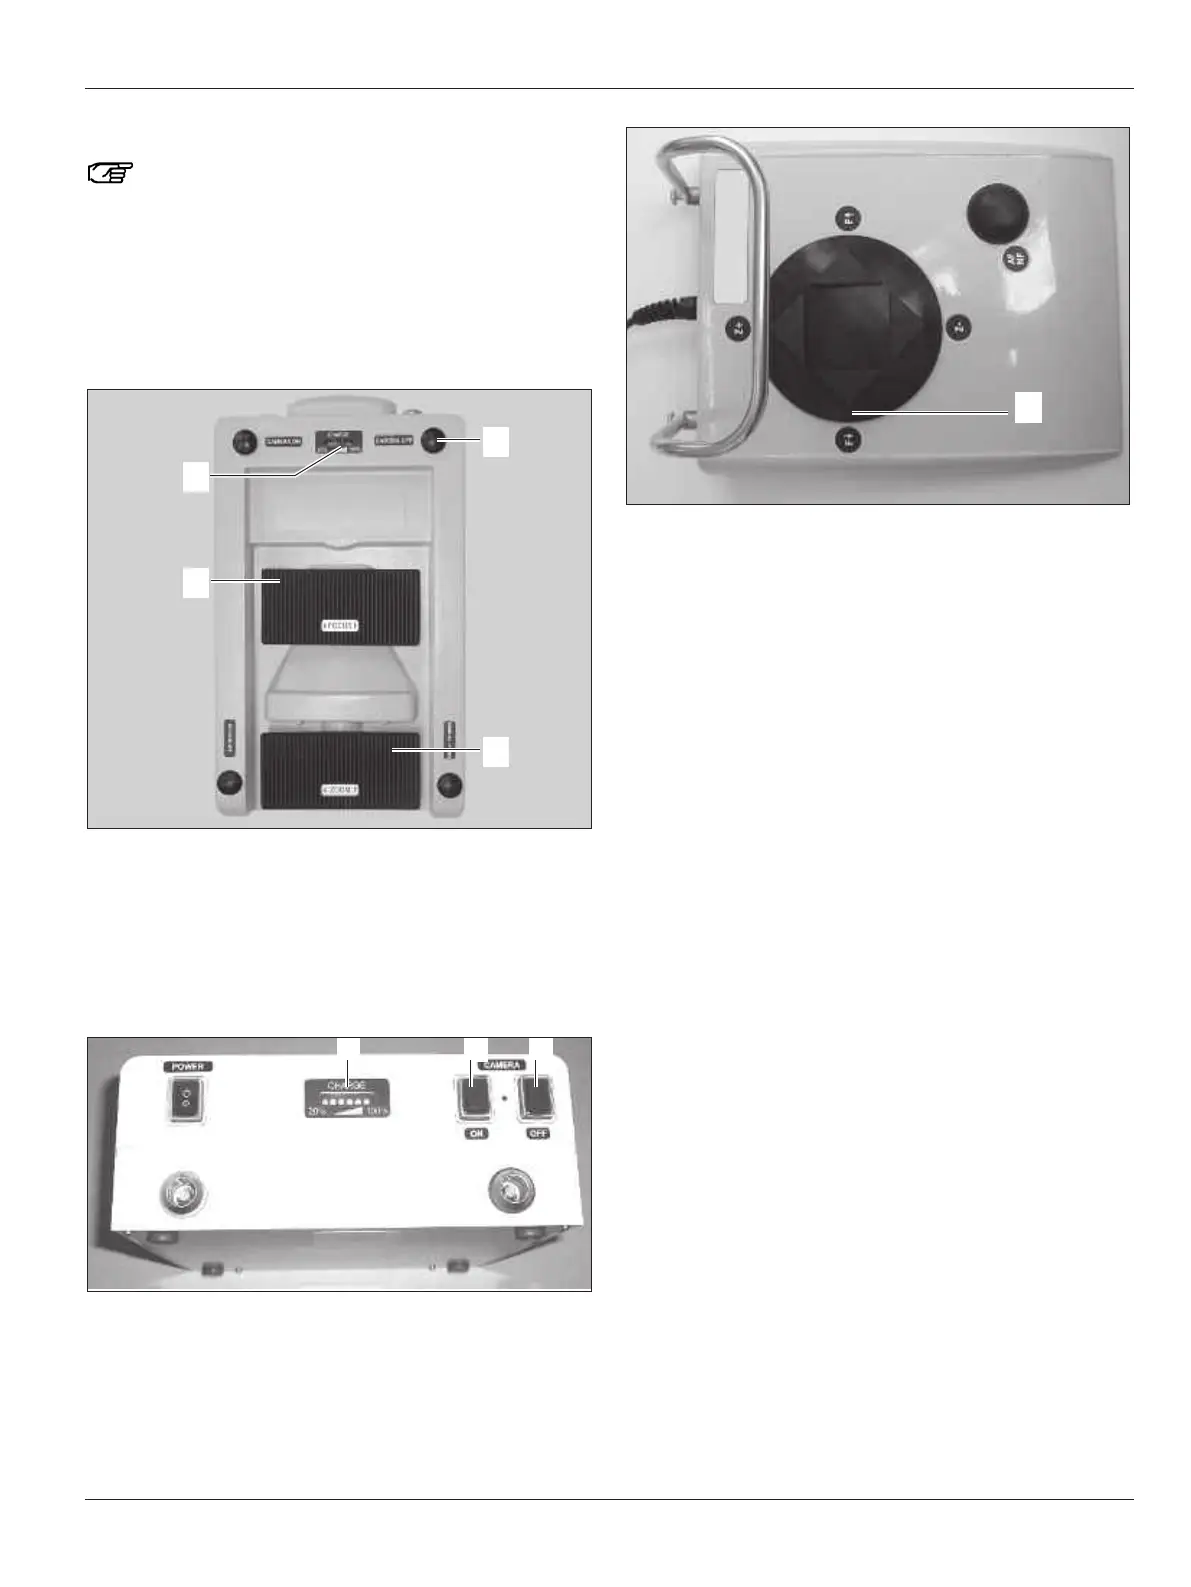
Leica HM500 Dental footswitch and Dental databox:
➩Connect the Dental footswitch to the Dental databox.
➩Simultaneously press the CAMERA ON (49), CAMERA OFF (50)
and FOCUS – (45) buttons.
You will hear a long audible signal and all 5 yellow LEDs on
the charge level indicator (48) will flash.
Checking battery calibration
➩Unplug the power pack.
➩Press any button.
All 5 LEDs come on (but no LED is flashing!)
Calibration was successful.
If all 5 LEDs do not come on, this means calibration was not
successful.
➩Remove the battery and reinstall it. Calibrate as described
above.
Following successful calibration:
➩Screw back the lid of the battery compartment.
 Loading...