Preparation Before Surgery
11Leica HM500/Ref. 10 715 697/Version B
Checklist before the operation
Check the charge level of the battery in the footswitch/Dental
databox
➩
Press any button on the footswitch.
At least 4 LEDs on the charge level indicator (34)/(48) must
light up (see page 27).
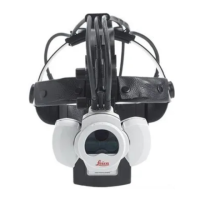
Check the headset adjustment
➩Check the headset and adjustment mechanism are perfectly
adjusted and correctly attached (page 17 onwards).
Connecting the fiber-optic light guide
➩Connect the fiber-optic light guide to the Leica MLS500 light
source and microscope (see page 22).
Connect the data cable
➩Connect the data cable to the microscope and Leica MLS500
footswitch/Dental databox (see page 14).
Check the microscope setting
➩Check the interpupillary distance, diopters and eye distance
(see page 18).
Switch on the Leica HM500
➩Switch on the Leica MLS500 light source at switch (61).
➩Switch the footswitch on at switch (36) or the Dental databox
at switch (47).
The automatic instrument self-test now runs.
Automatic instrument self-test
Warning 1
Risk of eye injuries
➩Do not look through the instrument optics while the
self-test is in progress.
➩Do not use the instrument until the instrument self-test
is completed.
When the Leica MLS500 light source and the Leica HM500
footswitch or Dental databox are connected by the data cable,
an audible signal will be heard when the footswitch is switched
on and the Leica HM500 will carry out an automatic instrument
self-test. At the end of the test an audible signal is given three
times.
The MLS500 light source starts automatically with the autofo-
cus option and the lowest magnification.
Check zoom and focus
➩Use manual focus.
➩Select the lowest magnification.
➩
View a specimen at a working distance of 300 mm and
bring into focus by manual focusing via the footswitch.
➩View a specimen at a working distance of 700 mm and
bring into focus by manual focusing via the footswitch.
➩Select the highest magnification.
➩View the specimen as described above at working dis-
tances of 300 mm and 700 mm.
➩Switch over to autofocus.
➩View the specimen at different distances (300 to 700 mm).
➩Use the zoom at different distances (300 to 700 mm).
Switch on the camera
➩Connect the video cable.
➩Connect the camera to the footswitch or Dental databox
(see page 15).
Select the focusing mode
➩Switch on autofocus or manual focusing (see page 27).