Operation
27Leica HM500/Ref. 10 715 697/Version B
Adjusting the microscope
29
30
31
32
33
35
34
Z+Z–
F+F–
42
43
44
45
46
Z–
F+
Z+
F–
49 5048
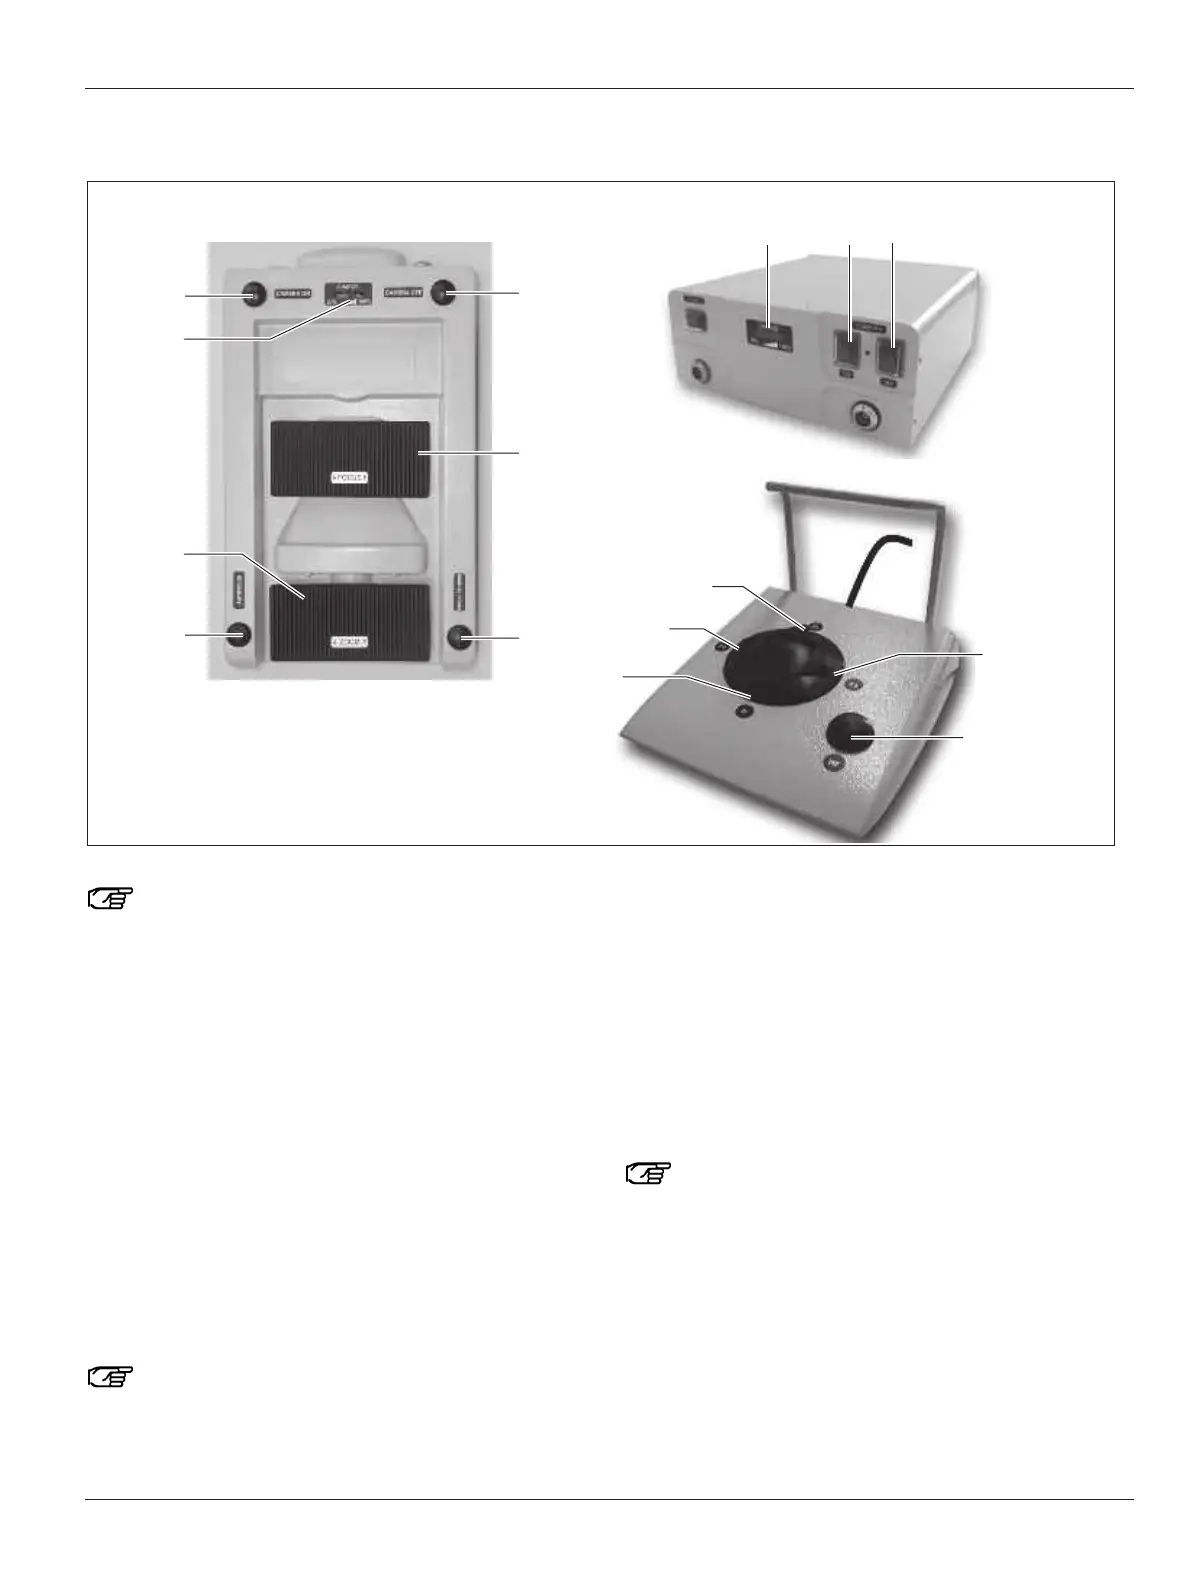
Leica HM500 Dental footswitch Leica HM500 Dental databox and Leica HM500 Dental footswitch
An acoustic signal is given when any button, switch or
rocker switch is operated.
Adjusting the magnification (zoom)
➩With the rocker switch (33) zoom in (Z+) or zoom out (Z–).
or alternatively with the Leica HM500 Dental footswitch:
➩
Zoom in (Z+) with button (46) and zoom out (Z–) with button (44).
Adjusting the focus manually
➩With rocker switch (30), focus with (F+) or (F–).
or alternatively with the Leica HM500 Dental footswitch:
➩Focus with button (42) (F+) or button (45) (F–).
Switching on autofocus
➩Press button (32).
or alternatively with the Leica HM500 Dental footswitch:
➩Press button (43).
If you are using two or more Leica HM500s, use one
exclusively in autofocus mode and all the rest in man-
ual focusing mode.
Checking the charge level of the battery in the footswitch/
Dental databox
➩Briefly press any button or rocker switch on the footswitch.
At least 4 LEDs on the charge level indicator (34)/(48) must
light up.
Switching on the speed focus function
➩Press and hold down button (31).
or alternatively with the Leica HM500 Dental footswitch:
➩Press and hold down button (43).
With the speed focus function you can automatically
re-focus rapidly and precisely while working in manual
focussing mode.
Switch on the camera
➩Press button (35).
The camera is now switched on.
or alternatively with the Leica HM500 Dental footswitch:
➩Press switch (49).
The camera is now switched on.