Preparation Before Surgery
13Leica HM500/Ref. 10 715 697/Version B
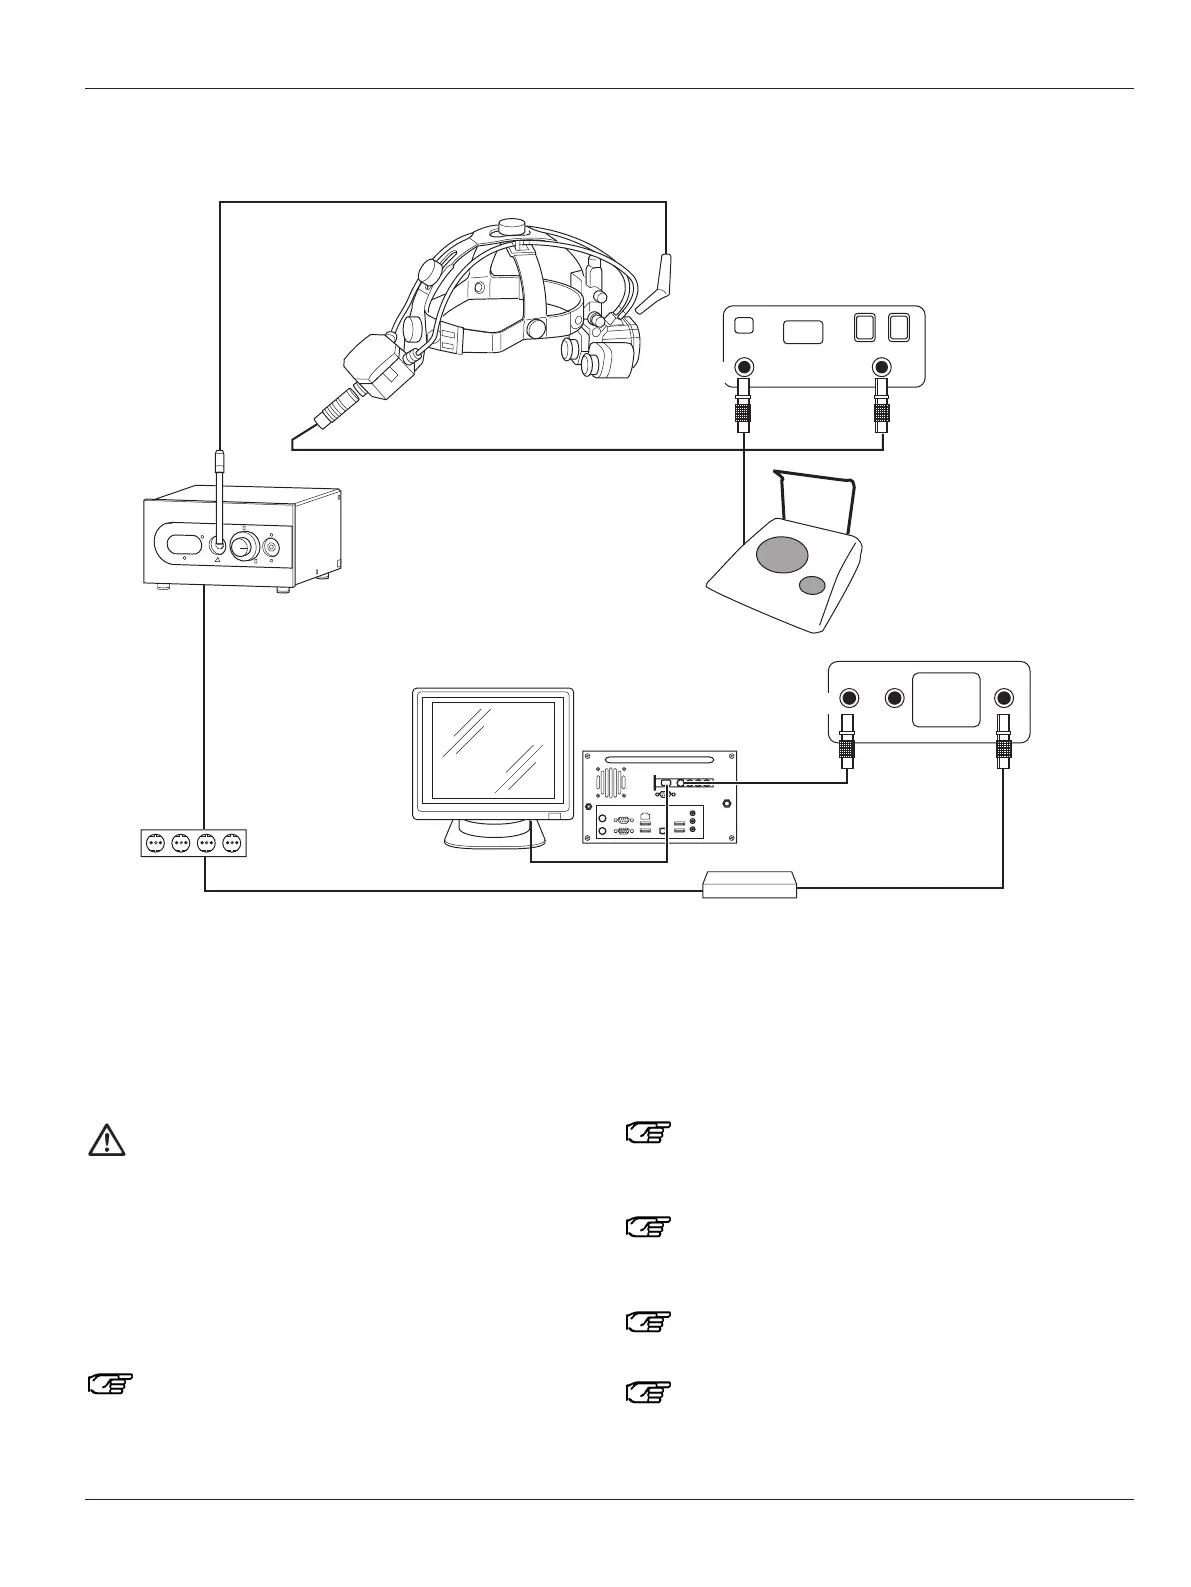
Connecting the Leica HM500 Dental
1 Monitor (optional)
6 Leica MDRS (optional)
7 Leica MLS500 light source
11 Leica HM500 Dental databox (alternative)
12 Leica HM500 Dental footswitch (alternative)
75 Trolley multiple socket outlet
85
82
86
7
87
1
75
83
1 2 3 4
6
11
12
11
blue
black
f
ront side
back side
orange
82 Leica HM500 with PAL/NTSC camera
83 Power pack (EU, UK, USA or Japan)
85 Fiber-optic light guide
86 Dental databox – microscope data cable
87 Video cable (S video)
Warning 2
Risk of eye injuries
• When lasers are used in combination with the
Leica HM500 microscope, it is the responsibility
of the user (laser safety officer) to ensure that eye
protection is sufficient and safe.
• For safety reasons, the protection class of the laser
safety glasses must be raised two classes (in accor-
dance with EN207) when standard eyepieces or inter-
changeable eyepieces I or II are used.
Leica HM500 Dental is not suitable for use in
operating rooms.
Secure the power cable for the Leica MLS500 light
source (7) to the rear of the Leica MLS500 light source
by means of the strain relief device (see page 22).
Plugging an additional multiple socket outlet into a
socket in the Leica HM500 trolley socket system is not
permitted.
Comply with the safety instructions for the
Leica HM500 trolley (see page 30).
Do not place the Leica HM500 Dental databox (11) on
the floor.