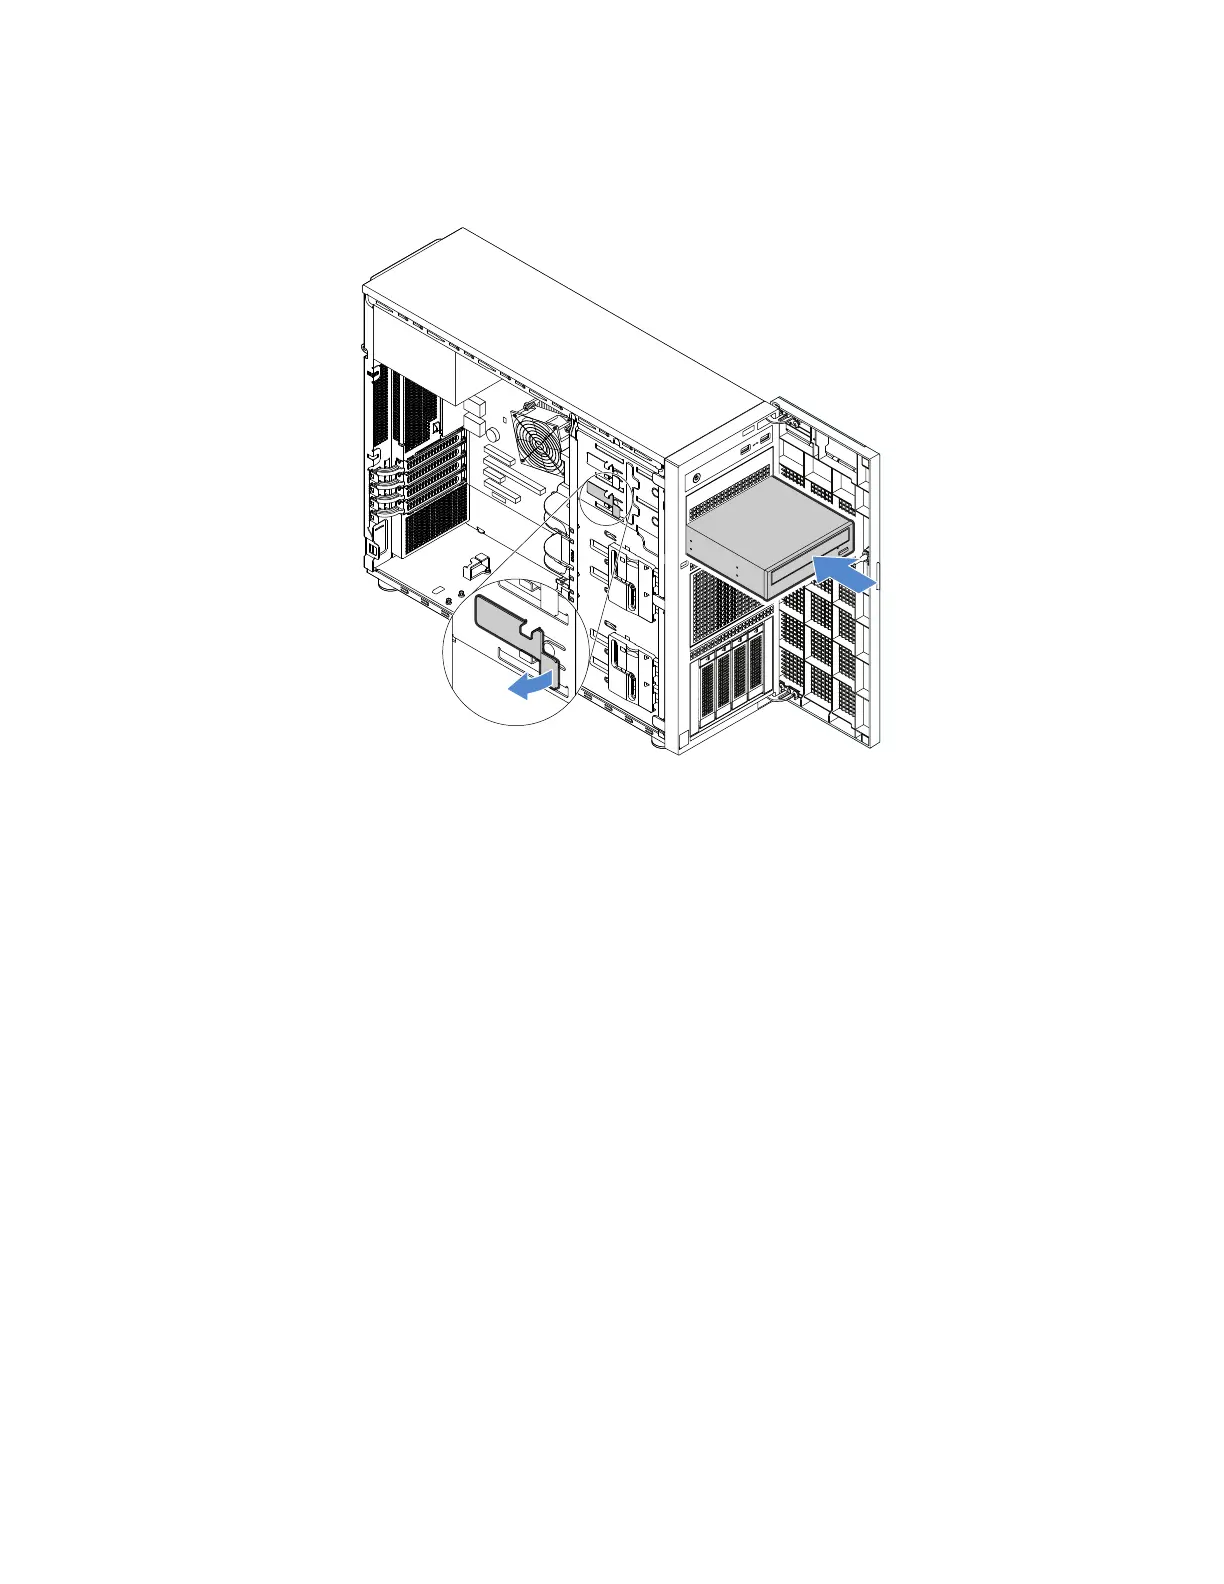
4.Inserttheopticaldriveintotheopticaldrivebayandslideitinuntilitisobstructed.Gentlypullthemetal
tabonthesideofthechassis,andthencontinuetoslidetheopticaldriveinuntilitsnapsintoposition.
Figure32.Installingtheopticaldrive
5.Connectthepowerandsignalcablestotherearoftheopticaldrive.See“Connectingcablesforthe
opticaldrives”onpage114.
6.SavetheremovedEMI-protectiveshieldfromthechassisandtheplasticshieldfromthefrontbezelin
caseyoulaterremovethedriveandneedtheshieldstocoverthedrivebay.
Non-hot-swapdrive
Thistopicappliesonlytoservermodelsthatsupportnon-hot-swapdrives.See“Featuresandspecifications
ofyourserver”onpage7formoreinformationaboutthesupportednon-hot-swapdrives.
•“Removinganon-hot-swapdrive”onpage69
•“Installinganon-hot-swapdrive”onpage70
TheEMIintegrityandcoolingoftheserverareprotectedbyhavingalldrivebayscoveredoroccupied.
ThenumberoftheinstalledHDDsinyourservervariesdependingontheservermodel.Thevacantbays
arecoveredbyanEMI-protectivepanel.
Attention:AnunoccupieddrivebaywithoutanyotherprotectionmightimpacttheEMIintegrityandcooling
oftheserver,whichmightresultinoverheatingorcomponentdamage.TomaintaintheEMIintegrityand
coolingoftheserver,installanewnon-hot-swapdriveassoonasyouremovethefailingone.
HDDinstallationrules:
•FollowtheorderoftheHDDdrivebayswheninstallinganHDD.See“Servercomponents”onpage22
tolocatetheHDDbaysinyourserver.
68ThinkServerTS460UserGuideandHardwareMaintenanceManual