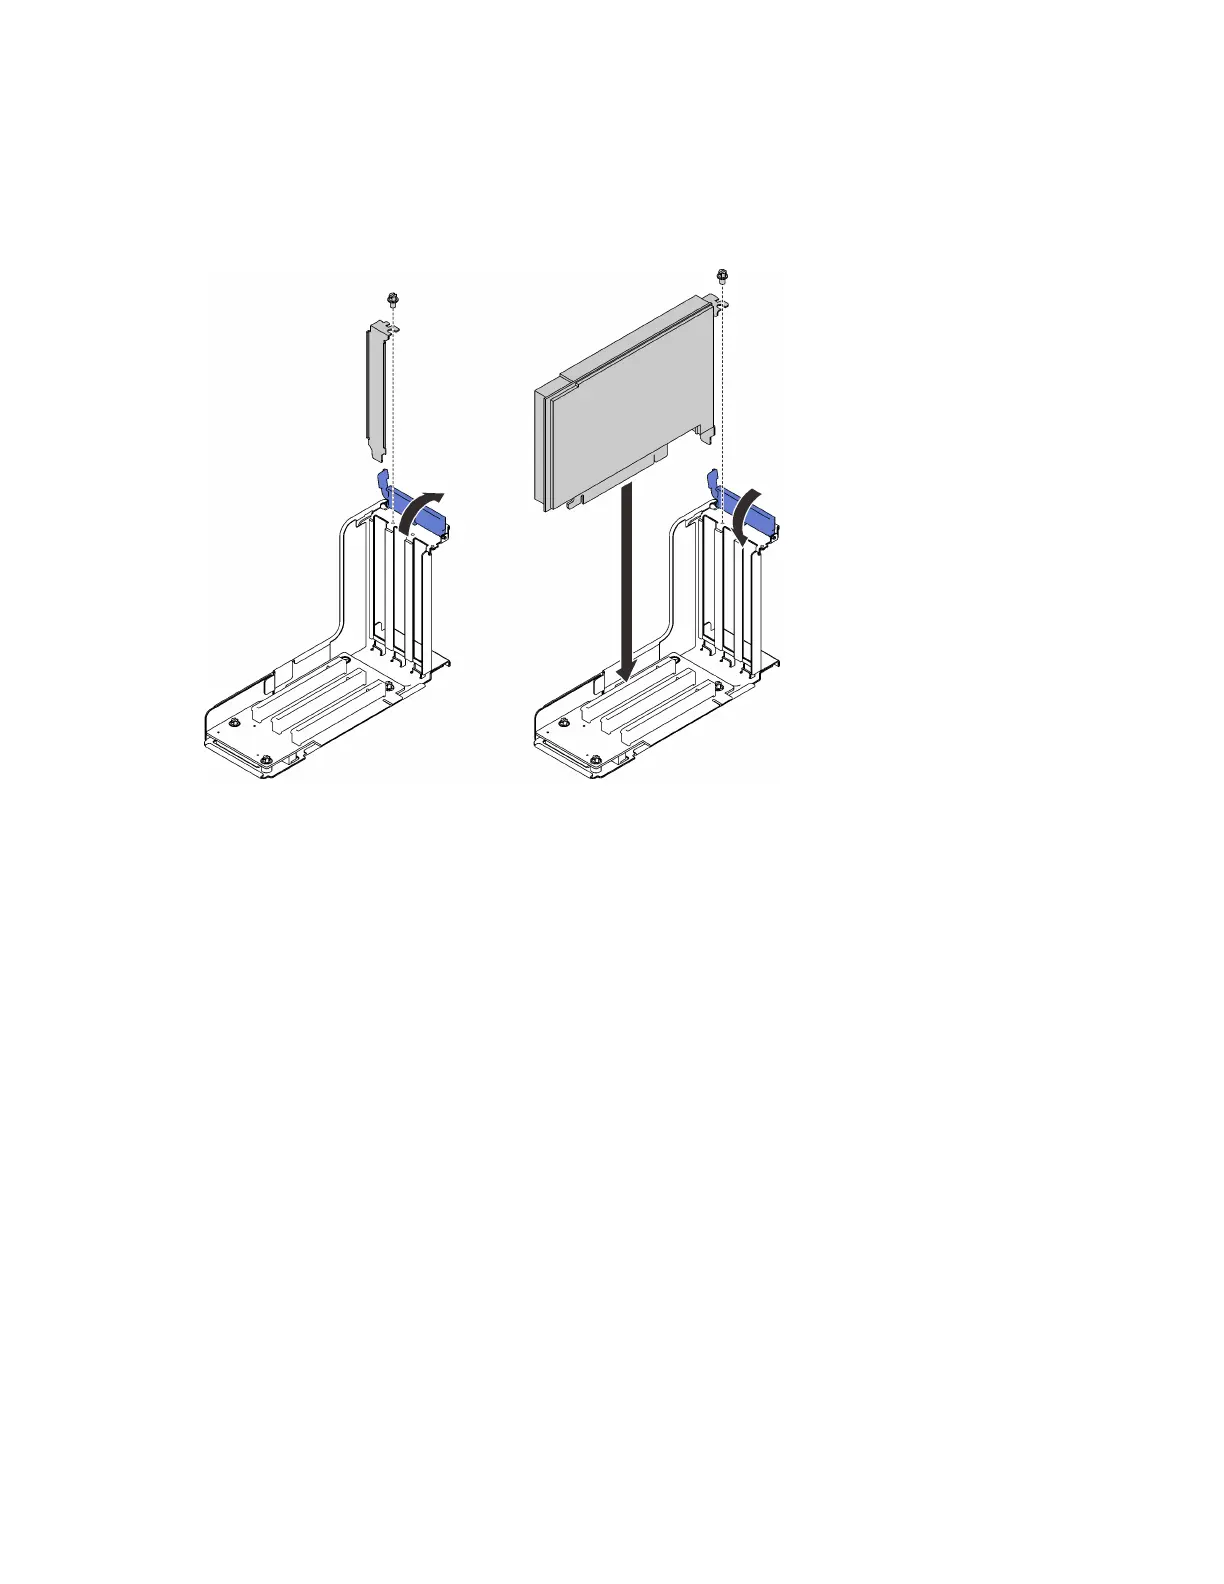
Step 1. Open the retaining bracket on the PCIe riser assembly.
Step 2. If a filler has been installed to the slot on the riser, remove the screw that secures it and remove the
filler.
Step 3. Align the adapter with the connector on the PCIe riser assembly, and push it in.
Figure 81. Installing an adapter into the PCIe riser assembly
Step 4. Secure the adapter with a screw.
Step 5. Close the retention latch.
After this task is completed
• If one of the following adapters has been installed, install a flash power module (see
“Install a flash power
module” on page 274
).
– ThinkSystem RAID 930-8i 2GB Flash PCIe 12Gb Adapter
– ThinkSystem RAID 930-16i 4GB Flash PCIe 12Gb Adapter
– ThinkSystem RAID 930-8e 4GB Flash PCIe 12Gb Adapte
– ThinkSystem RAID 940-8i 4GB Flash PCIe Gen4 12Gb Adapter
– ThinkSystem RAID 940-8i 8GB Flash PCIe Gen4 12Gb Adapter
– ThinkSystem RAID 940-16i 8GB Flash PCIe 12Gb Adapter
– ThinkSystem RAID 940-32i 8GB Flash PCIe 12Gb Adapter
• Proceed to complete the parts replacement (see
“Complete the parts replacement” on page 282).
Demo video
Watch the procedure on YouTube
192
ThinkSystem SR860 V2 Maintenance Manual

 Loading...


