3-8 Lexmark™ E350d, E352dn
4512-420, -430
Printhead assembly electronic adjustment
A step-by-step process to align a new printhead.
Note: Before aligning the printhead electronically, first align the printhead mechanically, if needed. See
“Printhead assembly mechanical adjustment” on page 3-12.
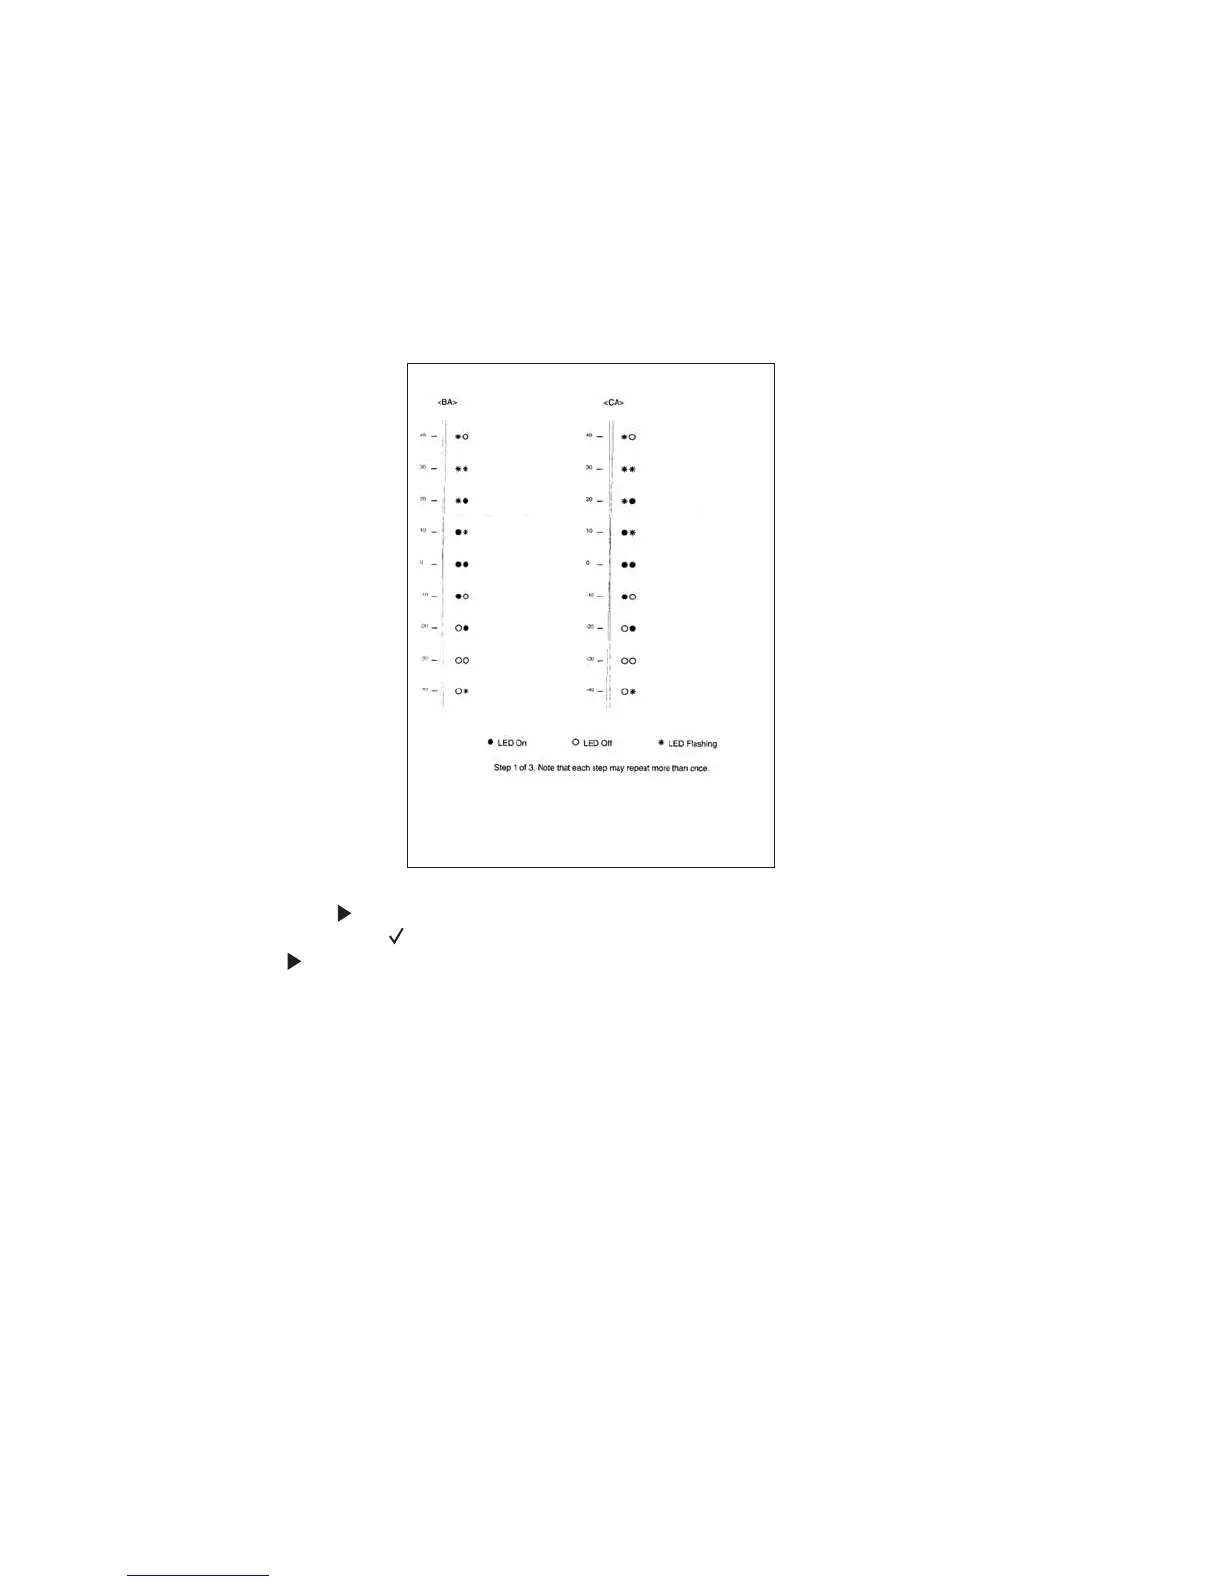
1. Press Go to print Step 1 test page.
2. In column <BA> of Step 1 test page, look for the position where the vertical lines are the closest to each
other. Press to select the corresponding number (new setting).
3. Press and release to move to the <CA> pattern on the right side of Step 1 test page.
4. Press to select the <CA> setting.
Step 1 printout
(sample only; use actual sheet)