CHAPTER 3B ENGINE 50cc/80cc ATV SERVICE MANUAL09.0
CHAPTER 3B ENGINE PAGE 3B - 65 -
and for looseness when installed.
Replace it if necessary.
Inspect dust cover for wear or damage.
Apply grease to the dust cover.
Install spring brush in its holder.
Apply a light film of grease to both ends sliding
surfaces of armature shaft.
Install armature in front bracket.
·Make sure the surfaces between the brush and
armature are not damaged.
·Be sure the dust cover lip is not damaged by the
armature mount shaft.
Install a new O-ring in front bracket.
Engage motor housing with that of front bracket.
Install two housing bolts.
When engaging the housing with front bracket,
install the armature first, hold the armature shaft
and then install the housing in case the armature is
drawn out by the magnet.
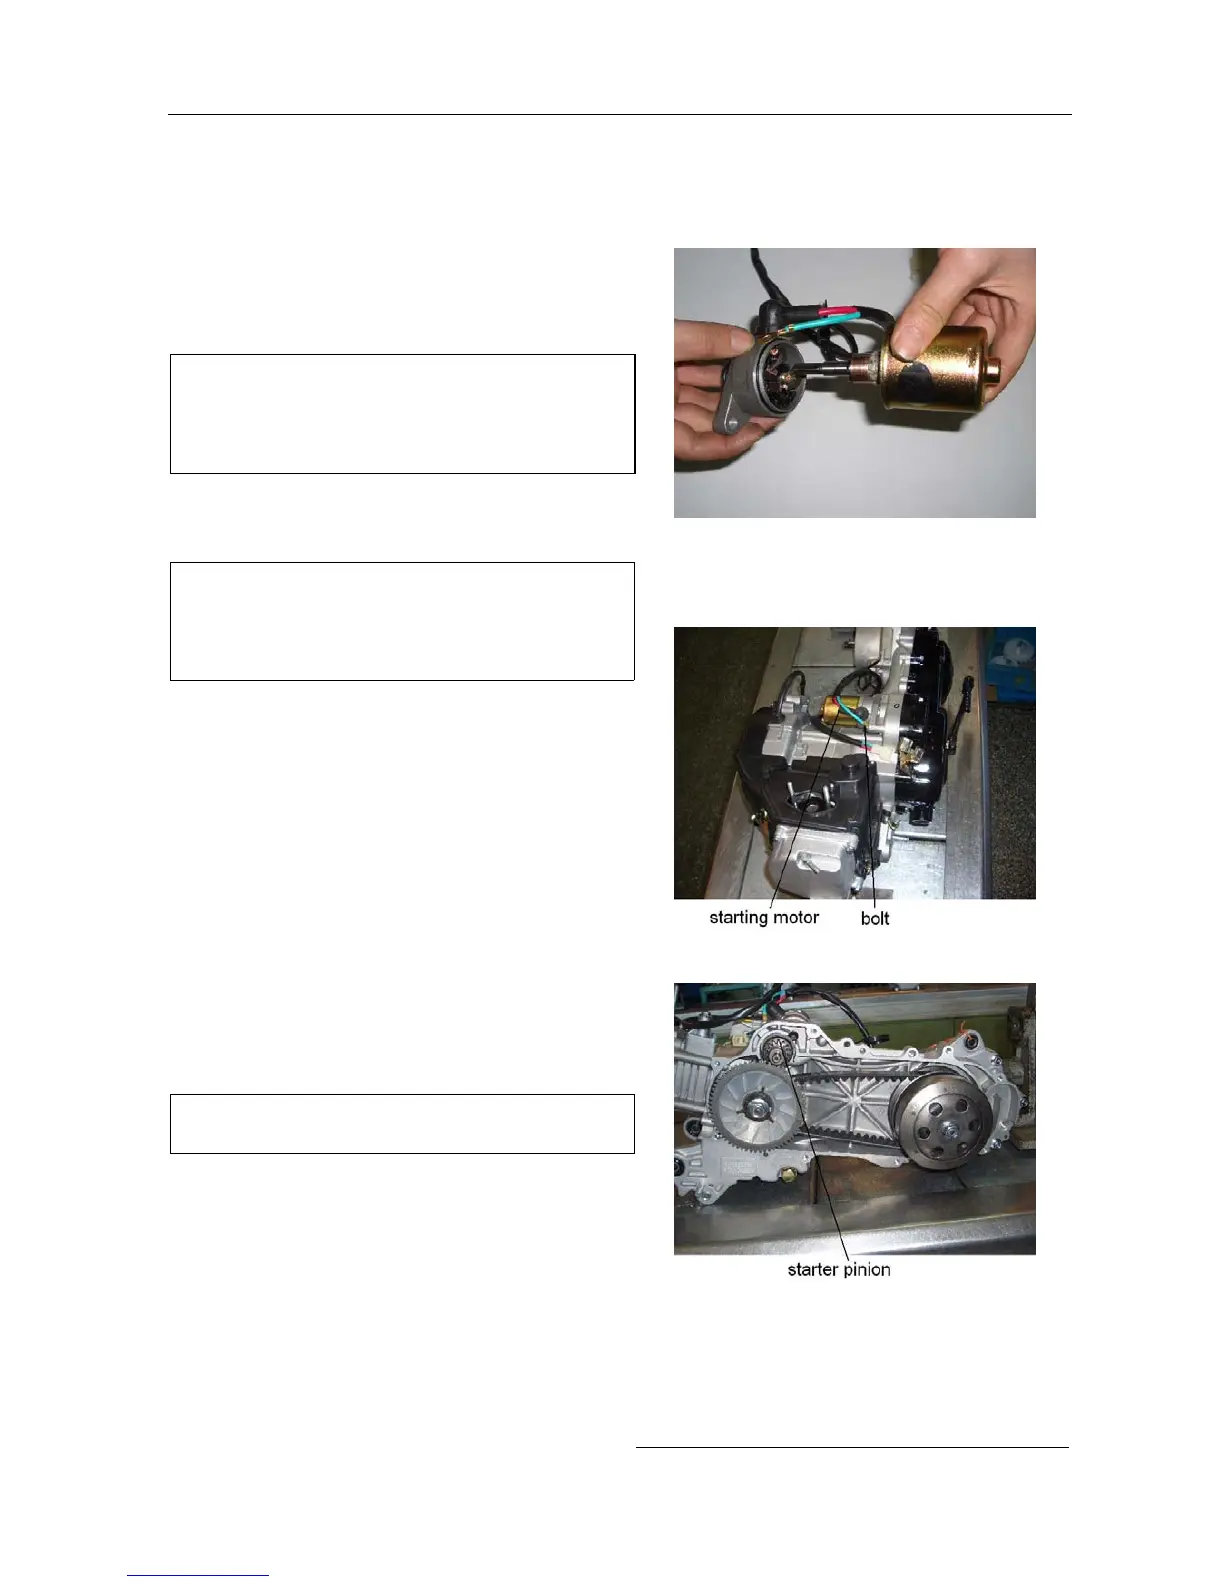
Starter motor installation
Apply grease to starter motor O-ring and install the
starter motor.
Install the two bolts.
Connect the starter motor terminals to the harness.
3.9.3 Starter pinion removal
Remove the left crankcase cover.
Remove the pinion.
Make sure not to damage the drive belt during the
removal.
INSPECTION
Check if the starter pinion operates properly.
Check the gears and bearing for wear or damage.
Check for extensions of driver gear.
Check for spring return of driver gear.
 Loading...