Using the On–Screen Display
7
Use the system’s on–screen display to navigate menus and configure options and settings.
NOTE
To access the on-screen display, you must connect the included mouse and a monitor (not included) to the recorder.
See 4 Basic System Setup, page 7 for full instructions.
7.1 Navigation Bar
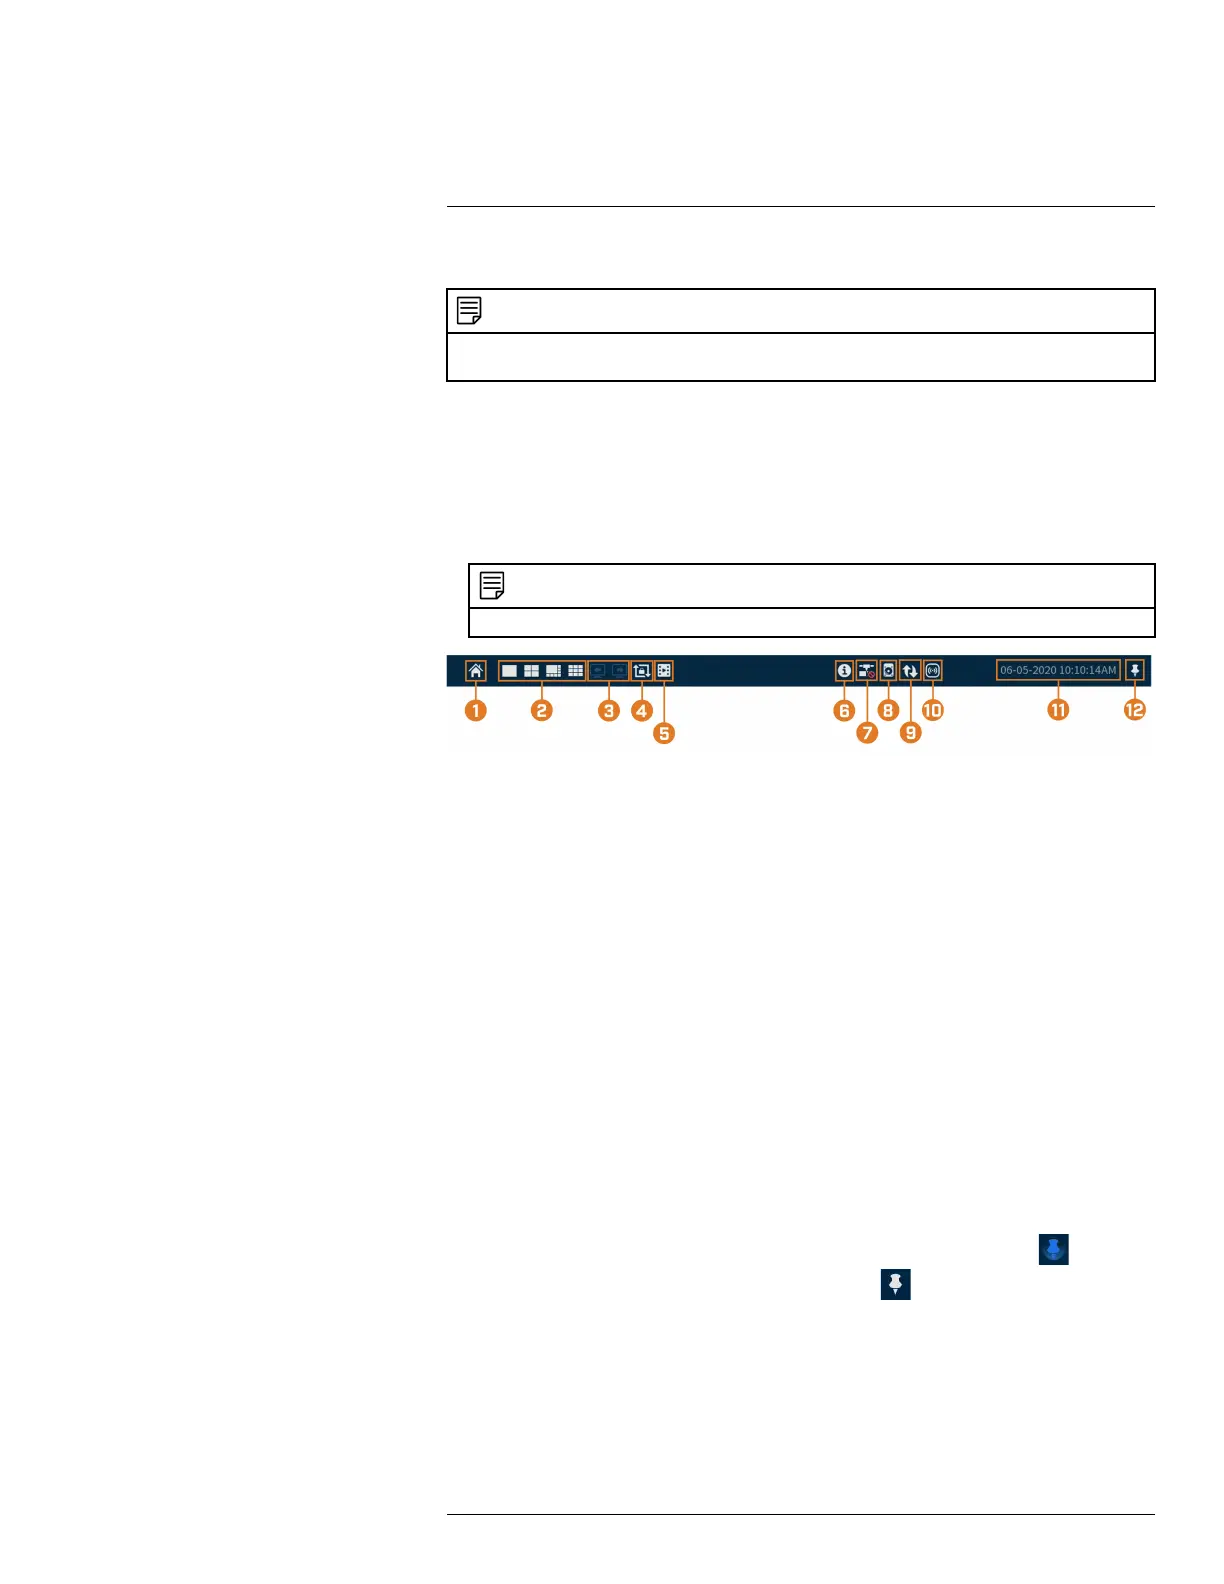
The Navigation Bar along the bottom of the recorder’s Live View display allows you to access
the Main Menu and control basic functions of the recorder.
To show the Navigation Bar:
• Hover the mouse pointer near the bottom of the Live View screen.
NOTE
You can also lock the Navigation Bar to have it displayed at all times. See below for details.
1. Main Menu: Select for quick access to main operational settings, such as playback, backup,
network. and shutdown. See , page for full instructions on using the Main Menu.
2. Viewing Modes: Select how many channels are shown on screen during live viewing.
3. Previous / Next Channel(s): Display previous / next channel(s) in single or quad channel
viewing mode.
4. Sequence Mode: Start or stop Sequence Mode. In Sequence Mode, the system display will
automatically cycle through connected channels every few seconds.
5. Playback: Opens the Playback Menu. This allows you to search for video recordings saved
on the recorder’s hard drive. For details on using the Playback menu, see 9 Playback, page 23.
6. Information: Displays system information, such as model number, device ID, IP address, etc.
7. Network: View and configure network options, including setting a dynamic or static IP ad-
dress. For full instructions on configuring network options, see 15.7.1 Selecting DHCP or
Static IP Address (TCP/IP), page 67.
8. Hard Drive Manager: Configure hard drive read/write options (see 15.9.6 Configuring Hard
Drive Type, page 81 for details) or format drives (see 15.9.5 Formatting the Hard Drive, page
80 for details).
9. Updates: Check for available firmware updates — requires an Internet connection.
10. Warning Light & Siren — Deterrence Cameras Only: Click to activate warning lights and
sirens for all connected deterrence cameras. Click again to deactivate.
11. System Date & Time
12. Lock Navigation Bar: Choose to always show the Navigation Bar on screen (
) or hide it
until the mouse pointer is near the bottom of the screen (
).
7.2 Quick Menu
The Quick Menu gives you quick access to functions which can also be accessed using the Navi-
gation Bar.
To open the Quick Menu:
#LX400111; r. 5.0/56647/56647; en-US 15