Using the Main Menu15
2. Click STORAGE. Click the Schedule tab on the side panel, then Snapshot on the top panel.
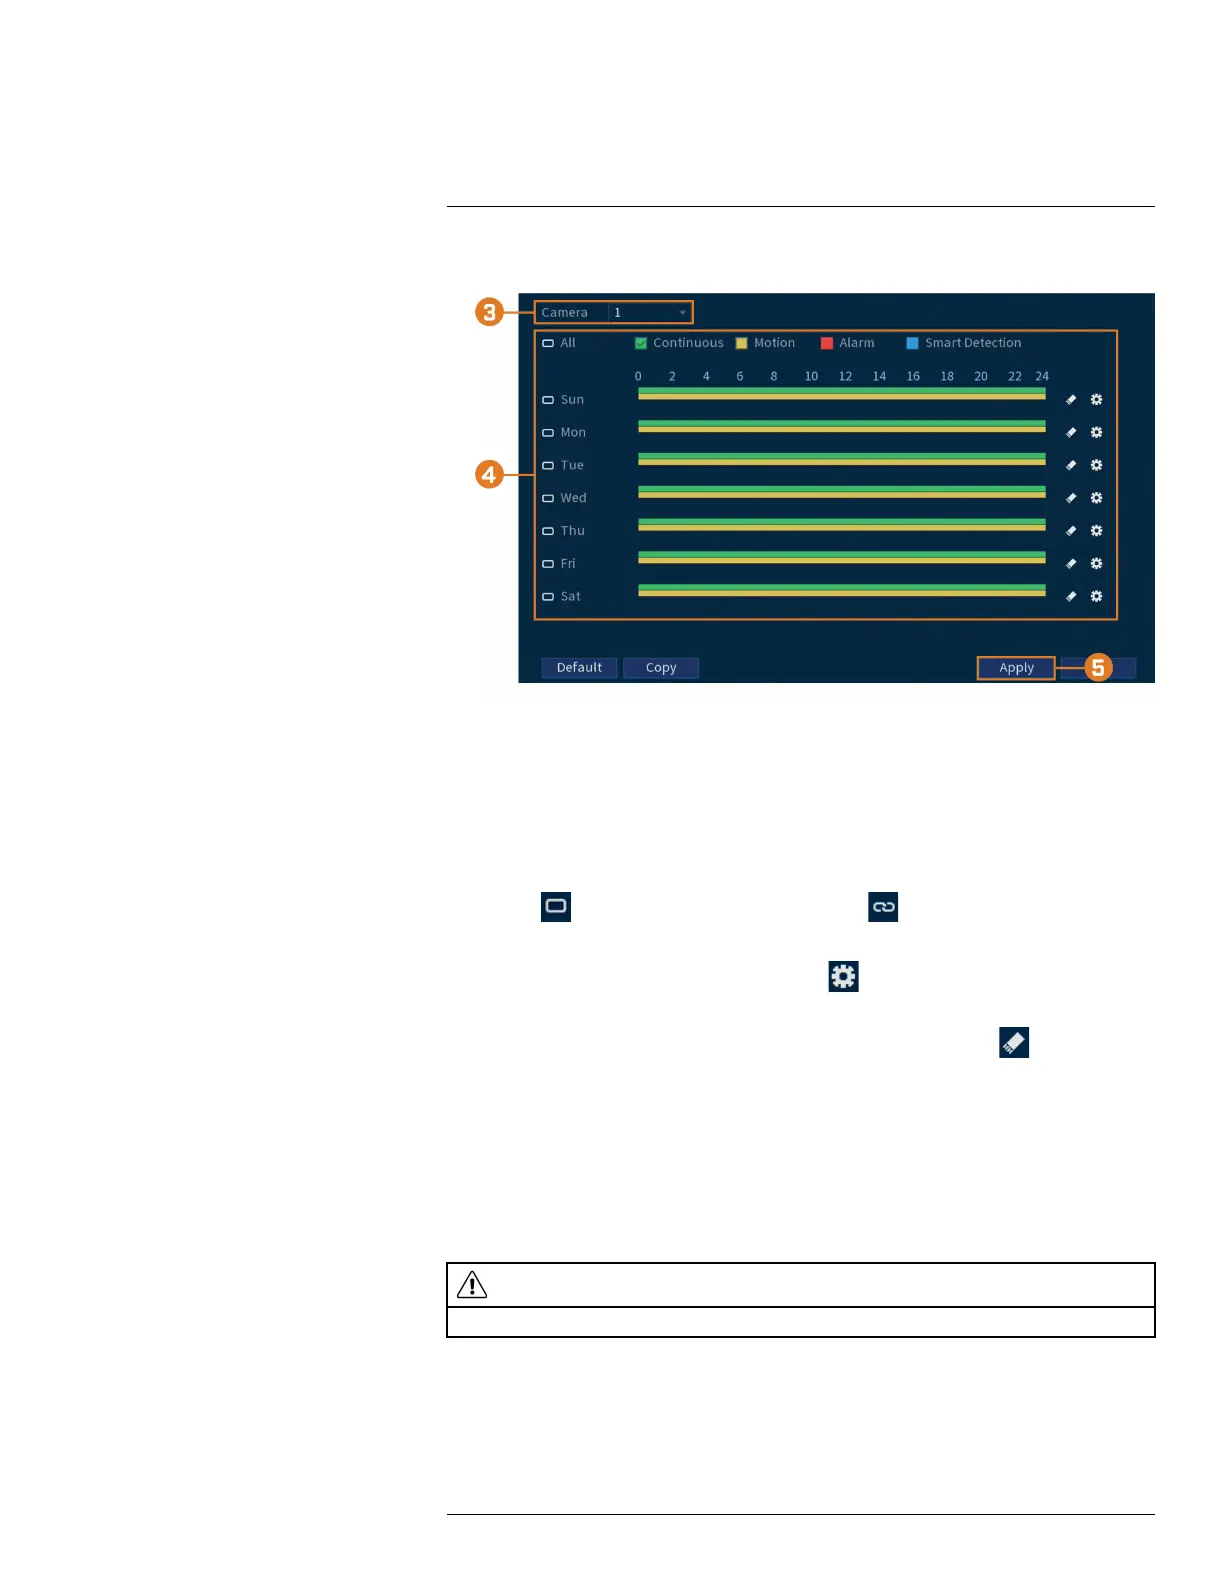
3. Under Channel, select the channel you would like to configure or select All.
4. Configure the schedule as needed:
• Check Continuous, MD (Motion Detection), or Alarm to select the recording type you
would like to configure.
• Click-and-drag on each day to customize the recording schedule. The schedule is set up as
a grid, which each block representing one hour.
• Click
beside 2 or more days to link schedules ( ). This allows you to quickly
change multiple schedules at once.
• To make fine adjustments to a schedule, click
. This will allow you to set exact start
and end times for a schedule.
• To disable all recording of the selected type on the selected day, click
.
5. Click Apply.
6. (OPTIONAL) Click Copy to apply the settings for the current channel to one or more other
channels (see 15.12 Copying Settings to Another Channel, page 89 for full instructions on us-
ing the copy function).
15.9.5 Formatting the Hard Drive
If you install a new hard drive, you must format the hard drive using the system before you will be
able to record.
CAUTION
Formatting the hard drive erases all data on the hard drive. This step cannot be undone.
To format hard drives:
1. From the Live View display, right-click to open the Quick Menu, then click Main Menu.
#LX400111; r. 5.0/56647/56647; en-US 80