Using the Main Menu15
4. Click to enable (
) / disable ( ) the selected event type.
5. Choose how the system will react when the selected event occurs:
• Show Message: Error message will appear on the recorder’s display.
• Record Channel: For Offline events only. Select the numbered tiles next to this option to
record video from the corresponding channels. Set the length of recording following a net-
work disconnection event in the Post_REC field.
• Buzzer: The recorder will sound an audible alarm.
• Send Email: Send an email notification with details on the event (requires email configura-
tion — see 15.7.3 Configuring Email Alerts, page 68 for details).
6. Click Apply.
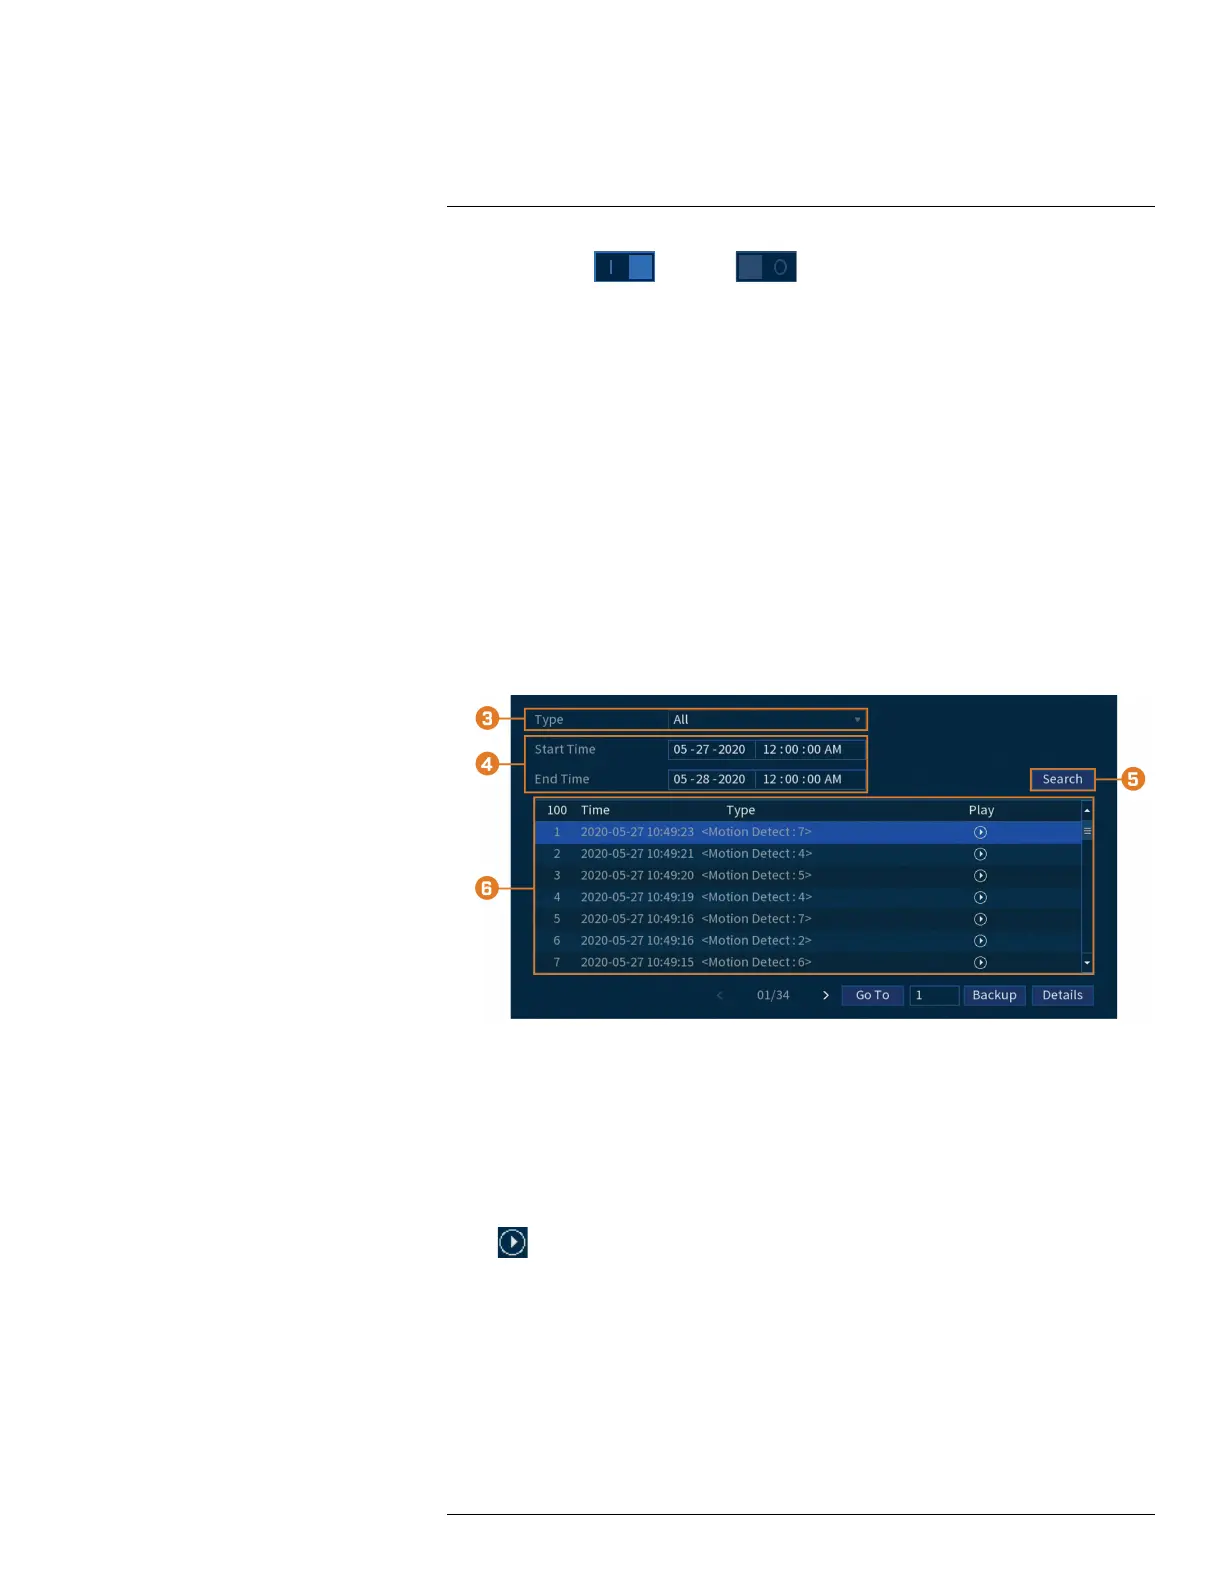
15.3.3 Searching Event Logs
Search all channels for events, including motion detection and video loss.
To search for events:
1. From the Live View display, right-click to open the Quick Menu, then click Main Menu.
2. Click Events, then click the Event Log tab.
3. Select an event type to search for.
4. Enter a start and end time for your search.
5. Click Search.
6. Events that match your search criteria are displayed:
• The Type column is formatted to show <[Event Type]: [Channel Number]>.
• Click Details to see more information on the selected event.
• Motion events have more options than other events. You can view the event by clicking
in the Playback column, or back up the video clip to a USB flash drive (not included)
by clicking Backup.
15.4 Backup
See chapter 10 Backup, page 28 for details.
15.5 Display
Set the system’s monitor resolution, configure Sequence mode, and other display settings.
#LX400111; r. 5.0/56647/56647; en-US 57