Using the Main Menu15
2. Click SYSTEM, then click the General tab, then Date&Time on the top panel.
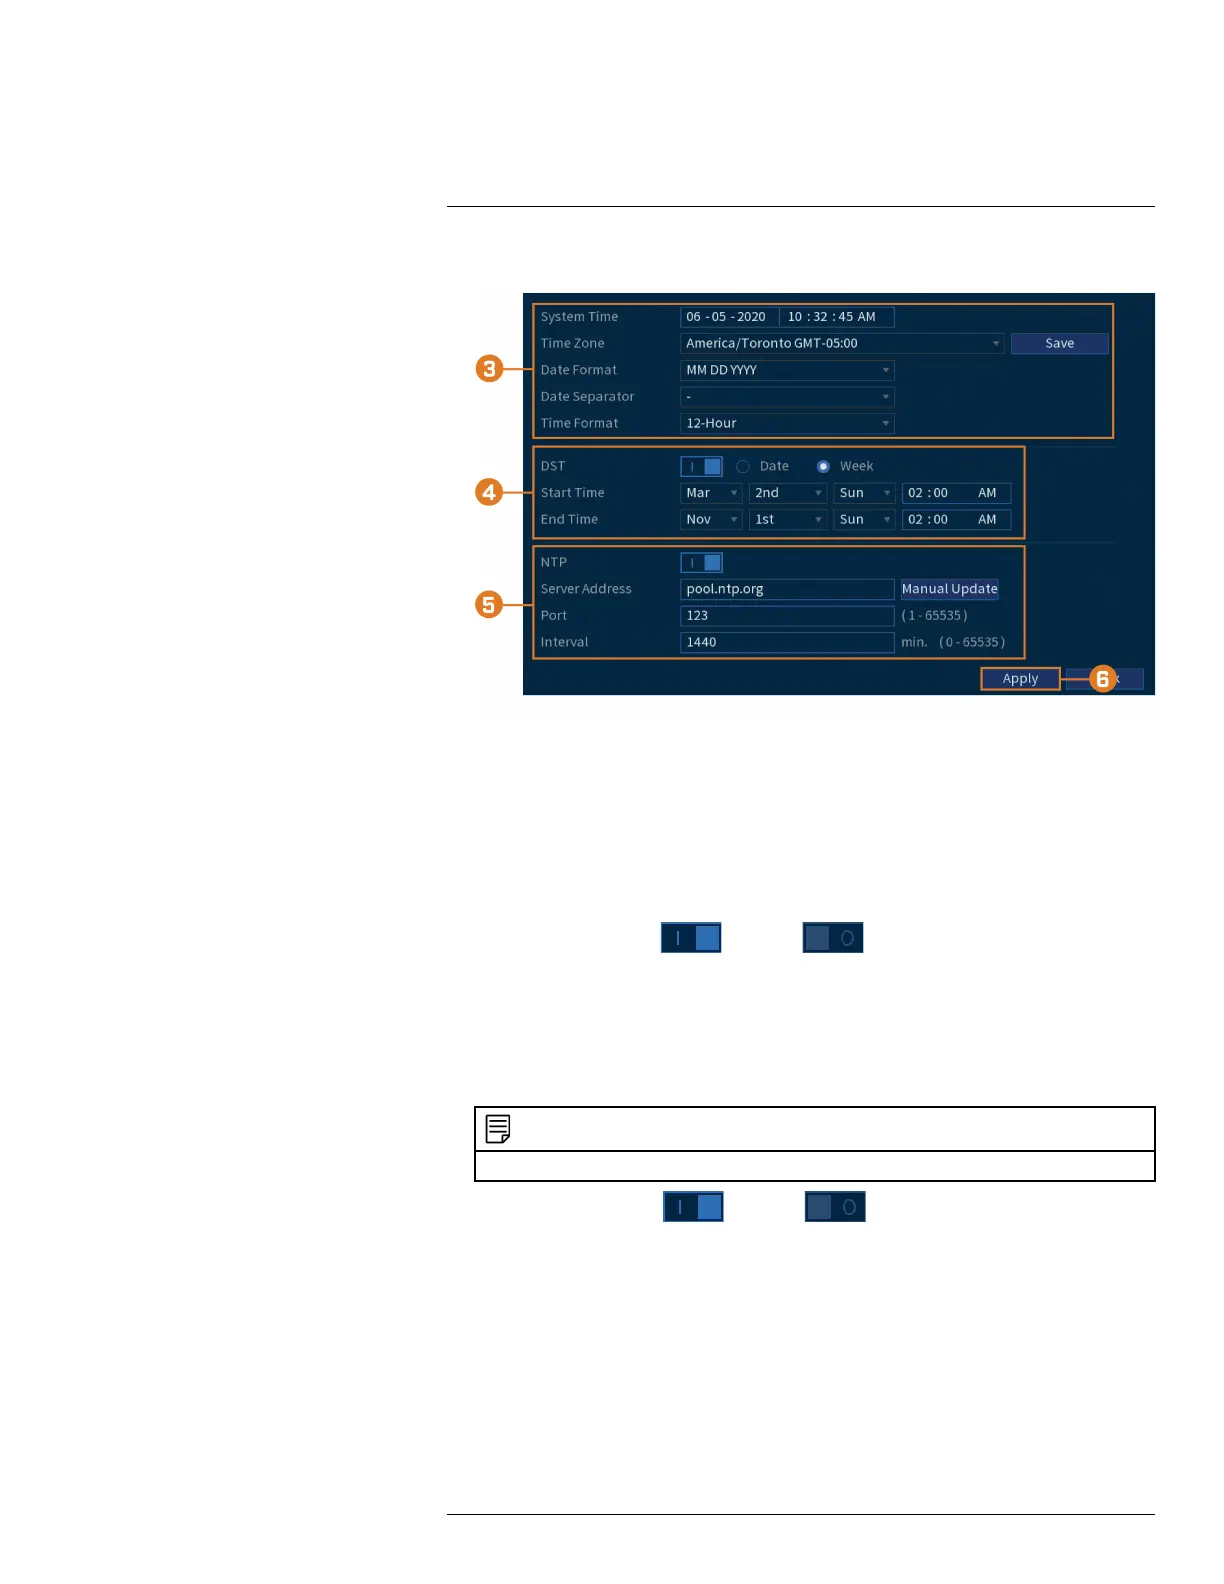
3. Configure system time:
• System Time: Set the current date and time.
• Time Zone: Select your system time zone.
• Date Format: Choose how the date and time appear.
• Date Separator: Choose the symbol that separates date from time.
• Time Format: Choose from 12–hour or 24–hour time.
4. Configure Daylight Savings Time (DST) settings:
• DST: Click to enable (
) / disable ( ) Daylight Savings Time.
• Select Week to set the start and end time based on a day and week (e.g., 2nd Sunday of
March), or select Date to set the start and end time to a specific date.
• Start Time / End Time: Set start and end times for DST. Format will change depending
on your selection for either Week or Date.
5. Configure Network Time Protocol (NTP) settings:
NOTE
Your system must have a constant connection to the Internet to use NTP.
• NTP: Click to enable ( ) / disable ( ) Network Protocol Time.
• Server Address: (Advanced users only) Enter a custom NTP server.
• Port: (Advanced users only) Enter a custom NTP port.
• Interval: Select how often the system will sync time with the NTP server.
6. Click Apply.
15.8.3 Configuring Holidays
You can set certain days as holidays. Holidays have a special recording schedule.
#LX400111; r. 5.0/56647/56647; en-US 73