Using the On–Screen Display
7
• Right-click anywhere on the Live View screen.
1. Main Menu: See , page for full instructions on using the Main Menu.
2. Playback: Opens the Playback Menu. This allows you to search for video recordings saved
on the recorder’s hard drive. For details on using the Playback menu, see 9 Playback, page 23.
3. Pan/Tilt/Zoom: Control and configure settings for Pan-Tilt-Zoom (PTZ) cameras. For full in-
structions on connecting and using PTZ cameras, see 17 Pan/Tilt/Zoom (PTZ) Cameras, page
91.
4. Viewing Modes: Select how many channels are shown on screen during live viewing.
5. Previous / Next Channel(s): Change the display to the previous / next channel(s).
6. Info: Displays system information, such as model number, device ID, IP address, etc.
7. Sequence: Start or stop Sequence Mode. In Sequence Mode, the system display will automati-
cally cycle through connected channels every few seconds.
8. Disable Beep: Temporarily disable the current audible warning.
NOTE
Audible warnings can be given for a wide range of events, such as hard drive issues, network connectivity,
motion detection events and more. Disabling the current audible alarm using the Quick Menu will silence the
recorder only for a short time, then audible warnings will continue.
9. Manual Record: Select manual recording and snapshot options. See 8.4 Setting up Scheduled
or Manual Recording, page 20 for details.
10. Live Mode: Select two options from Live Mode. 1) Continuous for a full view of all channels
live streaming or set to 2) AI to include Face Detection events on the right of the screen.
11. Image Settings: Configure camera image settings per channel, such as brightness, contrast,
etc. For full details on configuring camera image settings, see 15.6.1 Adjusting Camera Image
Settings, page 62.
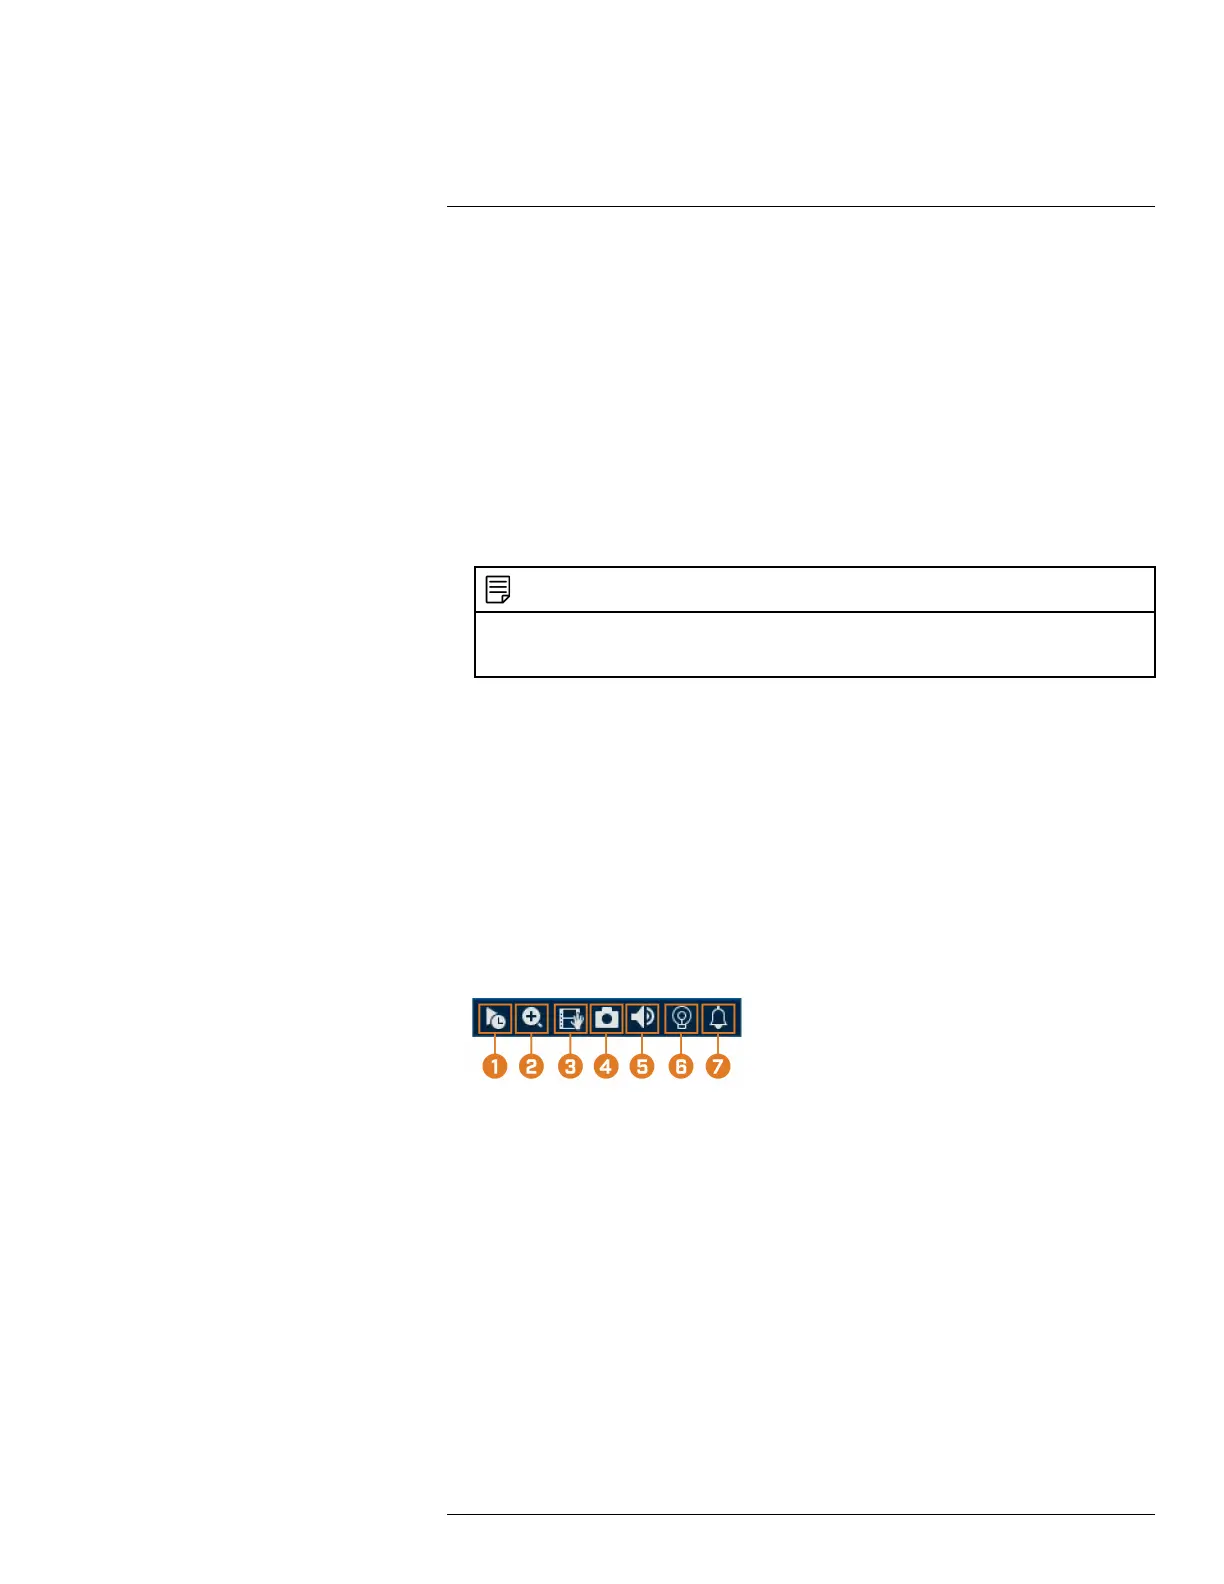
7.3 Camera Toolbar
The Camera Toolbar lets you perform quick functions for a specific channel on the recorder.
To use the Camera Toolbar:
• Hover the mouse near the top of a channel with a connected camera.
1. Instant Playback: Plays back recent video from the selected channel. By default, instant play-
back is set to play the last 5 minutes of recorded video. See 15.8.1 Configuring General Sys-
tem Settings, page 71 to set a custom playback length.
2. Digital Zoom: Click to enable digital zoom. Click-and-drag over the camera image to zoom
in on the selected area. Right-click to return to the full camera image. You can then repeat to
zoom in on a different area, or click the icon again to disable zoom.
3. Real-time Backup: Click to start recording the current channel manually. Click again to stop
recording and save the video file to a USB flash drive (not included).
4. Snapshot: Save a snapshot of the current camera image to a USB flash drive (not included).
5. Mute/Unmute: Click to mute/unmute listen-in audio.
6. Warning Light — Deterrence Cameras Only: Click to manually turn on the camera’s warn-
ing light for 10 seconds.
7. Siren — Deterrence Cameras Only: Click to manually turn on the camera’s siren for 10
seconds.
#LX400111; r. 5.0/56647/56647; en-US 16