Recorder Overview3
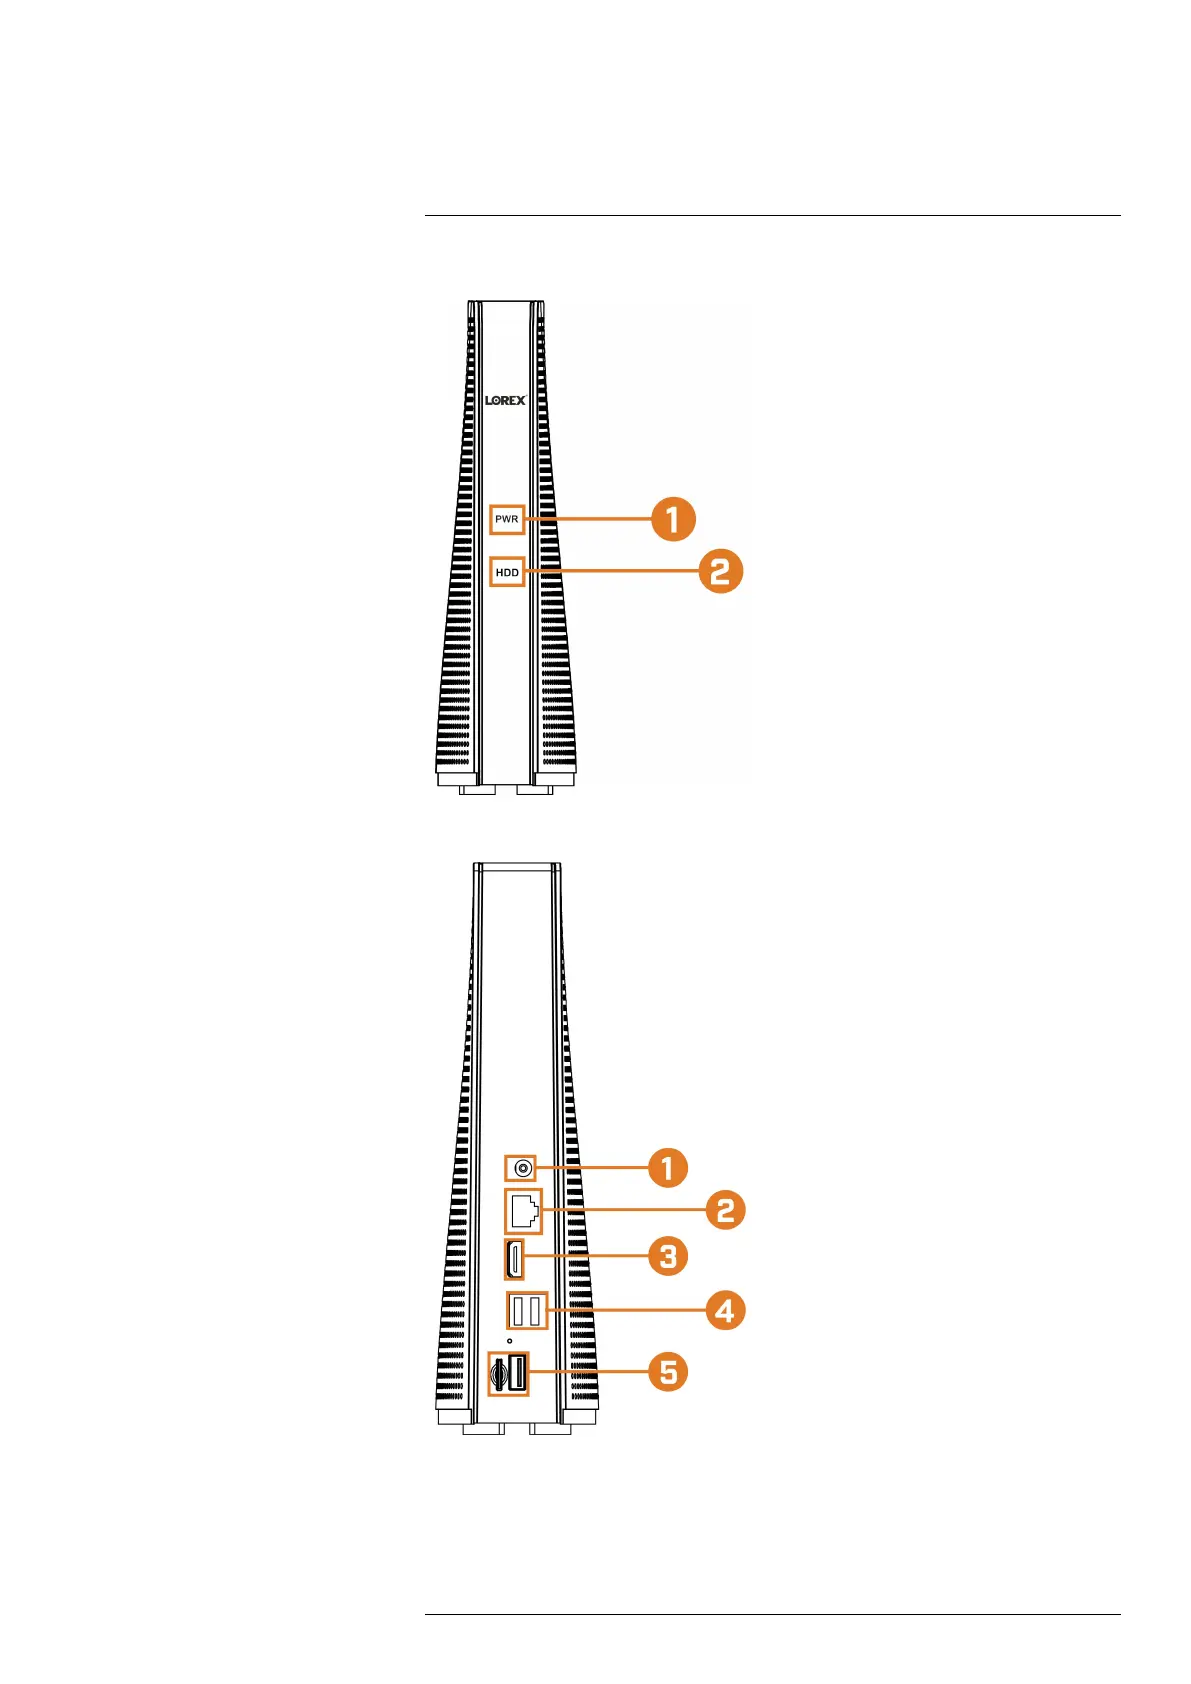
3.1 Front Panel
1. PWR – LED Indicator: Glows to indicate the
system is on.
2. REC – LED Indicator: Glows to indicate that
the system is recording video.
3.2 Back Panel
1. Power (12V): Connect the included 12V DC
power adapter.
2. LAN: Connect the included Ethernet cable to a
router or switch on your network for local and re-
mote connectivity.
3. HDMI: Connect the included HDMI cable to
view the system interface on an HDMI monitor or
TV (1080p output supported).
4. USB (Mouse / Backup): Connect the included
mouse or a USB flash drive (not included) for the
purposes of backing up recorded video.
5. microSD / Storage USB: Connect a microSD
card (included with certain configurations) or a
USB storage drive (not included) for video stor-
age purposes. For more details on storage options,
see 12 Storage, page 39.
#LX400115; r. 3.0/57178/57178; en-US 6

 Loading...