Basic Setup4
• Install the camera within range of the wireless receiver (noted in the camera’s specifications).
• This camera is weather resistant for outdoor use (IP66 rated). Installation in a sheltered loca-
tion is recommended.
• Battery life will vary based on temperature, settings and number of events.
4.4.2 Installing the Cameras
Follow the instructions below to mount the cameras. It is recommended that you refer to the "In-
stallation Tips" section to help you select good mounting locations (see 4.4.1 Installation Tips,
page 10).
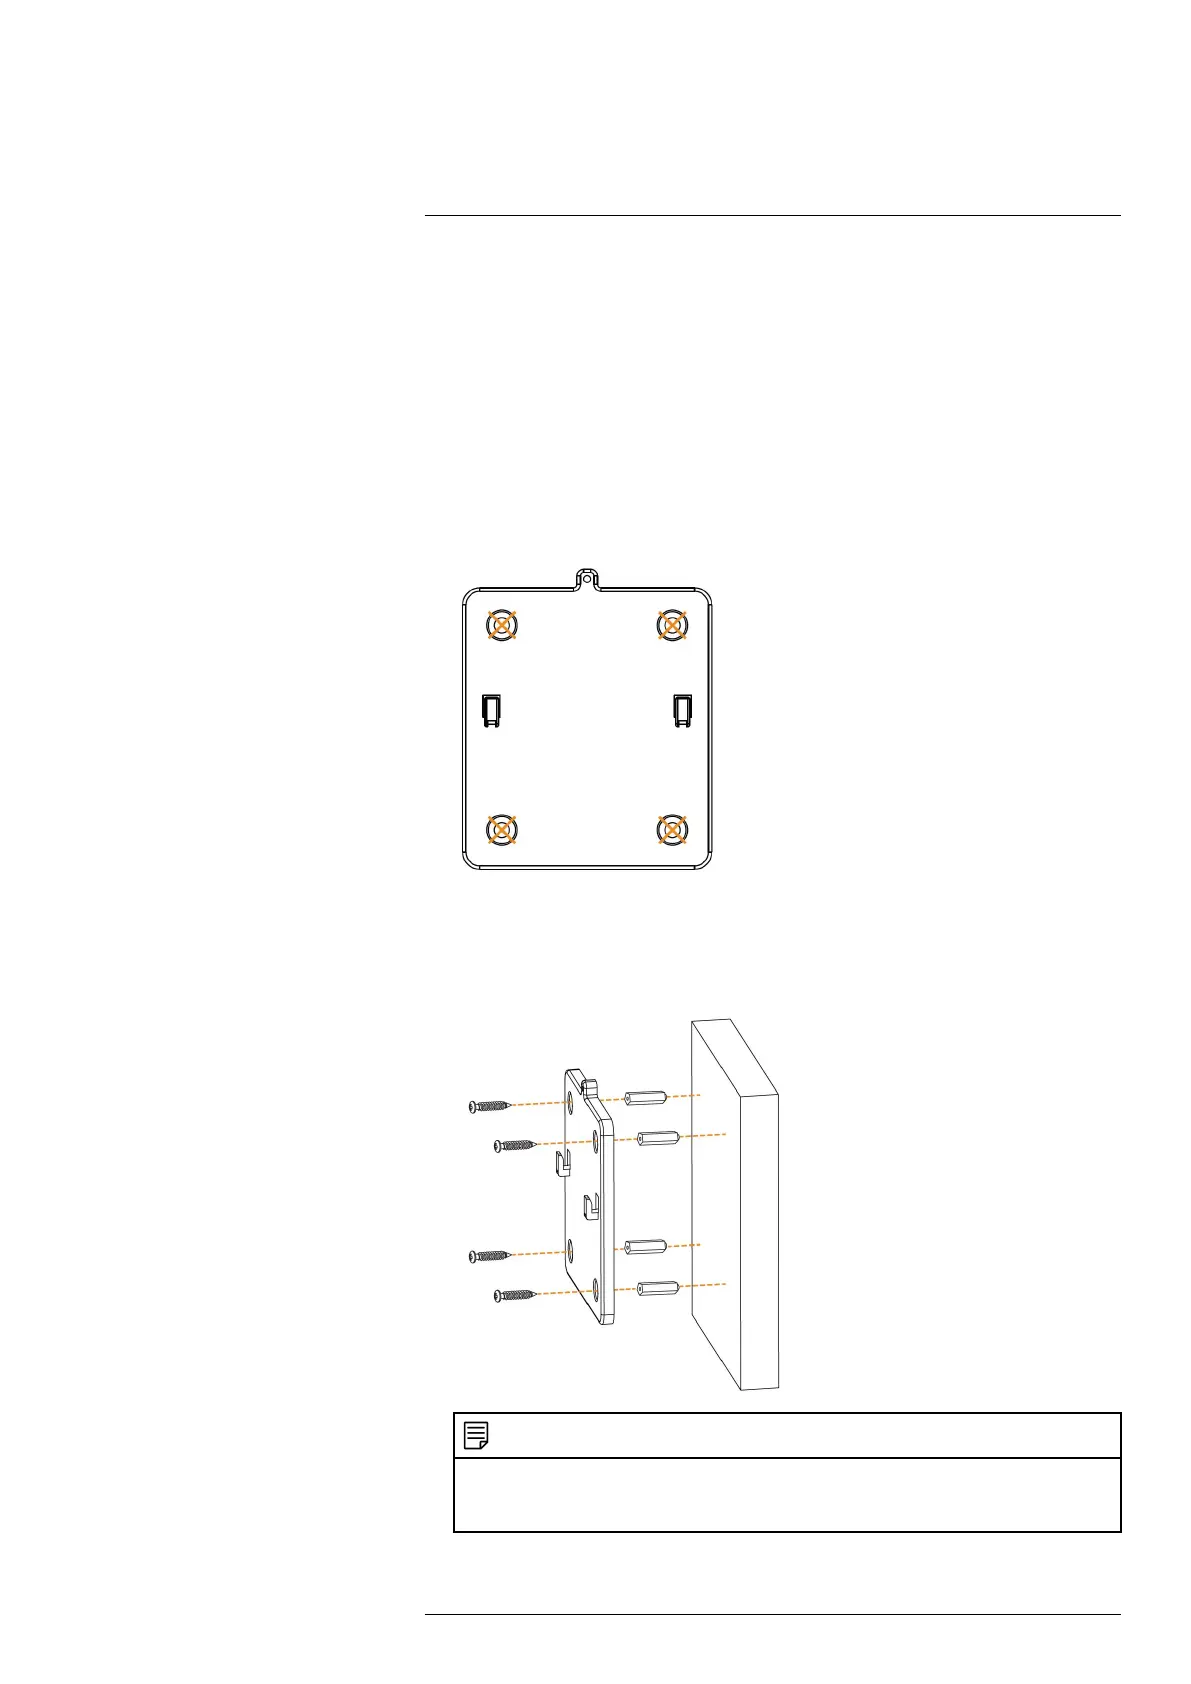
To install your cameras:
1. Set the mounting bracket in the desired mounting position. Mark holes through the mounting
bracket (shown as orange X’s below).
2. Drill holes where marked for the mounting screws using the included drill bit (item C in
toolkit).
3. Secure the bracket to the mounting surface with the included mounting screws (×4). Make
sure all screws are fastened tightly using the included screwdriver (item A+B in toolkit).
NOTE
• Insert the included drywall anchors if you are mounting the camera onto drywall.
• The hole at the top of the mounting bracket will be used in step 5, once the camera is attached to the
mounting plate.
#LX400115; r. 3.0/57178/57178; en-US 11
 Loading...