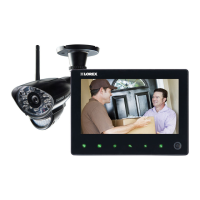
Screen Saver (Picture Frame Simulation)
Q: Can I upload my own pictures onto the LW2702?
A: The LW2702 does not offer the ability to upload your own pictures/videos. It only displays the
pre-loaded images (five scenery images).
Q: Can I set the LW2702 to play the pre-loaded images in a slideshow?
A: The LW2702 will only display the pre-loaded image selected in the OSD menu. To change the
image, please go to the OSD menu, and select another pre-loaded image.
Q: Can I delete the screen saver images?
A: No. The images are pre-loaded into the monitor, not the SD card. Formatting the SD card will
not delete the screen saver images.
Privacy
Q: Is the signal secure?
A: Yes. The Digital Wireless signal transmission type used by the Lorex LW2702 series is also
known as FHSS- Frequency Hopping Spread Spectrum. This type of signal is highly resistant to
deliberate jamming as it generates a channel hopping sequence using a sophisticated algorithm
generated by the receiver system.
Q: What memory cards is the LW2702 compatible with?
The system is compatible with SD (Secure Digital) and SDHC (SD High Capacity) memory cards,
minimum Class 2.
Q: What is the maximum capacity SD memory card supported?
A: The system supports a maximum of 16 gigabtyes.
Recording
Q: Can I record multiple cameras at the same time?
A: The LW2702 can only record one channel at a time.
TIP: Set Trigger Record in the Record menu to 5 seconds (the lowest possible value),
and enable Quad Mode. This allows the system to: a) record a channel for 5 seconds
when motion is detected b) Records the next channel that detects motion for another 5
seconds.
Q: Why can’t I access the main menu while I’m in Quad Mode?
A: You must exit Quad Mode before you can access the main menu. Simply press Quad on the
remote control to exit.
Q: Why isn’t scheduled recording starting?
• Make sure that the SD card is properly inserted into the monitor. Make sure that the SD
card icon appears at the top of the screen.
•
Double check that you have set the system time. Press the Menu button to access the
main menu. Then navigate to Setting>Date & Time to set the system time.
•
Double check that you have set the start/stop time in the scheduled recording menu.
66

 Loading...