214328 28 Revision A
3.6 Installing Crop Dividers without Latch Option
NOTE:
If crop divider latch option was ordered with header, proceed to 3.5 Installing Crop Dividers with Latch Option, page
27. Otherwise, complete the following procedure:
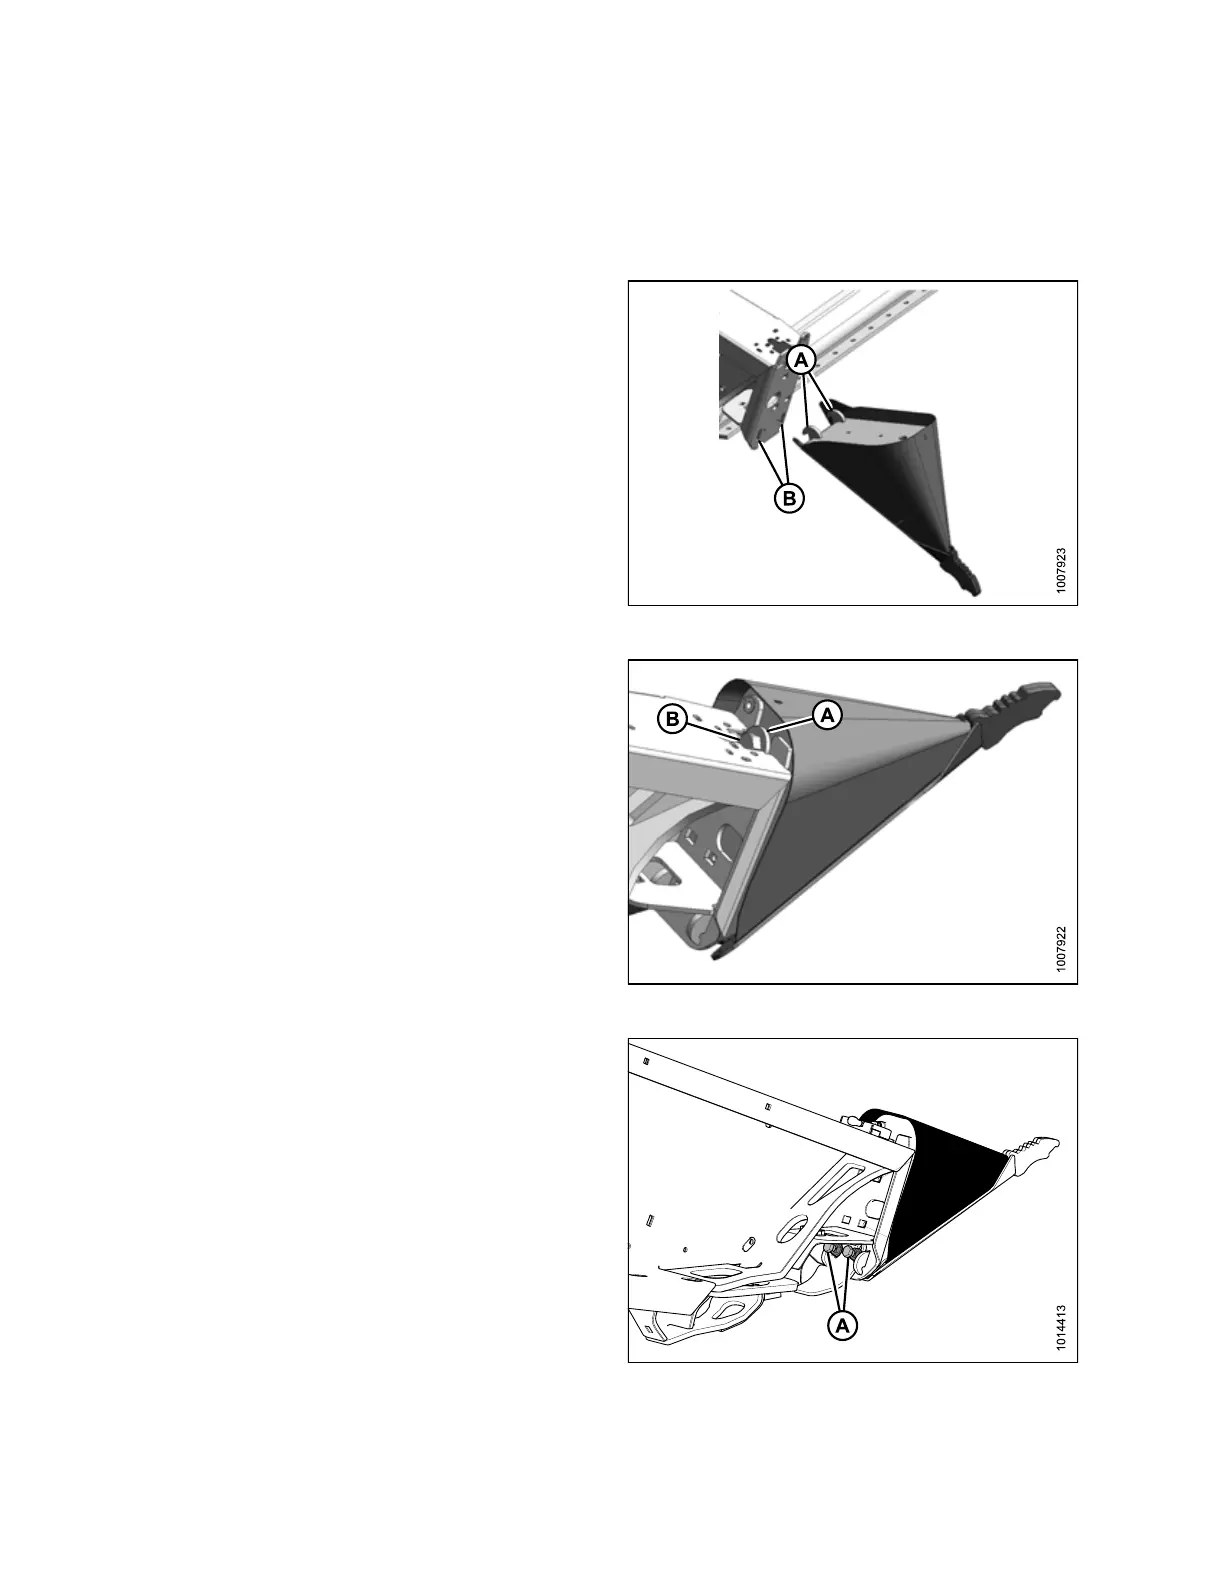
Figure 3.23: Crop Divider Installation
1. If not already open, open endshields. Refer to 3.3
Opening Endshield, page 25.
2. Position crop divider as shown by inserting lugs (A) into
holes (B) in endsheet.
Figure 3.24: Crop Divider Installation
3. Lift forward end of crop divider and install bolt (B) and
special stepped washer (A) (step towards divider).
Tighten bolt.
Figure 3.25: Crop Divider Adjustment
4. Check that divider does not move laterally. Adjust
bolts (A) as required to tighten divider and remove
lateral play when pulling at divider tip.
5. Close endshield. Refer to 3.7 Closing Endshield, page
29.
ASSEMBLING HEADER