214328 54 Revision A
5.5 Checking and Adjusting Non-Timed Knife Drive Belt Tension
This procedure applies to single- and double-knife headers with non-timed knife drives.
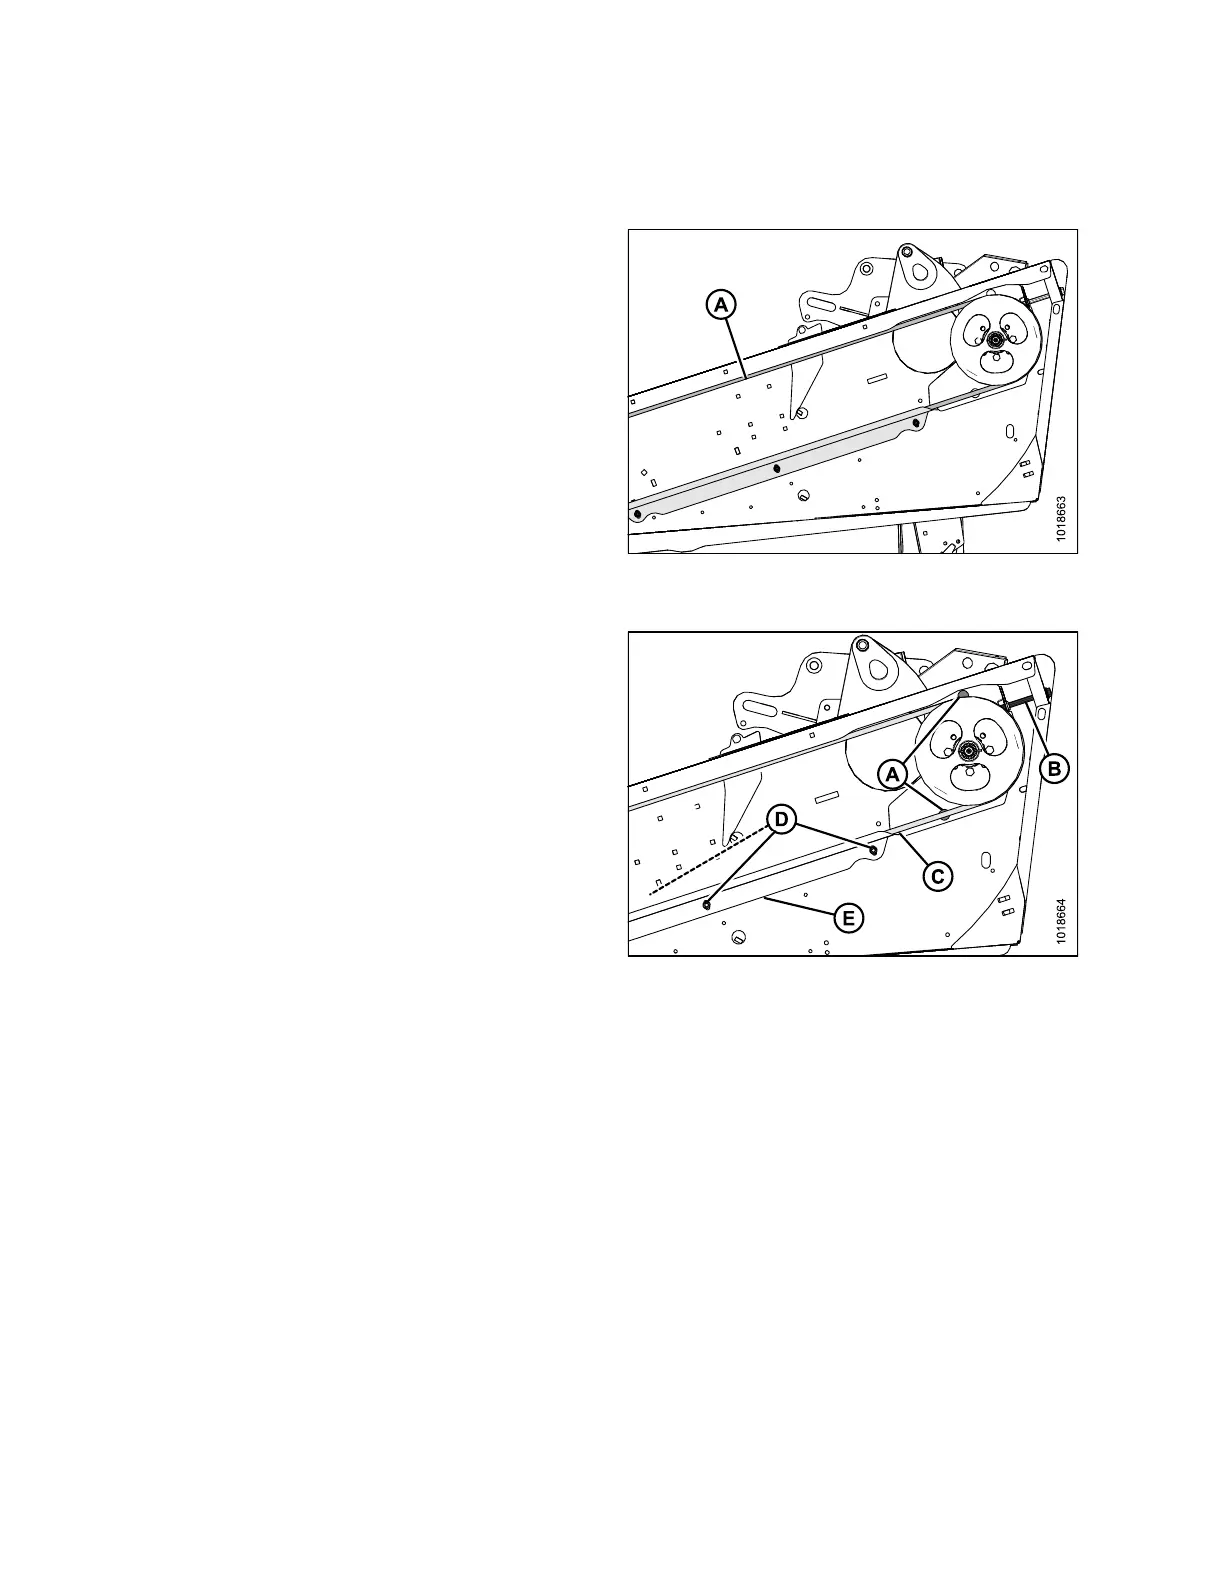
Figure 5.6: Knife Drive (Left Shown – Right
Opposite)
1. Shut down windrower and remove key from ignition.
2. Open endshield(s). Refer to 3.3 Opening Endshield,
page 25.
NOTE:
The knife drive is identical on both sides of the header
for double-knife headers.
3. Apply a force of 90 N (20 lbf) to midspan (A) of belt. The
belt should deflect 18 mm (3/4 in.). If necessary, adjust
tension as per the following steps.
IMPORTANT:
To prolong belt and drive life, do NOT over-tighten belt.
Figure 5.7: Knife Drive (Left Shown – Right
Opposite)
4. Loosen two bolts (A) that secure motor assembly to
header endsheet.
5. Turn adjuster bolt (B) as required to move drive motor
to achieve belt deflection as per above. Tighten
bolts (A).
6. Ensure that clearance between belt (C) and belt
guide (E) is 1 mm (1/32 in.).
7. Loosen three bolts (D), and adjust position of guide (E)
as required.
8. Tighten bolts (D).
9. Close endshield(s). Refer to 3.7 Closing Endshield,
page 29.
NOTE:
Readjust tension of a new belt after a five hour run-in
period.
PERFORMING PREDELIVERY CHECKS