Instruction Manual
Instruction Manual
35
7.5.2
Azzeramento rapido con leva di bloccaggio
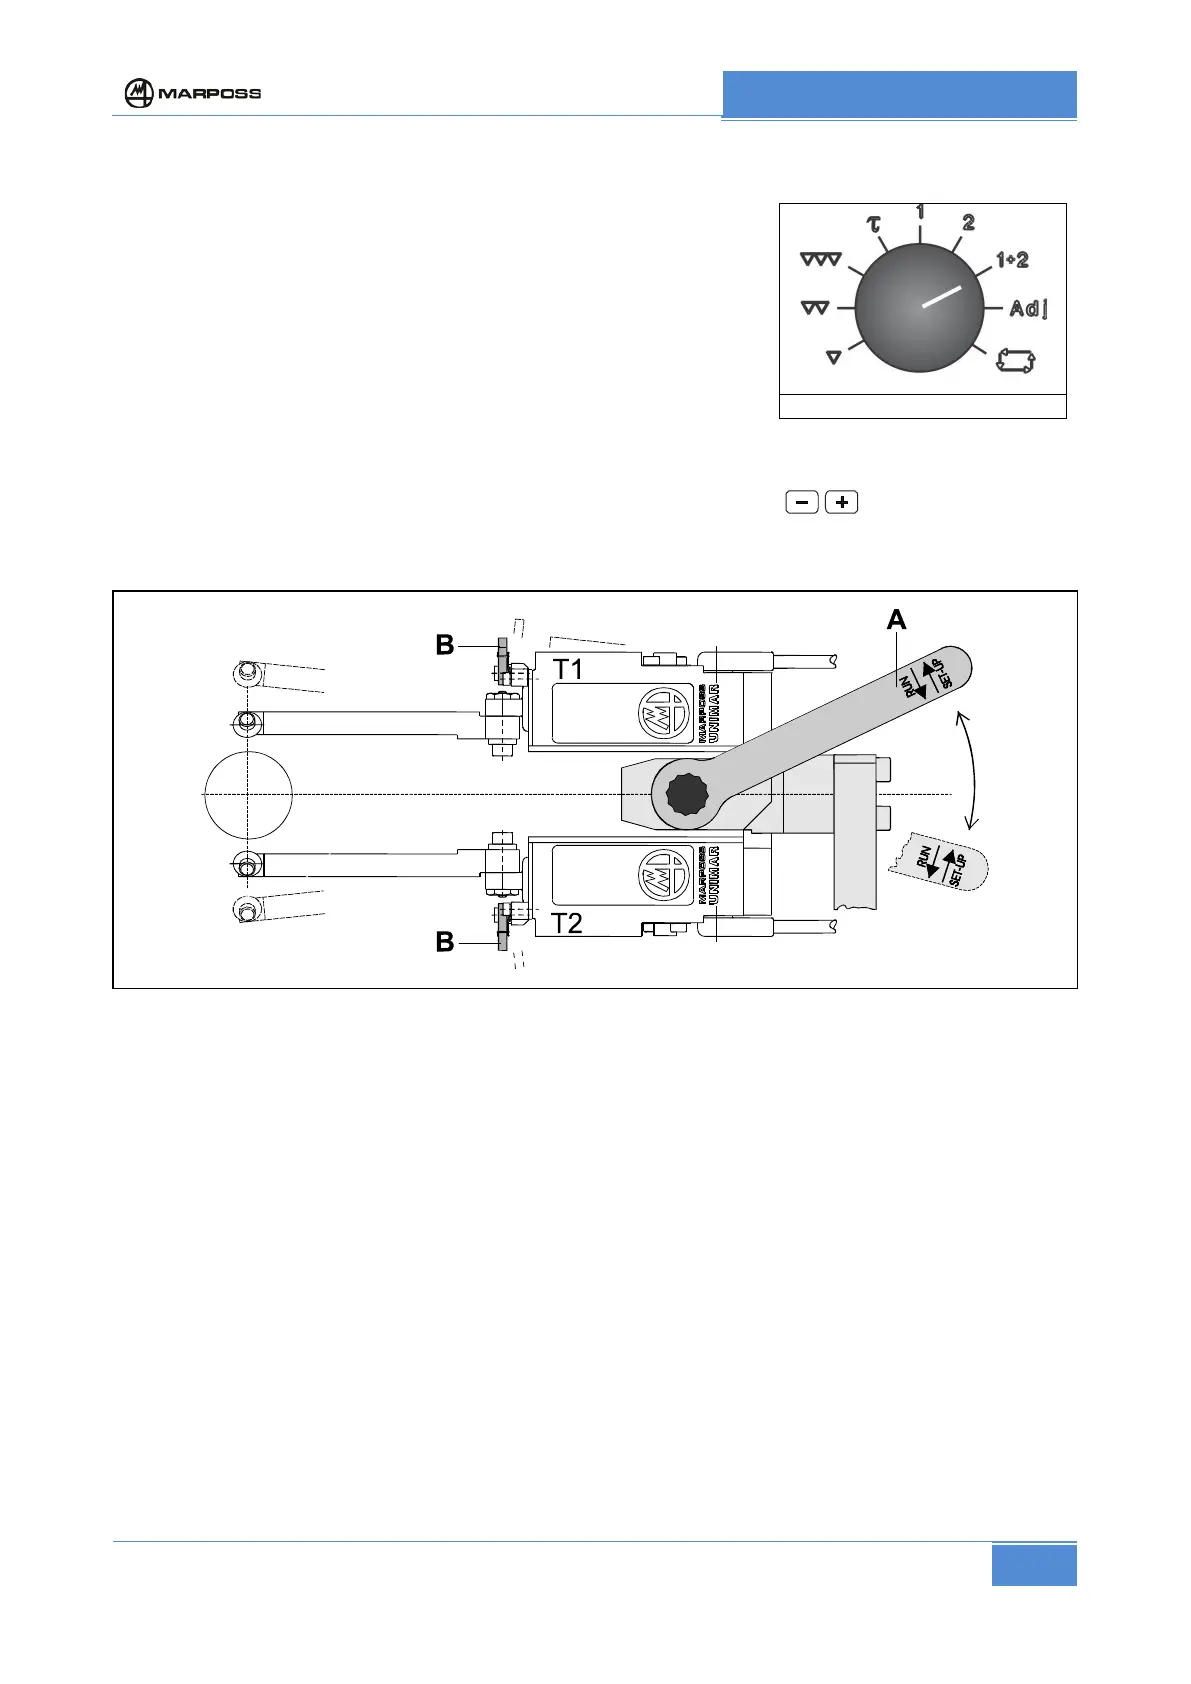
a) Set selector (Figure 15) to position 1+2.
b) Move the locking lever A to SET UP position so the movement of
heads T1 and T2 will be slightly loose.
c) Open the heads so as they can be inserted on the workpiece in
safety conditions.
d) Bring the heads to measuring position.
e) Simultaneously press the two little levers B, found on the armsets, and with a single movement close
the heads bringing the contacts onto the master workpiece.
f) Hold the little levers B pressed and rotate lever A to RUN until the heads are locked.
g) Bring the needle of the meter exactly to zero by means of pushbuttons for zero-adjustment
h) By means of selector (Figure 15) verify that both contacts are within the range of the readout meter,
otherwise repeat the zero-setting phases.
Figure 16 Rapid zero-setting with locking lever